Howdy, Stranger!
It looks like you're new here. If you want to get involved, click one of these buttons!
Categories
- 985 All Categories
- 3 Picture Posting and Resizing
- 57 New Member Introductions
- 119 Off-Topic Forum
- 4 Photography
- 2 Resources
- 17 New Product Information
- 168 The SierraWest Forum
- 10 Brett's Blog
- 119 General News & Ramblings
- 3 Re-Release Information
- 6 Q & A about SierraWest
- 9 What Would You Like to See?
- 403 Builds
- 144 HO Scale Builds
- 177 O Scale Builds
- 62 Finished SW Build Pics
- 15 Miscellaneous Builds
- 194 Techniques
- 19 Working with Wood
- 23 Painting Castings
- 5 Masonry
- 23 Scenery
- 37 Tools and Supplies
- 21 Layout Planning & Building
- 40 Miscellaneous
- 24 Prototype Information
- 22 Reference and Research
How do you light your Diorama?
All,
I have been working on my wood cutters shack and have been looking through how others are doing their lighting. Personally, i followed Alan's tutorial below for the most part. however, i chose to use smaller LED's. But, all of the other products and processes are the same. Alan's tutorial did not show the implementation from a mechanics perspective as to how he connected everything on his diorama from the bottom.
So, i thought this would be an opportunity for us to share how we are going about doing it from the ground up as it were. i would be interested to see how others are taking care of wire management on the bottom of their diorama. i'm just kind of winging it based off of what i think others likely have done.
http://www.craftsmankituniversity.com/vanforum/index.php?p=/discussion/778/lighting-clinic/p1
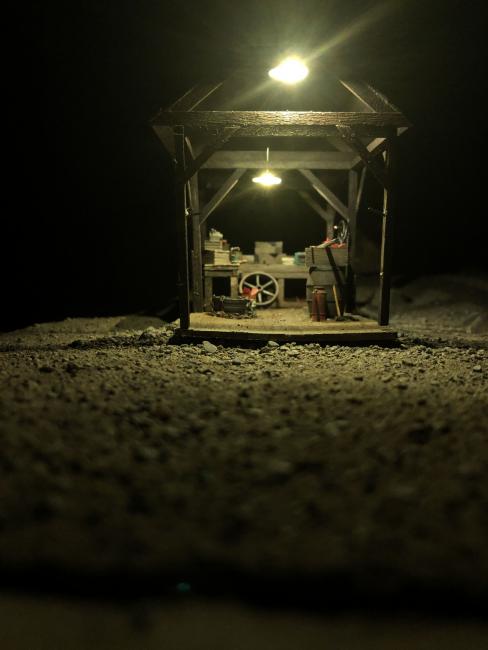
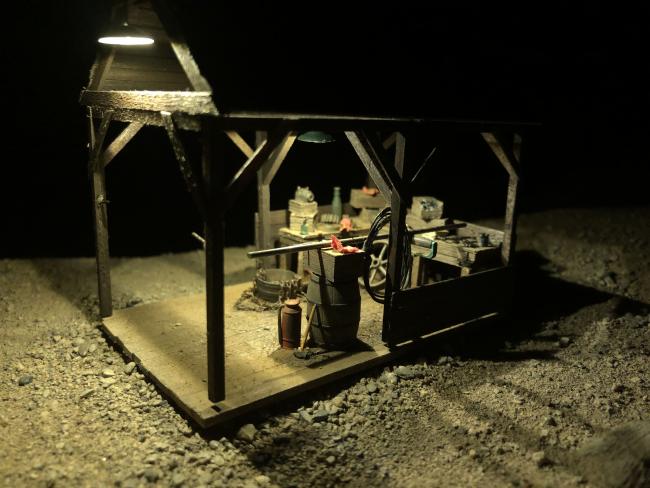
Below is how i'm approaching my wood cutters shack wiring. This will be pretty simple with a total of 6 LED's. 5 will be constant on LED's and one will be on a fireplace simulator.
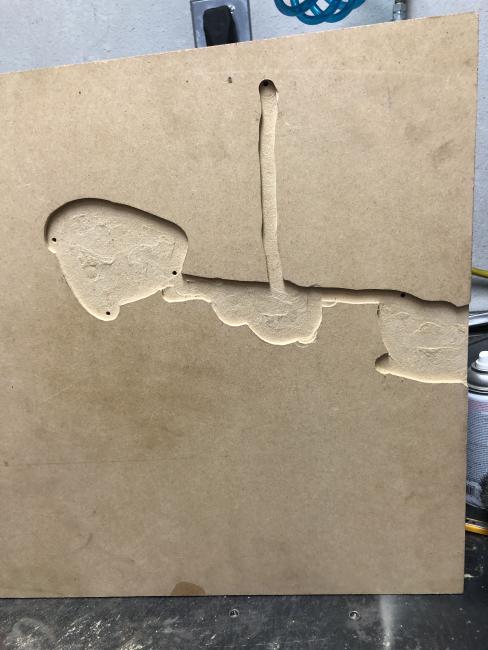
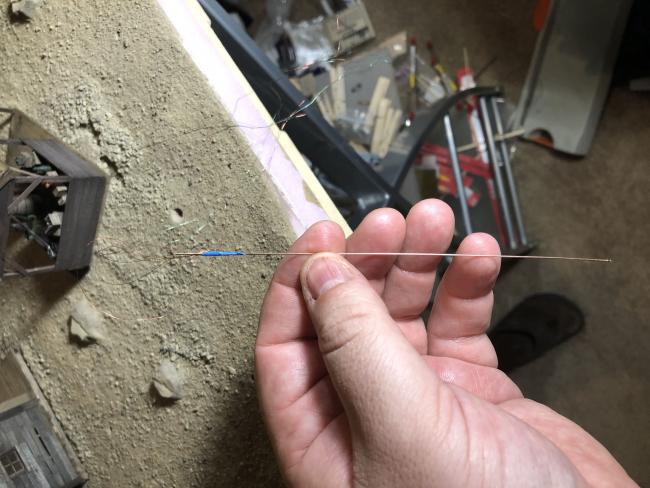
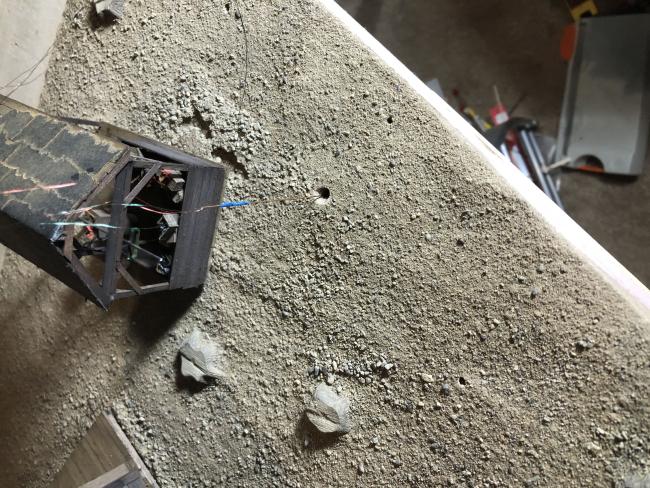
For each of the LED's i gave my self 12-15" or so of a lead wire. I wanted more than i would need to make wiring the circuit up on the bottom as easy as possible. Then, i dry set my structures and used a pair of tweezers to start the hole in the foam. Next i used a drill to finish the hole. After i had my holes drilled i used a finish router to connect all of the holes in the mdf. This way the wires will be recessed as the diorama sits on a table or whatever. This will also allow for recessed switches as well. When i started to fish my leads through the base i found that using some wire helped tremendously, it gave me something to fish the lead through with while but adding some weight to the lead as i was gluing the structure down. This help pull the wired down as i moved stuff, the magnetic wire has nearly no weight.
Here are some photos that i took over the last two days.


Comments
I tend to run all wires to one location then run them down through the base as a bundle. I'll make a hole and use a straw as a liner.
One tip I found when using magnet wire is to tie a knot at the end of each pair of wires. This way I don't get confused on which 2 wires go together.
As for underneath the dio, mine are usually a mess. I'll cut the wires to length leaving a few inches to work with (tie another knot). I usually make a cutout for the board and batteries and screw and/or epoxy into place. I use painter tape to secure the wires. Found this much easier to remove should I need to re-do a solder point.
I was trying to think of a way that would be the least painful to do this..
Next is to cut stand off's. i ordered some Delrin that i'll machine on the lathe then drill and tap for the power distribution board.
I hope this helps someone else in the future.
i added the plug as well, i didn't want the diorama hard wired to the power supply. I thought about adding a switch. But, plugging or unplugging the diorama isn't a big deal.