
Howdy, Stranger!
It looks like you're new here. If you want to get involved, click one of these buttons!
Categories
- 983 All Categories
- 3 Picture Posting and Resizing
- 57 New Member Introductions
- 119 Off-Topic Forum
- 4 Photography
- 2 Resources
- 17 New Product Information
- 168 The SierraWest Forum
- 10 Brett's Blog
- 119 General News & Ramblings
- 3 Re-Release Information
- 6 Q & A about SierraWest
- 9 What Would You Like to See?
- 402 Builds
- 143 HO Scale Builds
- 177 O Scale Builds
- 62 Finished SW Build Pics
- 15 Miscellaneous Builds
- 193 Techniques
- 19 Working with Wood
- 22 Painting Castings
- 5 Masonry
- 23 Scenery
- 37 Tools and Supplies
- 21 Layout Planning & Building
- 40 Miscellaneous
- 24 Prototype Information
- 22 Reference and Research
Wood coloring experiments
In anticipation of my O scale Trackside Trio arriving (woohoo) I have been trying some wood staining. These are craft sticks that measure out to about a 4x12. Each board was scribed with a pick and wire brushed. Not much else other than trying a couple of nail and knot holes and a few nicks here and there. I was just trying to get my coloring down.
The first pic is straight black IA followed by drybrushing in tan, gray, then linen.
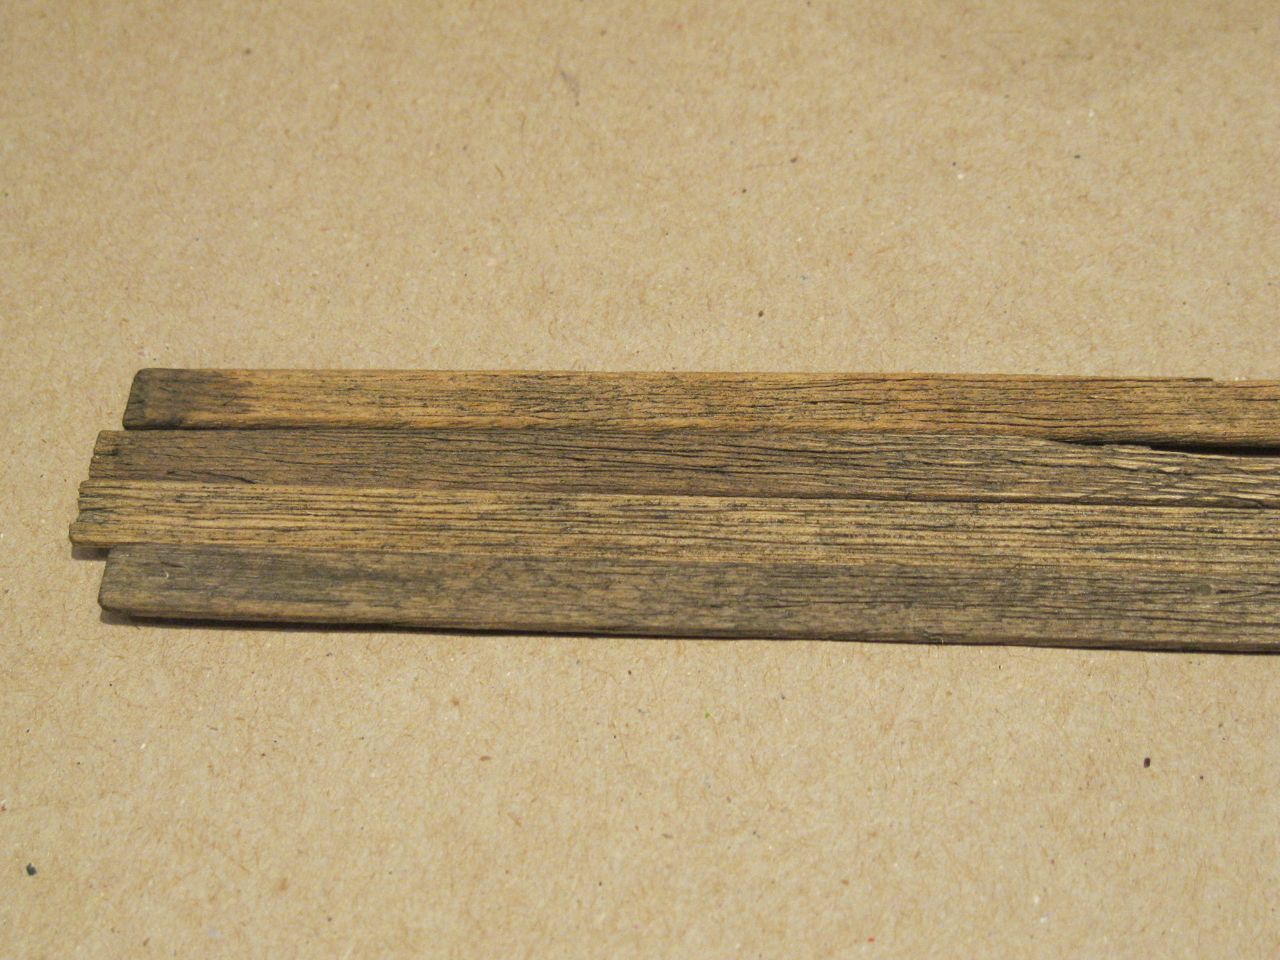
2nd pic is a few boards with varying formulas of black/brown IA.
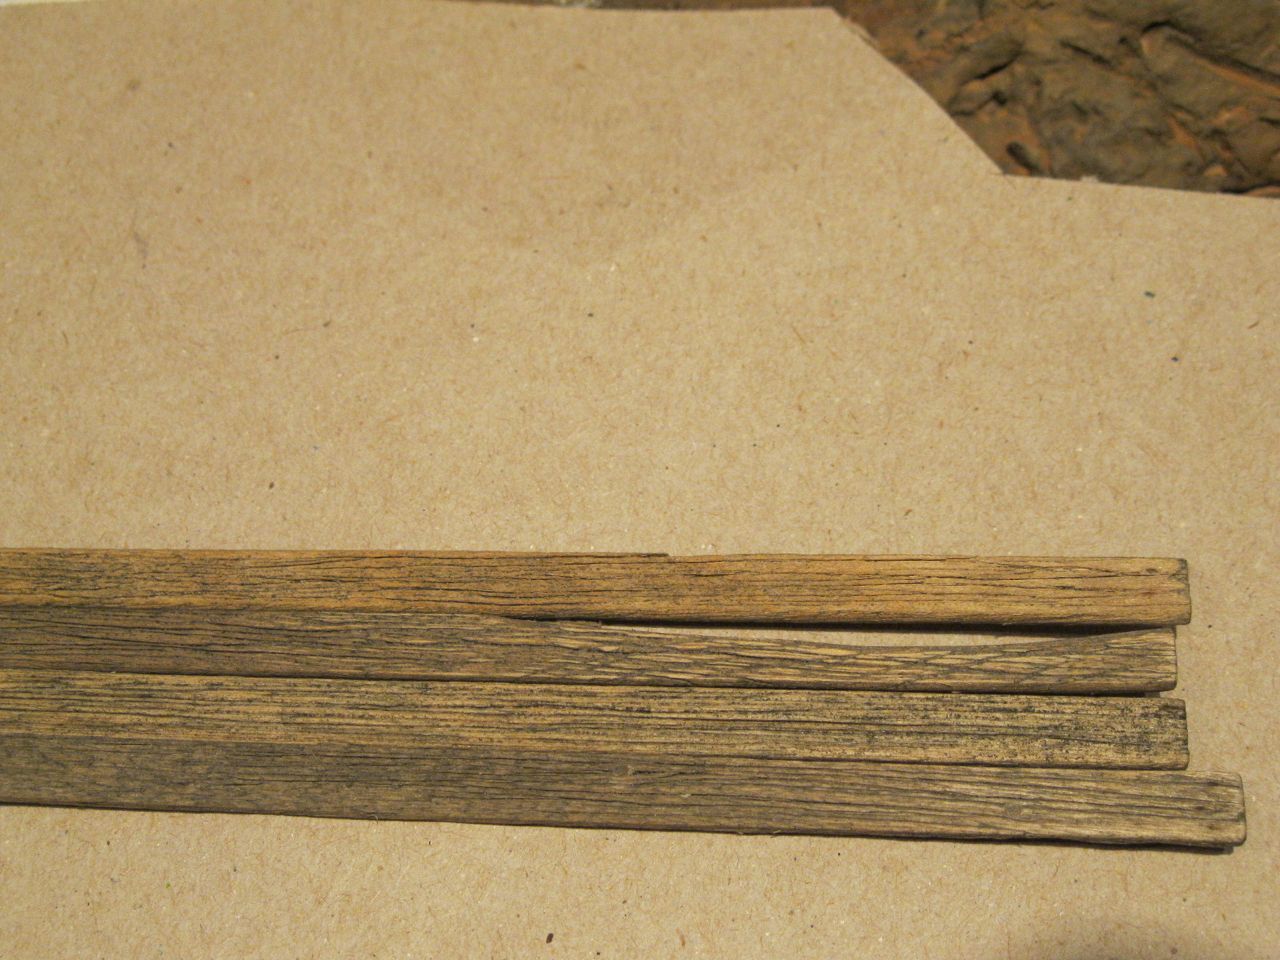
3rd pic is of the same boards lightly sanded to highlight.
I have also ordered all of the chalks suggested by Brett to give those a try as well. I would be interested to see what others think the advantages are of IA or chalks or both.
Ideas/comments/suggestions welcome.
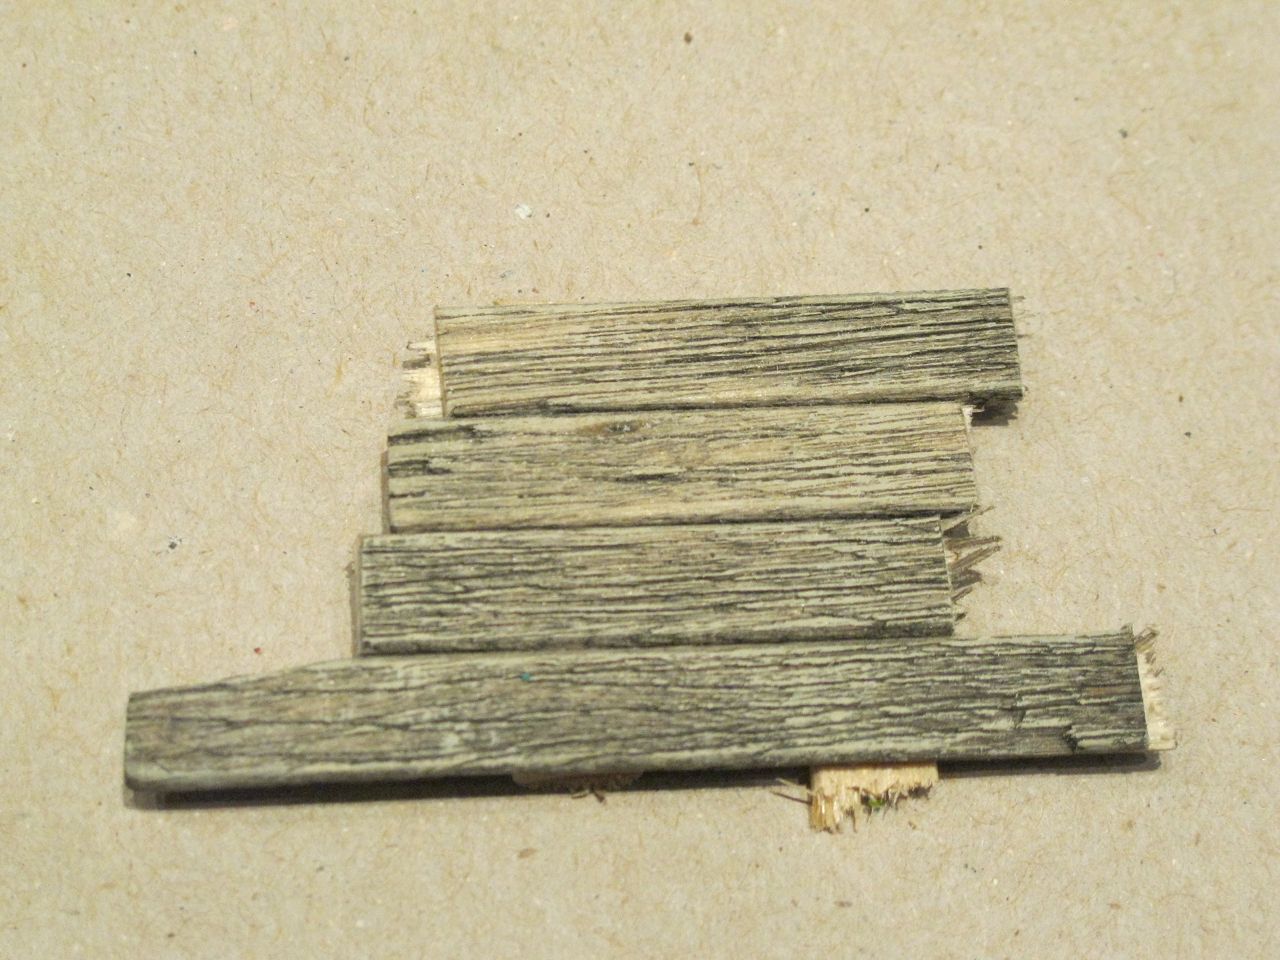
The first pic is straight black IA followed by drybrushing in tan, gray, then linen.
2nd pic is a few boards with varying formulas of black/brown IA.
3rd pic is of the same boards lightly sanded to highlight.
I have also ordered all of the chalks suggested by Brett to give those a try as well. I would be interested to see what others think the advantages are of IA or chalks or both.
Ideas/comments/suggestions welcome.
Comments
Take good notes on how you did your colors (especially the first set--looks fantastic!) The wood looks old and weathered and appears rather run down. The areas with the deep texture is where the darker color appears--exactly what you want. The reason for taking notes is if you happen to come up a piece or 2 short, you'll want to be able to replicate the color(s). Plus, several years from now you may look at a building and want to match the look on a different structure.
If you don't mind, a quick suggestion for the tan wood. See the 3rd piece in the picture #3? It's got sort of a speckled look to it. I've had that happen after sanding stripwood and then hitting the piece with ink & alcohol. It's almost like tiny bits of sawdust collect and ball up in the grooves after the A/I is added. To get rid of that, let the wood dry completely then go back over those areas with some real fine steel wool. It usually polishes up the wood and knocks down those tiny clumps. Blow it off good, then go back and dry brush if you like. I think you'll find that it helps the texture pop out. You can find fine steel wool in the paint section at Menards or Home Depot in different grades (like 00 all the way down to 0000, I think). Sometimes, I've used a tack cloth to get rid of the "micro sawdust" if I know I'm going to add A/I.
When you get your kits, the manual will have some recipes for staining stripwood. Make sure to try the soaking method as described. It's real easy and gives great results.
I'd say your expriment was a success. Nice work!
Get your work area set up and go wait for the mailman!
Bill, I noticed the spots also and was wondering about that. I did keep track of the recipes and steps I took on each board by writing a number on the back of each one and each time I did something I wrote it down. I also liked the first pic. I'm sure it was the drybrushing finish that did it. I wonder how that will work on top of chalk.
Brett, the kits are scheduled to arrive today, but not the chalks. It will give me some time to read over the manual and digest that before trying those techniques out.
One variation I tried was to put in knot holes on 1 board prior to coloring. I like the way it turned out.
I'm going to try a couple more colors tomorrow as well as the above mentioned drybrushing attempt.
I'll still need to darken the knot holes, work on the left edge, and a few other details. If anything pops out that could be done better just chime in.
Thanks
Greg In Australia
I have seen the Hunterline products in person at several shows where they have samples of the different coloured stained wood infront of each bottle.
Essentially these "solutions" are basically just an A&I mix to my understanding.
The creosote black pictured below looks exactly like my regular A&I stain that I use for wood.
My recommendation is that you just mix your own and save your money.
Mixing your own will also ensure that you can repeat the process at anytime in the future, even if Hunterline withdraws their specific 'product' from the market.
Karl.A
here is a basic listing of Rembrandt Colors:
Brown Family For Wood:
• Raw Umber — 408.3, 408.5, 408.9
• Burnt Umber — 409.3 and 409.9
• Raw Sienna — 234.3
Orange/Red Family For Rust:
• Gold Ochre — 231.5
• Burnt Sienna — 411.3 and 411.5
• Light Orange — 236.7
• Permanent Red — 370.3
Black, White, Grey:
• Black — 700.5
• White — 100.5
• Warm Grey — 704.7
• Cool Grey — 727.7
• Neutral Grey — 704.8
Woody715 - try buffing with some fine steel wool (buy the 000 size in the paint dept. at the hardware store) after you have weathered the wood and it has dried. This should send you in the right direction.
I did come across a simple base colouring recipe I like: 20 ml of transparent ink in 1/2 litre of 70% alcohol - brown or sepia (I used sepia because I couldn't find Bombay inks). Mix the ink in a bit of water and add to alcohol. Soak for any time up to 10 minutes- this yields a nice faded warm brown - looks like not too old cedar to me ( being a west coaster). Transparent inks stain differently than pigment inks and really get into the wood. Afterwards brush with 000 steel wool. This weekend when the brood is out ill practice washing in some chalks on test pieces. I tried some weather-it on some of these pieces and they look great.
For newbies who don't have a stock of precious basswood, I've been using coffee stir sticks I pick up from coffee shops when feeding my addiction to espresso. They're not basswood but good for experiments + they can be scribed, and tagged etc. for future reference.
Wayne Woodland
However, the sticks as prescribed in the manuals give you much more control over quantity and also very importantly texture ....
Karl.A
Not that the Pan Pastels are bad there just a lot harder to get the control your looking for.
Jerry
Geezerbill
1 Ranger crackle paint-yellow then wet-brushed with Vellejo white
2 AK heavy chipping with craft paint on top-similar to mineral spirits method
3 Same as above with heavier chipping
4 Ranger crackle paint-yellow
5 AK heavy chipping with Vallejo white on top
I like the Ranger, but it has been discontinued so probably not a good option to use. The chipping fluid is water based so it has the added advantage of being able to chip more than once. Only being able to chip right away was a big drawback I found in using the mineral spirits method.
The downfall I see with the chipping fluid is that I am not seeing the crisp chips that I wanted to see...they appear somewhat blended. I'm playing around with using tape vs a brush to chip the paint. Also, each test here was with one coat of paint. I'm going to try several light coats and see what I get.
The boards are 6"-8" wide, O scale
I tried thinning some of it with water (blue on the left) and matte medium. The cracks turned out nice and small, but it was very hard to chip off. I rubbed some pigments on one to highlight the cracks.
The white board is starting to look right. I'm using chipping fluid as a resist, just like using mineral spirits. My hope is that since this method is water soluable, more can be chipped later if I want to. I put on a coat of chipping fluid, and let dry. 2 coats of white paint and let dry. Scored with #11 blade and wetted surface. Let that sit for a couple of minuted. Dabbed dry and used Scotch tape to lift chips.
Beam on right is same treatment except used stiff brush to remove paint. This method seems to remove paint from high surfaces and leave it in the crevices.
Geezerbill