Howdy, Stranger!
It looks like you're new here. If you want to get involved, click one of these buttons!
Categories
- 985 All Categories
- 3 Picture Posting and Resizing
- 57 New Member Introductions
- 119 Off-Topic Forum
- 4 Photography
- 2 Resources
- 17 New Product Information
- 168 The SierraWest Forum
- 10 Brett's Blog
- 119 General News & Ramblings
- 3 Re-Release Information
- 6 Q & A about SierraWest
- 9 What Would You Like to See?
- 403 Builds
- 144 HO Scale Builds
- 177 O Scale Builds
- 62 Finished SW Build Pics
- 15 Miscellaneous Builds
- 194 Techniques
- 19 Working with Wood
- 23 Painting Castings
- 5 Masonry
- 23 Scenery
- 37 Tools and Supplies
- 21 Layout Planning & Building
- 40 Miscellaneous
- 24 Prototype Information
- 22 Reference and Research
Shop Talk
I recently annexed a portion of my basement to set-up a new modeling shop. My goal here was to have a dedicated room just for modeling. This would allow me to stop work without having to put anything away, and just close the door...
This project was all for go and not for show. I repurposed many items and the entire construction was done by me at a minimal expense. The room measures 13' x 9' with furnace duct work running through a portion of the room. This required boxing in the area of the ceiling duct work with drywall. I wanted a long bench with two distinct work stations with supply storage that could be easily reached without leaving the bench. Good lighting was a must so I built-in recessed LED shop lights above the main work bench. In addition, a long reach task light was positioned between the two work stations so it could be rotated to either area. I like to work from stools rather than sitting down in an arm style chair. I designed the height of the bench to accommodate this at 35.5" high. In addition, I have always wanted a designated bench for the diorama work. I prefer to work up my dioramas standing up. This allows me to change position easily and view things as I need to. I constructed the diorama work bench height to allow for a standing work position at 38.5". Storage below is all my diorama supplies. This area was also illuminated by an LED shop light.
The following is an illustrated tour of the shop:
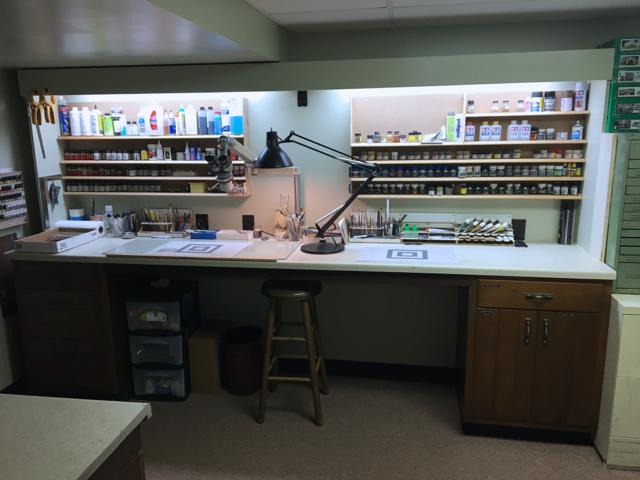
View of the shop from the doorway. Note the boxed in ceiling duct work, recessed LED shop lights, 10' long bench with two separate work stations and supply shelving. Long reach task light can be rotated to either station.
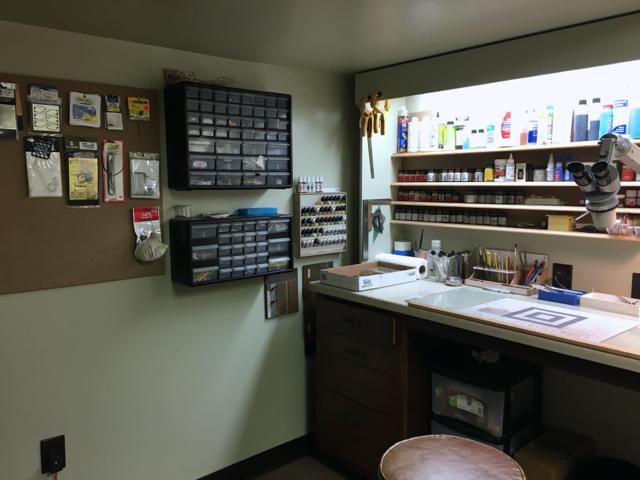
The brown board attached to the wall is a type of dense particle board. This allows me to put various hangers and hooks anywhere for various supplies.
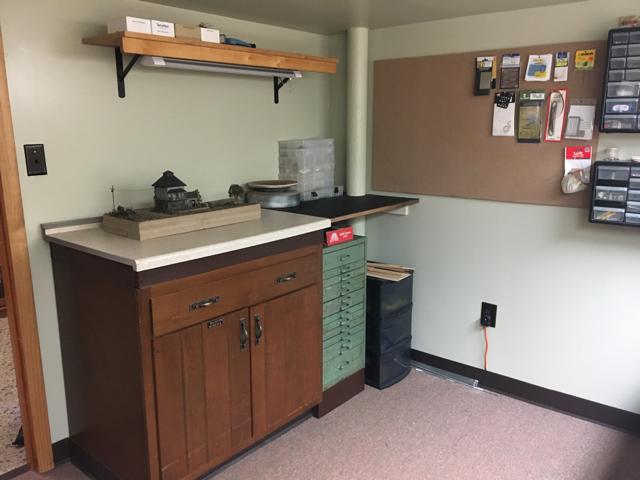
Diorama work area. standard countertop on the left half and I covered the right half with a ribbed rubber matt to cover the bare plywood surface.
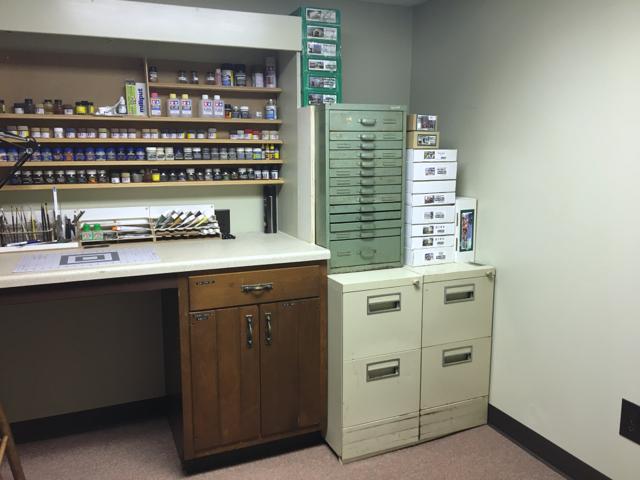
Old metal file cabinets for literature storage and other misc. storage. Type setting cabinets for castings and other supplies. These drawers can be easily pulled out and carried to the bench for sorting.
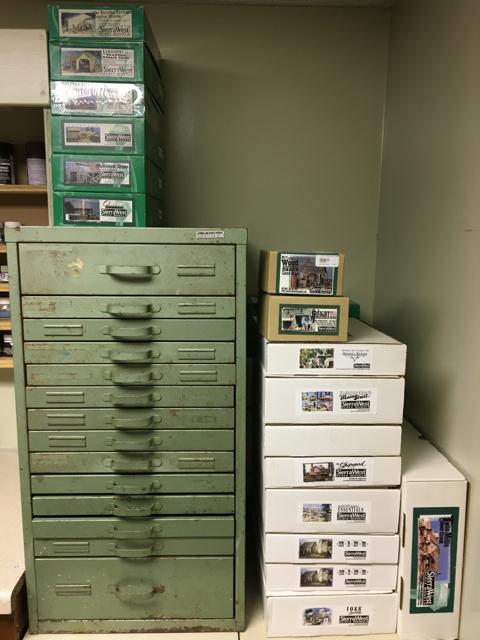
SierraWest Scale Models kit stash! Every HO/HOn3 kit ever made save for the work train. If you don't see it...it's been built and the empty box is behind the stack! The one with light glare is Shelby's Marine still shrink wrapped...sweet kit!
Bare wall to the right of the stash...for diorama display area...in development stages.
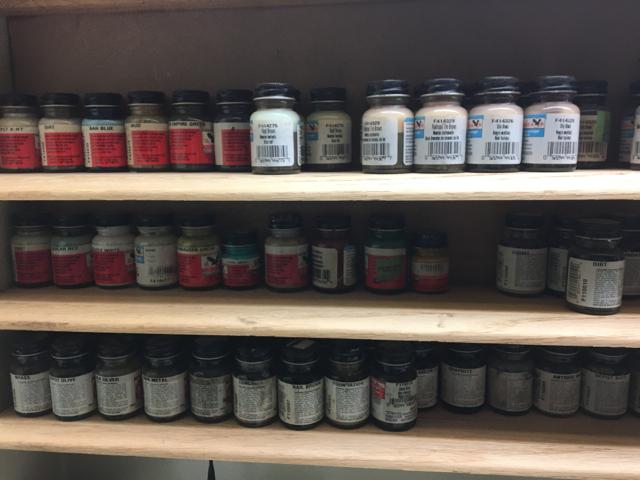
Close up of my old Floquil and Poly Scale paint collection. The shelves were made from left over oak baseboard trim.
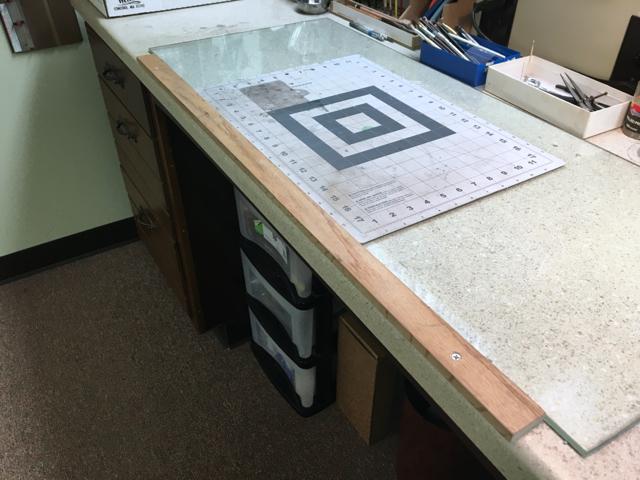
One of the work stations with a piece of 1/4' plate glass measuring 3' 3" x 16" and Fiskar cutting mat. Note the wood piece running along the front edge...I designed this for two reasons. Firstly, I like to detail my stripwood with my wire brush on a piece of solid oak rather than on glass or formica. Secondly, it provides a lip to allow things on top of the glass to be pressed against the edge for support.
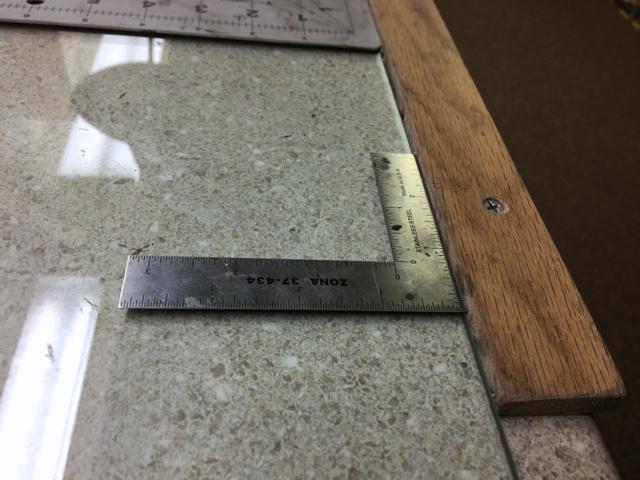
Note the edge or lip created by the oak strip.
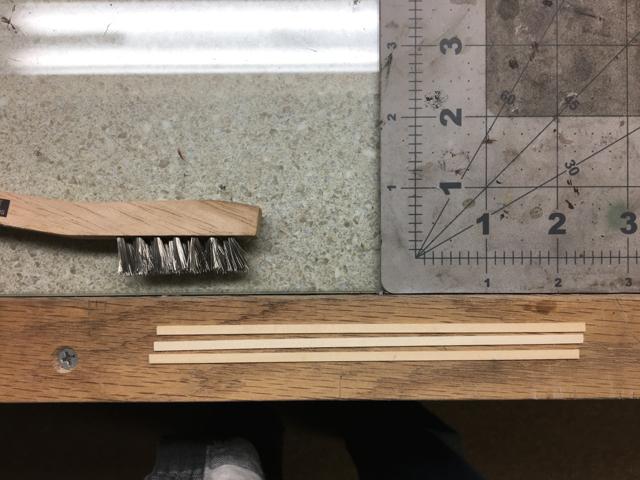
Ready to grain some stripwood!...
This project was all for go and not for show. I repurposed many items and the entire construction was done by me at a minimal expense. The room measures 13' x 9' with furnace duct work running through a portion of the room. This required boxing in the area of the ceiling duct work with drywall. I wanted a long bench with two distinct work stations with supply storage that could be easily reached without leaving the bench. Good lighting was a must so I built-in recessed LED shop lights above the main work bench. In addition, a long reach task light was positioned between the two work stations so it could be rotated to either area. I like to work from stools rather than sitting down in an arm style chair. I designed the height of the bench to accommodate this at 35.5" high. In addition, I have always wanted a designated bench for the diorama work. I prefer to work up my dioramas standing up. This allows me to change position easily and view things as I need to. I constructed the diorama work bench height to allow for a standing work position at 38.5". Storage below is all my diorama supplies. This area was also illuminated by an LED shop light.
The following is an illustrated tour of the shop:

View of the shop from the doorway. Note the boxed in ceiling duct work, recessed LED shop lights, 10' long bench with two separate work stations and supply shelving. Long reach task light can be rotated to either station.

The brown board attached to the wall is a type of dense particle board. This allows me to put various hangers and hooks anywhere for various supplies.

Diorama work area. standard countertop on the left half and I covered the right half with a ribbed rubber matt to cover the bare plywood surface.

Old metal file cabinets for literature storage and other misc. storage. Type setting cabinets for castings and other supplies. These drawers can be easily pulled out and carried to the bench for sorting.

SierraWest Scale Models kit stash! Every HO/HOn3 kit ever made save for the work train. If you don't see it...it's been built and the empty box is behind the stack! The one with light glare is Shelby's Marine still shrink wrapped...sweet kit!

Bare wall to the right of the stash...for diorama display area...in development stages.

Close up of my old Floquil and Poly Scale paint collection. The shelves were made from left over oak baseboard trim.

One of the work stations with a piece of 1/4' plate glass measuring 3' 3" x 16" and Fiskar cutting mat. Note the wood piece running along the front edge...I designed this for two reasons. Firstly, I like to detail my stripwood with my wire brush on a piece of solid oak rather than on glass or formica. Secondly, it provides a lip to allow things on top of the glass to be pressed against the edge for support.

Note the edge or lip created by the oak strip.

Ready to grain some stripwood!...


Comments
Those old drawers are priceless. My wife has a large format set that I have been eyeballing for years with zero chance of stealing.
So many great ideas in this, it is hard to compliment them all. Well done sir.
Terry
I'd like to know more about that magnifier setup you have there. What is it?
-Steve
especially the swsm stash.
That's for sure Stephen!...age old problem...
Thanks Terry.
Well Steve, that piece of equipment I kind of stumbled onto and I'm actually embarrassed to mention what I paid for it. It is a binocular microscope that is one of the highest quality scopes you can get. I purchased it from a hospital years ago where I worked previously. It's a Zeiss and German optics are known as one of the finest. It was an eye operating microscope. There were actually two, this one being a teaching scope all mounted on a huge stand with fiberoptic light sources and pedal operated zoom. The working distance is ridiculous and the clarity is amazing. Picked up the entire piece for $500! Thousands of dollars worth just for the optics let alone the fiberoptics, etc...
Right Tom that was the biggest change was the dedicated work areas and not having to clean up frequently...if I don't want to!
For sure Rick...the carpet I purchased and installed myself. There was a very limited number of remnants at the carpet store as I wasn't planning on spending much. Got one for $150 BUT...it has the worst pattern for finding crap you drop on the floor!!
Thanks Phil, and as I recall you have a pretty nice set-up yourself!
You too huh Tom? I think that happens to all of us.
It is awfully nice Brett to have the space. It's a huge motivator to treat my SWSM kits so well...
Ahh...coveting thy neighbors stash! hehe
I'd like a stash of kits like yours;..in O scale..
It looks great. I might suggest a rolling stool/chair. I find mine handy moving from one side of work area to another.
You're right of course Bryan regarding the scope, but knew it was such a good deal had to pul the trigger on it.
I have thought about the stool on wheels which would probably work fine. However, I have carpet that is very short pile so probably would roll OK. I find myself utilizing the stool by sitting out on the edge with my feet on the floor...a wheeled stool may not allow for this position comfortably...heck I should just try it and see!
Right Phil, that's why I designed my room with a completely separate work space for diorama work and at a height for standing so I can move around. I put the dio on a turntable as well.
Thanks,
George
George
The hardwood strip is fastened to the front edge of my workbench and is just about 1/8 inch higher than my 1/4 inch plate glass work surface I have. The glass then butts up against the wood strip leaving an 1/8 inch of the wood above the glass. My cutting mat laying on the glass also butts up against the wood lip keeping all concerned from moving around. This also allows things laying on the glass to butt up against the wood such as rulers, squares, walls I'm working on, etc.
The wood is not as hard on the wire brushes and the strip wood doesn't slip around as much as the wood gives some slip resistance when I'm wire brushing. I can also hold the strip wood better with my left had as the edges of the oak strip can be gripped with my fingers in addition to holding the strip wood (see picture).
If I have to drill a hole in something, the wood strip is a great backing and I just move down the strip to a different location than where I use the wire brush.
When the strip gets worn I just unscrew it and replace it with a new one.
Getting a good grip on the strip wood for wire brushing.
Butting up a square at the lip created by the wood strip. Glass also butted up here preventing movement.
Squaring up a piece of strip wood, also note the cutting mat also butted up against the wood strip.
George