Howdy, Stranger!
It looks like you're new here. If you want to get involved, click one of these buttons!
Categories
- 985 All Categories
- 3 Picture Posting and Resizing
- 57 New Member Introductions
- 119 Off-Topic Forum
- 4 Photography
- 2 Resources
- 17 New Product Information
- 168 The SierraWest Forum
- 10 Brett's Blog
- 119 General News & Ramblings
- 3 Re-Release Information
- 6 Q & A about SierraWest
- 9 What Would You Like to See?
- 403 Builds
- 144 HO Scale Builds
- 177 O Scale Builds
- 62 Finished SW Build Pics
- 15 Miscellaneous Builds
- 194 Techniques
- 19 Working with Wood
- 23 Painting Castings
- 5 Masonry
- 23 Scenery
- 37 Tools and Supplies
- 21 Layout Planning & Building
- 40 Miscellaneous
- 24 Prototype Information
- 22 Reference and Research
Slate roof tiles
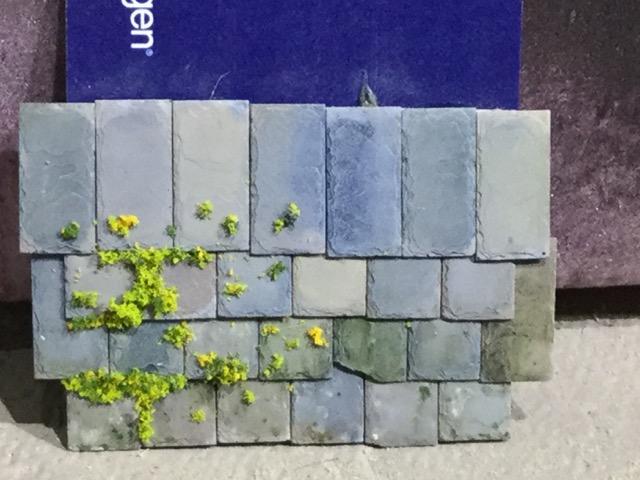
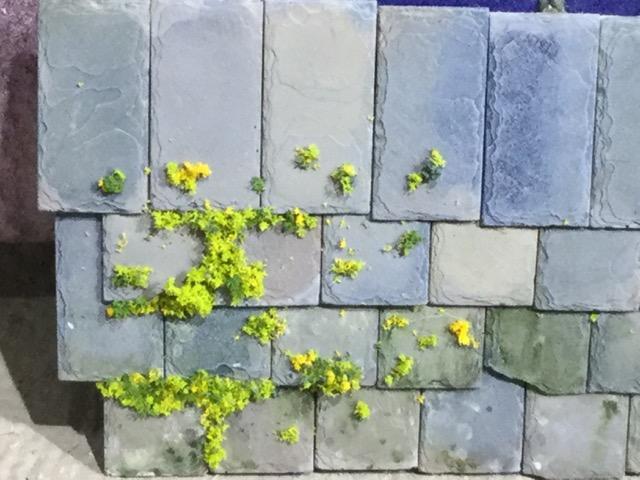
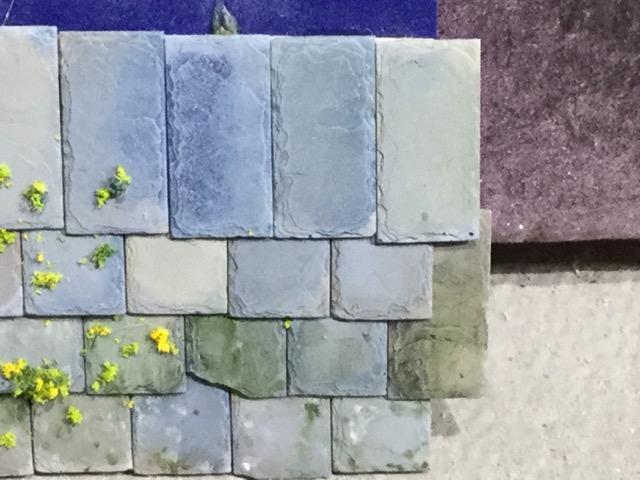
I'm experimenting with slate roof tiles for a future build. Here we have a section of tiles. The tiles were created using dental plaster in a mold. The plaster was colored with a few drops of black paint while mixing, and some random gray/blue/brown paint was painted inside the mold prior to pouring the plaster. The tiles were placed as a roof section, then drybrushed.
The top 2 rows had no other painting, the bottom 2 rows had some lichens added with enamel paints. The right side has no textured lichens, while the left side has textured lichens added in a variety of colors and textures.
The painted lichens were toned down because they really stuck out. Lichens really stand out on the real thing, but it looked too bright in scale.
The textured lichens look a bit out of scale to my eye also, even though I like the areas around the tile joints.
Thoughts?


Comments