
Howdy, Stranger!
It looks like you're new here. If you want to get involved, click one of these buttons!
Categories
- 985 All Categories
- 3 Picture Posting and Resizing
- 57 New Member Introductions
- 119 Off-Topic Forum
- 4 Photography
- 2 Resources
- 17 New Product Information
- 168 The SierraWest Forum
- 10 Brett's Blog
- 119 General News & Ramblings
- 3 Re-Release Information
- 6 Q & A about SierraWest
- 9 What Would You Like to See?
- 403 Builds
- 144 HO Scale Builds
- 177 O Scale Builds
- 62 Finished SW Build Pics
- 15 Miscellaneous Builds
- 194 Techniques
- 19 Working with Wood
- 23 Painting Castings
- 5 Masonry
- 23 Scenery
- 37 Tools and Supplies
- 21 Layout Planning & Building
- 40 Miscellaneous
- 24 Prototype Information
- 22 Reference and Research
Picture Resizing Tutorial

In order to post pictures to the forum, they need to be in a manageable size. In most cases, you won’t be able to transfer the pictures of your model directly from your camera to the forum because the files will be too big. We’ve found a program called XnView that quickly and easily resizes your pictures. Best of all it’s FREE!
Download and install the program by clicking on this link:
http://download.cnet.com/3001-2192_4-10067391.html?spi=045ef636be2a0a160f2721c93b2434c4
Once it’s installed, open the program and you’ll see a screen like this:
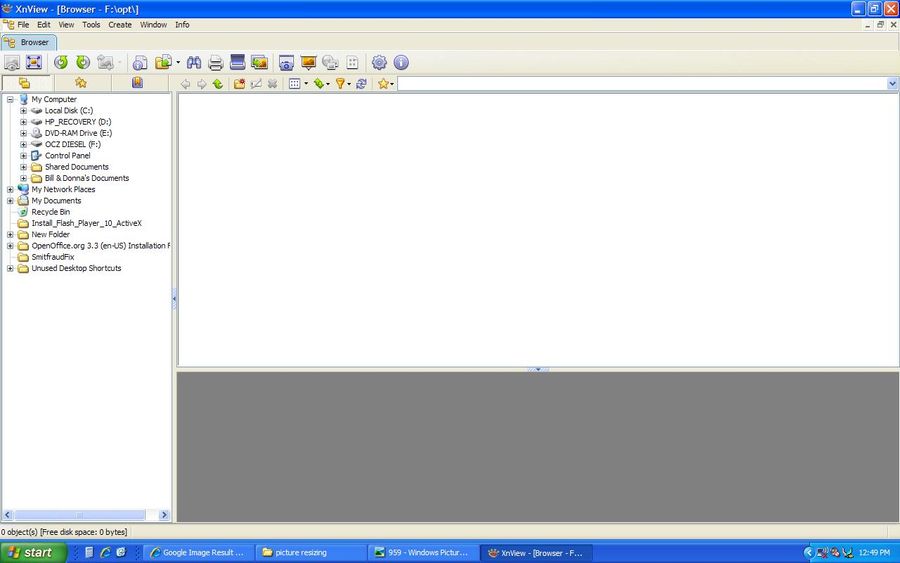
Direct XnView to your pictures by using the panel on the left. In this example, the pictures are in “My Pictures” and a folder titled “Sierra West”.
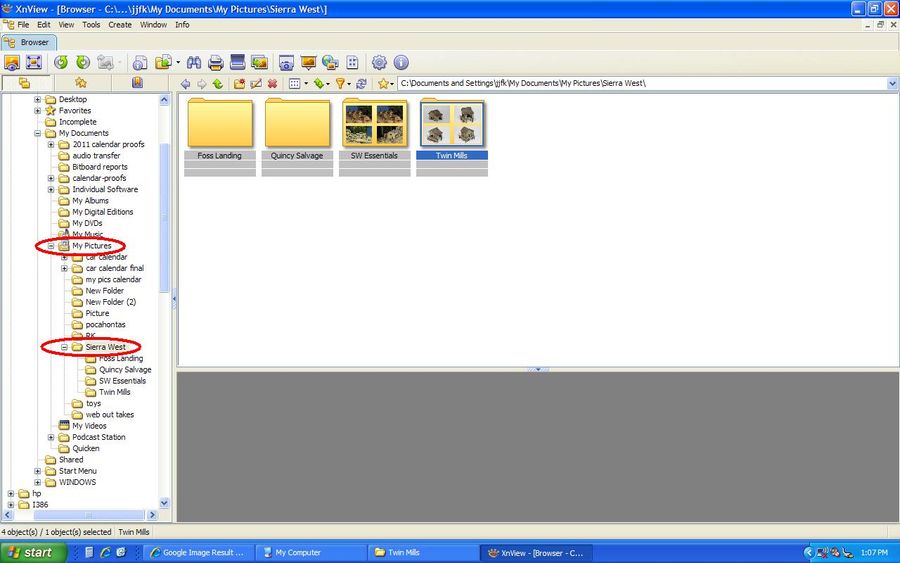
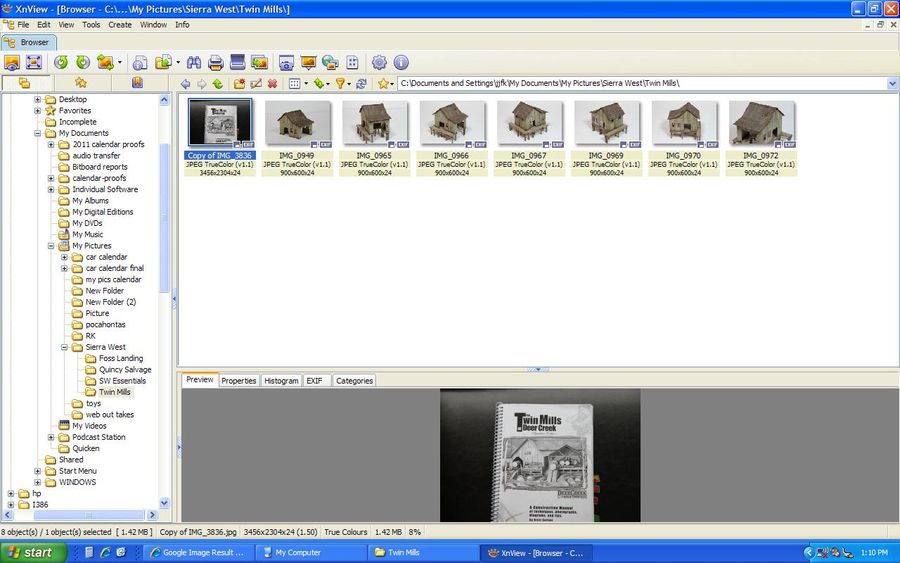
The photo that needs resizing is in the “Twin Mills” folder. By double clicking on the Twin Mills folder, all the pictures will display in the top panel.
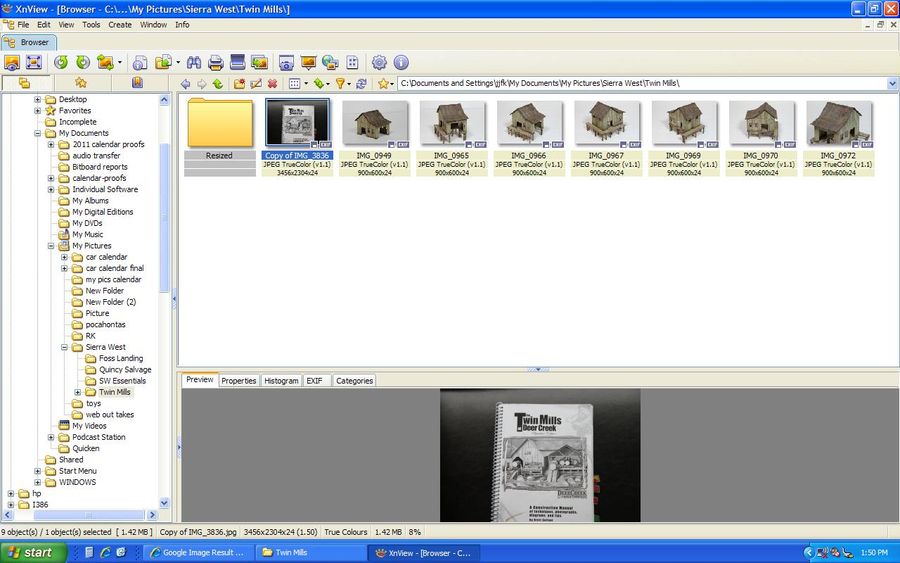
*Here’s a quick housekeeping tip: Create a folder to hold the resized pictures. Put your cursor in the white area of the top panel, right click and select “New Folder” and title it “Resized”. This will easily help you identify which pictures are ready to post to the forums while still preserving the size and quality of the original images. (Who knows, you may need those high res images when your work gets published in the Gazette!)
The image in this example that needs resizing is called “Copy of IMG 3836”. By clicking on it once, it will appear in the bottom preview.
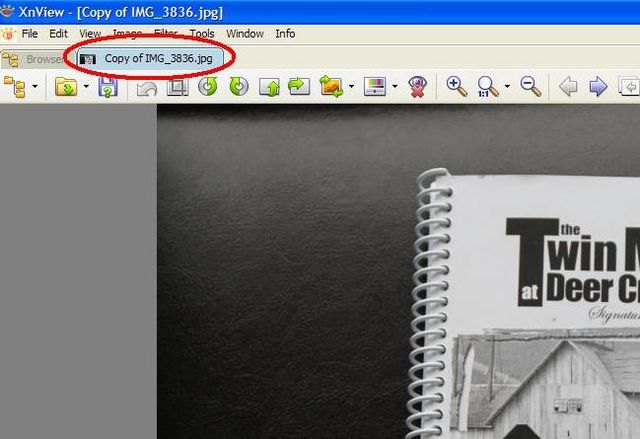
However, to resize it we need to double click on the image, which will open a new tab with the name of the image.
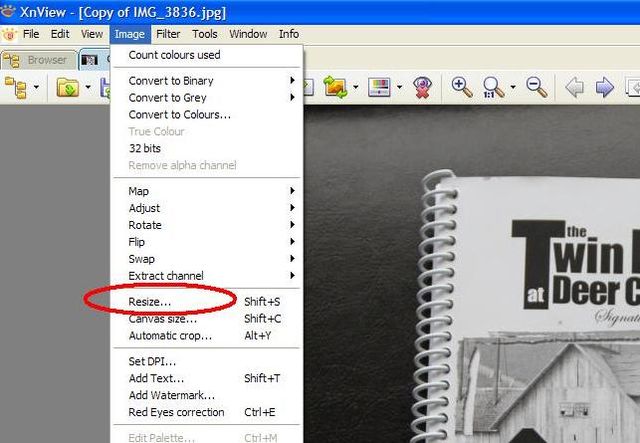
From the text at the top, click on “Image” then scroll down and select “Resize”
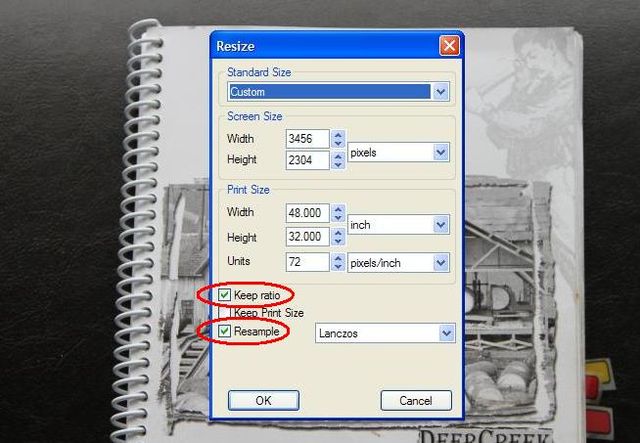
The Resize box will open. Make sure there’s a green check mark in the boxes “Keep Ratio” and “Resample”
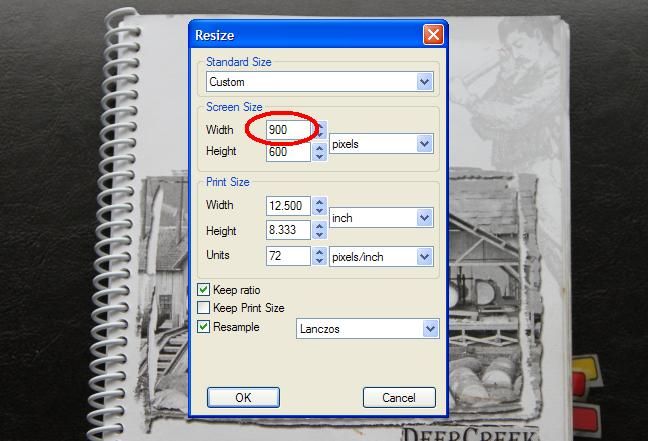
Now resize the image by highlighting and changing the number in the “Width” field to 900. The “Height” field will change automatically (in this example 600). Click “OK” and the image will resize.
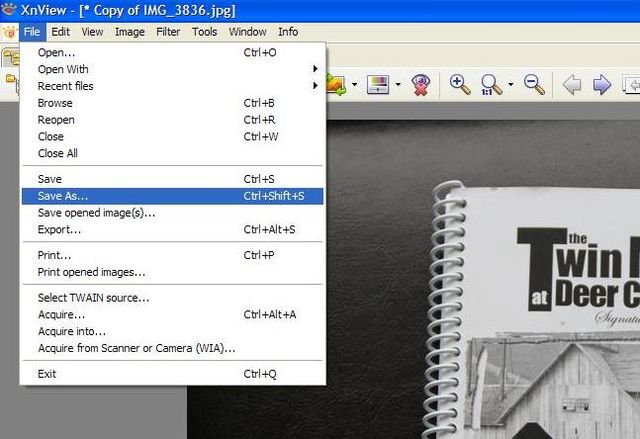
The resized picture needs to be saved. At the top left, click on “File” and scroll down to “Save As”
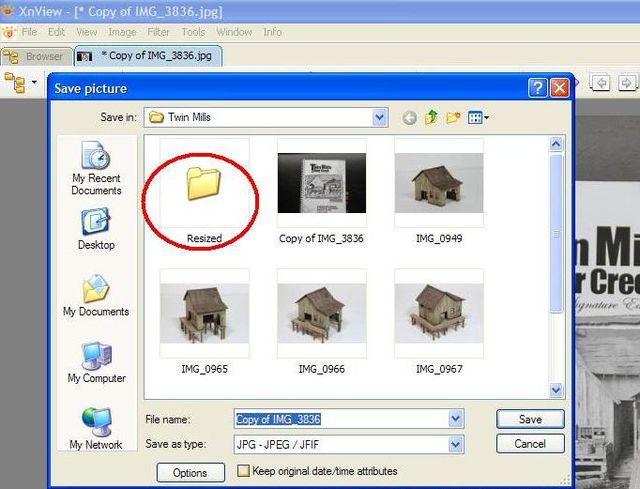
Double click on the “Resized” folder, then click “Save”
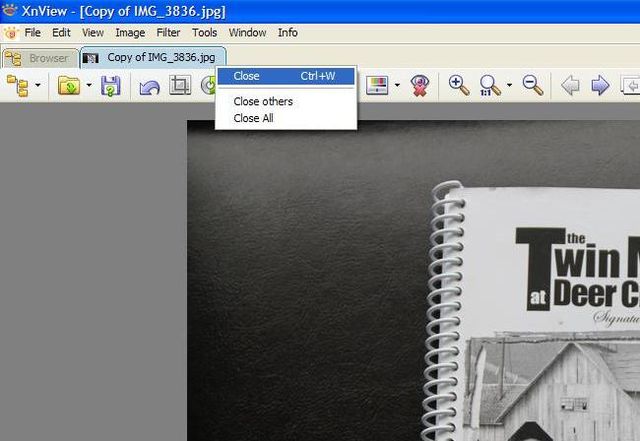
To get back to the original browser panel, right click on the blue image tab and select “Close”
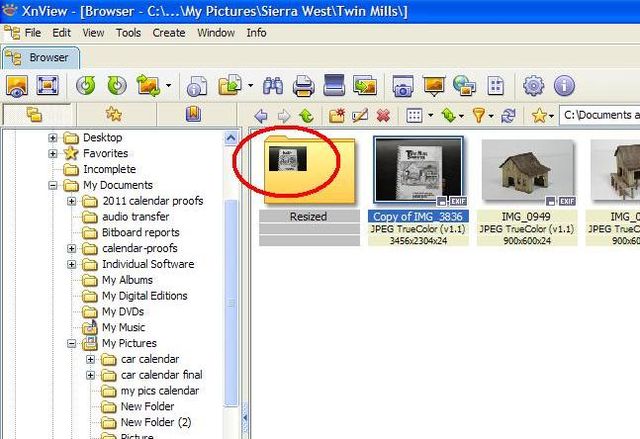
Now you’ll see the original browser panel and notice a thumbnail of the resized image inside the “Resized” folder. By resizing the original image from 3456 pixels wide to 900 wide, the file size has been reduced from about 2MB to 100K (about 20 times smaller!)
Your picture is now ready to post in the forum. If you need help with that, see the thread titled "Picture Posting Tutorial".
Download and install the program by clicking on this link:
http://download.cnet.com/3001-2192_4-10067391.html?spi=045ef636be2a0a160f2721c93b2434c4
Once it’s installed, open the program and you’ll see a screen like this:
Direct XnView to your pictures by using the panel on the left. In this example, the pictures are in “My Pictures” and a folder titled “Sierra West”.
The photo that needs resizing is in the “Twin Mills” folder. By double clicking on the Twin Mills folder, all the pictures will display in the top panel.
*Here’s a quick housekeeping tip: Create a folder to hold the resized pictures. Put your cursor in the white area of the top panel, right click and select “New Folder” and title it “Resized”. This will easily help you identify which pictures are ready to post to the forums while still preserving the size and quality of the original images. (Who knows, you may need those high res images when your work gets published in the Gazette!)
The image in this example that needs resizing is called “Copy of IMG 3836”. By clicking on it once, it will appear in the bottom preview.
However, to resize it we need to double click on the image, which will open a new tab with the name of the image.
From the text at the top, click on “Image” then scroll down and select “Resize”
The Resize box will open. Make sure there’s a green check mark in the boxes “Keep Ratio” and “Resample”
Now resize the image by highlighting and changing the number in the “Width” field to 900. The “Height” field will change automatically (in this example 600). Click “OK” and the image will resize.
The resized picture needs to be saved. At the top left, click on “File” and scroll down to “Save As”
Double click on the “Resized” folder, then click “Save”
To get back to the original browser panel, right click on the blue image tab and select “Close”
Now you’ll see the original browser panel and notice a thumbnail of the resized image inside the “Resized” folder. By resizing the original image from 3456 pixels wide to 900 wide, the file size has been reduced from about 2MB to 100K (about 20 times smaller!)
Your picture is now ready to post in the forum. If you need help with that, see the thread titled "Picture Posting Tutorial".
This discussion has been closed.