Howdy, Stranger!
It looks like you're new here. If you want to get involved, click one of these buttons!
Categories
- 984 All Categories
- 3 Picture Posting and Resizing
- 57 New Member Introductions
- 119 Off-Topic Forum
- 4 Photography
- 2 Resources
- 17 New Product Information
- 168 The SierraWest Forum
- 10 Brett's Blog
- 119 General News & Ramblings
- 3 Re-Release Information
- 6 Q & A about SierraWest
- 9 What Would You Like to See?
- 402 Builds
- 143 HO Scale Builds
- 177 O Scale Builds
- 62 Finished SW Build Pics
- 15 Miscellaneous Builds
- 194 Techniques
- 19 Working with Wood
- 23 Painting Castings
- 5 Masonry
- 23 Scenery
- 37 Tools and Supplies
- 21 Layout Planning & Building
- 40 Miscellaneous
- 24 Prototype Information
- 22 Reference and Research
My First Forum Posting: Creating Believable Concrete
in Techniques
I enjoy reviewing and learning from old posts on the Sierra West Forum. Today I went into the Forum way back time machine from November 2013 and read "Concrete For Our Buildings". I would like to share a way that I make believable concrete as a supplement to that earlier post by "waynelp".
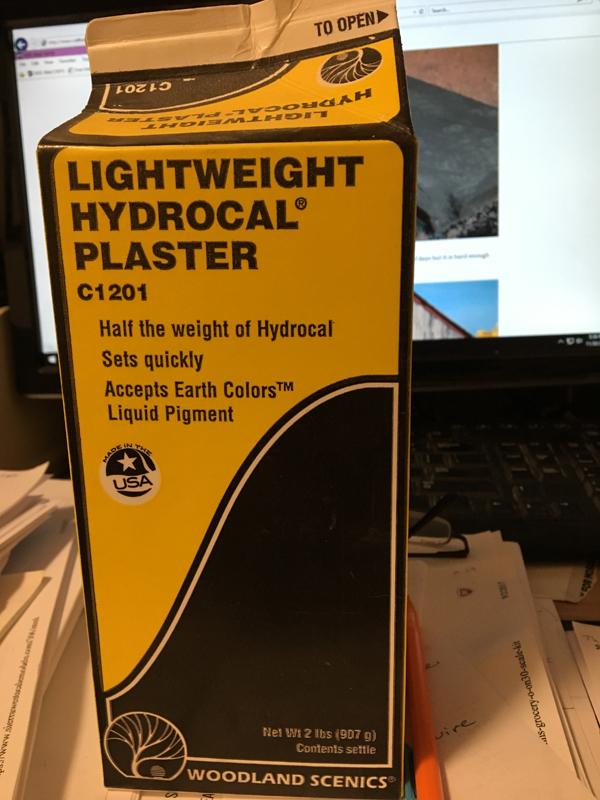
I like to use Lightweight Hydrocal Plaster by Woodland Scenics to create my concrete foundations, block walls and floors. I am using this material for a scratch built structure currently under development I find Lightweight Hydrocal easy to work with, very quick to set and dry, (it usually fully cures over night [well, at least out here in Sonoran Desert of Tucson it dries and cures that fast]) and it takes water soluble paints offered by Sierra West very well.

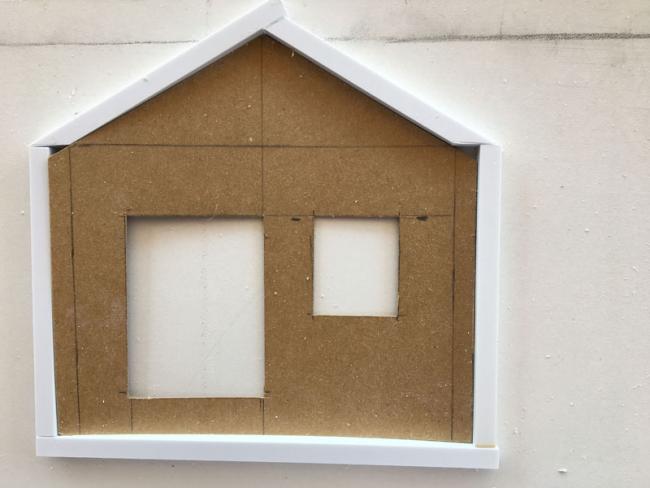
I like to create my forms by using 1/4" (.250" X .250") styrene strips for block walls when applicable. For the current project's concrete floor form however, I used pieces of 3/4" square wood trim. Next, I use dabs of caulk to adhere the wood or styrene strip form pieces to a laminated surface base. Using caulk allows for some last minute adjustments to the form to make certain everything is nice and square. Sometimes it helps to use some Vaseline petroleum jelly, lightly applied to the inside edge of the form, to act as a mold release agent.

Immediately after pouring the Hydrocal into my form I like to use a trowel to distribute and level the Hydrocal. Trowel gently in several directions across the surface of the material using your styrene strip or wood form as a leveling guide as the Hydrocal very rapidly begins to harden. (This hardening might occur in a minute or less after pouring.) This technique produces some interesting textures that become more evident once paint color is added in a later step. I learned this troweling idea/technique from a master who was pouring thin concrete floors over old concrete floors in a rental home I own. Later he added a color stain to the hardened concrete floor surface that created a surface that looked as though it was aged and well worn.
A few hours after completing the step above I like to use a #11 Exacto blade to lightly score a line along the inside top edge of my styrene form. I don't score this line more than 1/64th of an inch deep as it is meant to create a sharp edge along the newly cast piece by separating any material that may have overflowed the side of the cast piece over the form after the leveling step. Ever so gently pry, coax loose and remove the styrene strip/wood form. Now allow the newly cast piece to fully cure. If you rush this step the newly cast piece will not slip away from the base easily and in one piece. (I found this out the hard way!) After a day or so of curing it should be OK to gently nudge the cast piece loose by using a #11 Exacto knife and ever so gently scribing a light line along the edge between the cast piece and the laminated surface. It isn't necessary to scribe this line very deep. Just gently score around the perimeter of the cast piece and it will begin to slide.
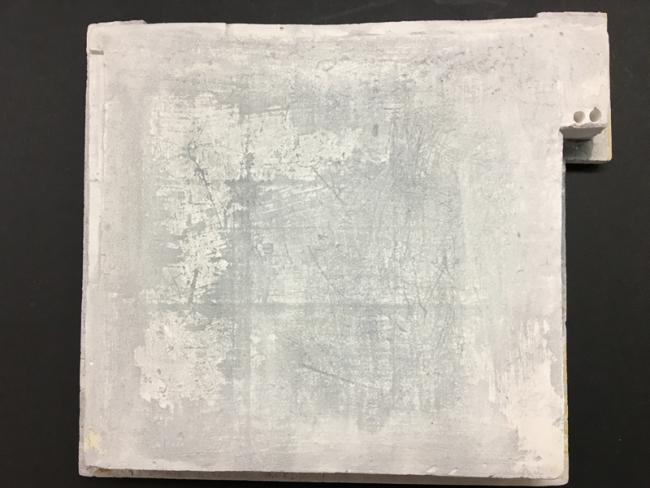
Let this piece fully cure again by turning it upside down to dry out from the bottom side of the casting. After a few days you should have a very light durable cast piece that can easily be scribed, cut or shaped. Now you should have a casting ready to paint. For my project's concrete floor I selected SierraWest water soluble "Concrete Grey" paint offered on the SierraWest website by Brett from the paint kit. I put several drops of the concrete grey paint into a small mixing vessel and added some drops of water creating a very fluid paint/more like a colored stain. You can experiment with how thick/thin the paint should be by applying it to some scrap pieces of cured Hydrocal. I lightly brushed the thinned paint over the surface of the structure floor I had created. At first it will look a bit darken even but after an overnight of completely absorbing and drying the color will lighten a bit. Then I like to ever so gently sand (using 220 sand paper) the surface a bit adding to the worn appearance. If you want to darken the piece a bit you can add another layer of diluted concrete grey paint. Here is the result. Once I get machines and castings placed on the floor I can add some more color and stains here and there by dusting chalk in selected places.

Your comments and suggestion are more than welcome. Using some of your ideas I should be able to make the structure floor casting look better, more believable.
Thanks for looking.
Later, Dave S Tucson, AZ
I like to use Lightweight Hydrocal Plaster by Woodland Scenics to create my concrete foundations, block walls and floors. I am using this material for a scratch built structure currently under development I find Lightweight Hydrocal easy to work with, very quick to set and dry, (it usually fully cures over night [well, at least out here in Sonoran Desert of Tucson it dries and cures that fast]) and it takes water soluble paints offered by Sierra West very well.

I like to create my forms by using 1/4" (.250" X .250") styrene strips for block walls when applicable. For the current project's concrete floor form however, I used pieces of 3/4" square wood trim. Next, I use dabs of caulk to adhere the wood or styrene strip form pieces to a laminated surface base. Using caulk allows for some last minute adjustments to the form to make certain everything is nice and square. Sometimes it helps to use some Vaseline petroleum jelly, lightly applied to the inside edge of the form, to act as a mold release agent.

Immediately after pouring the Hydrocal into my form I like to use a trowel to distribute and level the Hydrocal. Trowel gently in several directions across the surface of the material using your styrene strip or wood form as a leveling guide as the Hydrocal very rapidly begins to harden. (This hardening might occur in a minute or less after pouring.) This technique produces some interesting textures that become more evident once paint color is added in a later step. I learned this troweling idea/technique from a master who was pouring thin concrete floors over old concrete floors in a rental home I own. Later he added a color stain to the hardened concrete floor surface that created a surface that looked as though it was aged and well worn.
A few hours after completing the step above I like to use a #11 Exacto blade to lightly score a line along the inside top edge of my styrene form. I don't score this line more than 1/64th of an inch deep as it is meant to create a sharp edge along the newly cast piece by separating any material that may have overflowed the side of the cast piece over the form after the leveling step. Ever so gently pry, coax loose and remove the styrene strip/wood form. Now allow the newly cast piece to fully cure. If you rush this step the newly cast piece will not slip away from the base easily and in one piece. (I found this out the hard way!) After a day or so of curing it should be OK to gently nudge the cast piece loose by using a #11 Exacto knife and ever so gently scribing a light line along the edge between the cast piece and the laminated surface. It isn't necessary to scribe this line very deep. Just gently score around the perimeter of the cast piece and it will begin to slide.
Let this piece fully cure again by turning it upside down to dry out from the bottom side of the casting. After a few days you should have a very light durable cast piece that can easily be scribed, cut or shaped. Now you should have a casting ready to paint. For my project's concrete floor I selected SierraWest water soluble "Concrete Grey" paint offered on the SierraWest website by Brett from the paint kit. I put several drops of the concrete grey paint into a small mixing vessel and added some drops of water creating a very fluid paint/more like a colored stain. You can experiment with how thick/thin the paint should be by applying it to some scrap pieces of cured Hydrocal. I lightly brushed the thinned paint over the surface of the structure floor I had created. At first it will look a bit darken even but after an overnight of completely absorbing and drying the color will lighten a bit. Then I like to ever so gently sand (using 220 sand paper) the surface a bit adding to the worn appearance. If you want to darken the piece a bit you can add another layer of diluted concrete grey paint. Here is the result. Once I get machines and castings placed on the floor I can add some more color and stains here and there by dusting chalk in selected places.

Your comments and suggestion are more than welcome. Using some of your ideas I should be able to make the structure floor casting look better, more believable.
Thanks for looking.
Later, Dave S Tucson, AZ


Comments
Mike, Thanks for your comment.
Brownbr, (Bryan ? ) Thanks for your suggestions. Two ideas I had not considered at the time I did the casting but both are worthy of further investigation and implementation. I am definitely open to ideas of how to do concrete expansion joints and cracks in a realistic manner. Suggestions are welcome.
Later, Dave S. Tucson, AZ
Created the floor just as you described above, and before painting scribed the lines. After placing the machinery did final weathering. At close-up, the lines seem to be a natural part of the floor.
Ed, (engine 909) Thanks for your reply.. Looking forward to all the input I receive.
Ken, (KKarns) Thanks for the reply. Yes, I also use a dull #11 blade to make mortar joints between blocks. It is very effective. The trick after creating the blocks is to get the mortar joints a slight contrast to the block color in order to make them noticeable without having them dominate. Here again I use diluted SWSM water based paints and lightly touch my brush on a joint and let the paint run downstream along the mortar joint. I will try this technique on the concrete stress fractures as well.
Bryan, (brownbr) Thanks for the suggestions and additional tips. I will give the scribed concrete expansion joints a try this afternoon. The photos are great. Glad you added them.
Results soon.
Later, Dave S. Tucson, AZ
.
Thanks again to Bryan (brownbr) for recommending the improvement. It certainly looks more realistic with the joints and cracks.
Later, Dave S. Tucson, AZ
Thanks for the info, I have a lot of concrete in an upcoming build project. I will try your ideas
Later, Dave S.
Here is a "before" picture of the shop floor:
And the "after" photo of the reworked shop floor where I added some subtle expansion joints and stress cracks:
As always, thanks for looking. Your thoughts and suggestion are welcome.
Thanks, Dave S. Tucson, AZ
Thanks for your thoughts about hairline cracks.
Later, Dave S. Tucson, AZ