Howdy, Stranger!
It looks like you're new here. If you want to get involved, click one of these buttons!
Categories
- 985 All Categories
- 3 Picture Posting and Resizing
- 57 New Member Introductions
- 119 Off-Topic Forum
- 4 Photography
- 2 Resources
- 17 New Product Information
- 168 The SierraWest Forum
- 10 Brett's Blog
- 119 General News & Ramblings
- 3 Re-Release Information
- 6 Q & A about SierraWest
- 9 What Would You Like to See?
- 403 Builds
- 144 HO Scale Builds
- 177 O Scale Builds
- 62 Finished SW Build Pics
- 15 Miscellaneous Builds
- 194 Techniques
- 19 Working with Wood
- 23 Painting Castings
- 5 Masonry
- 23 Scenery
- 37 Tools and Supplies
- 21 Layout Planning & Building
- 40 Miscellaneous
- 24 Prototype Information
- 22 Reference and Research
Adding Lighting Effects to Brett's Amazing "Shop Heater" Detail Part... Karl. A
Jim M said:Karl, how did you run and hide the wires for the LEDs?
SteveF said:Karl..... If you get a spare moment sometime, I would love to see the pictures of how you ran it out the stack and into the rafters.
Here are the modifications I made to Brett's incredible detail part in order to install the lighting effects. Lots of pics so I dont have to type too much through the 'step by step' process.
This can obviously be used in many other situations, I've used the same method to light up the SWSM boilers, a trash can and 55 drum for burn barrels.
I'm sure there will be more uses and ideas to follow as they come to me and the incredible SWSM product line expands and grows.
Part one :- Preparing the amazing 3D printed parts to accept the electronics.
Shown are all the parts needed to get started, the 3D printed parts and a cheap fake flicker candle.
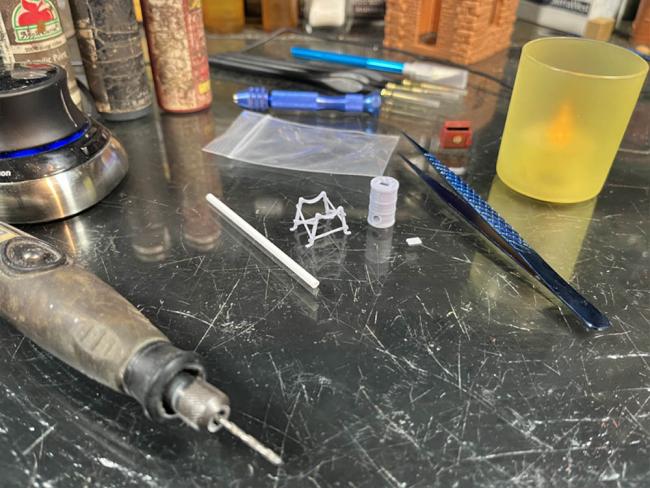
Step one, remove the bulb/battery base from the holder, there are several versions but they are all essentially the same.
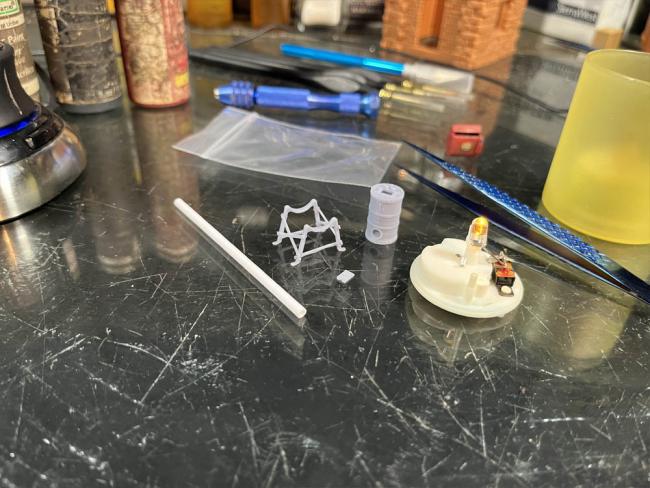
Use some nippers and remove the bulb from the base, remember which wire goes where,
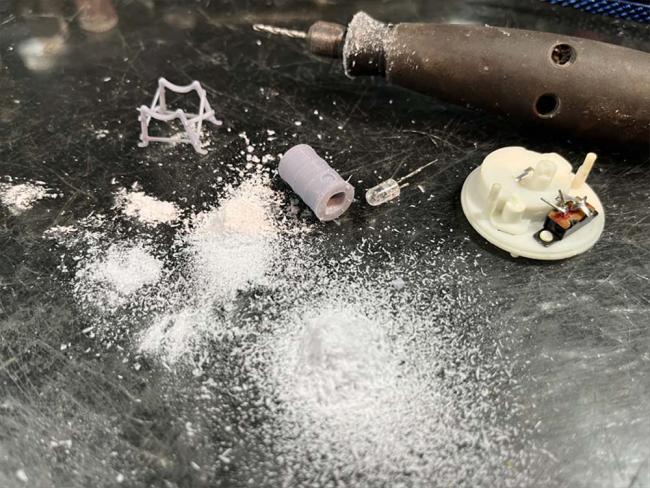
I then used my dremel flex attachment to drill out the BACK of the heater, slightly bigger than the bulb so that it could be accepted easily with a little extra room for the future new wires.
(WEAR A MASK WHEN DRILLING OR SANDING RESIN.)
I then prepared the parts for priming, as the heater frame is really fragile, I just used regular scotch double sided tape to hold it on the stick instead of my regular carpet tape. I've been using this scotch tape a lot for the fragile 3D prints lately, it holds them 'just' well enough for spray priming and you don't damage the VERY delicate parts as you remove them from the stick.
The trick I use to spray tubes is to insert a toothpick or BBQ skewer 'handle' into the tube so that I can spray it entirely, end to end.
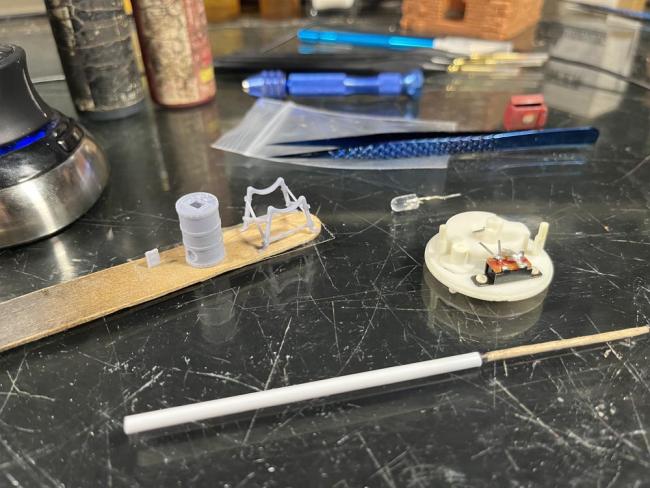
For black primer I use the $1.49 rattle cans from HomeDepot.
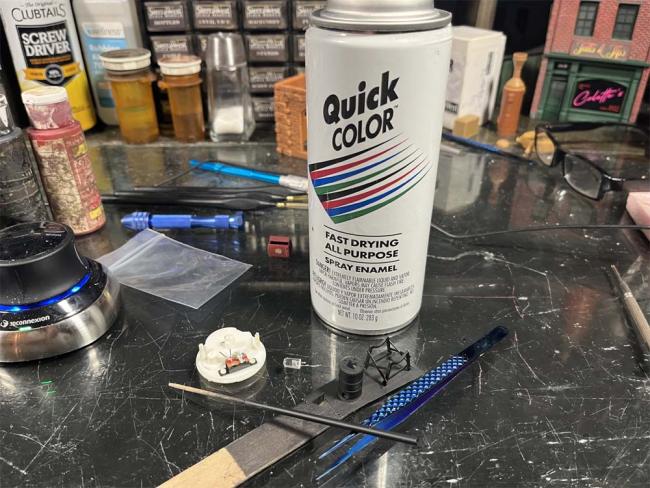
Here's how they came out after a light, even spray.
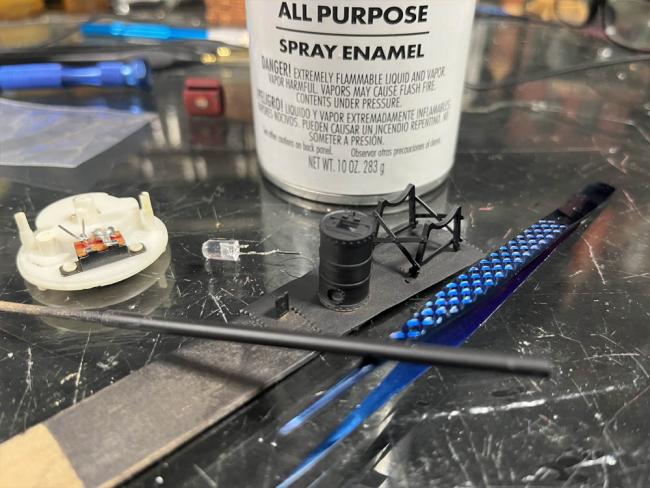
Next steps to follow. Working on the electronics...


Comments
Some very simple steps are taken to get the electronics working, I'm not great at soldering, so, if I can, you can too. Here are the steps I took.
Step one, I made sure I knew which 'lead' out of the LED was which and snipped them the same length. I then soldered on the magnet wires to the LED, using my little "third hand" clamp thingy so that I didn't burn myself, too bad.
Once cooled down I (temporarily) held the wires to the battery base to make sure it worked.
I then coated my solder joints with "Liquid Tape" (which is in that little yellow bottle) to ensure when I bent the 'leads' up, if they touched they wouldnt short out, because that would suck.
At this point is when I face palmed and realized that I could run the wires up through the stack and into the rafters to hide them.
Obviously, this would have been much better done before I had primed the drum to keep it cleaner and dust free.
Anyway, I drilled out the indentation in the casting for the stack attachment in order for the wires to come out and up through the stack tube.
Coming up, the final installation....
Step one is to thread the wires through the hole in the back of the heater and then up through the hole where the smokestack tube will be attached.
Next, pull the wire through until the LED is close, turn the LED so that it is shining out/pointed through the open door at the FRONT of the heater, bend the wires and 'leads' if needed for a flush fit.
Carefully push the LED all the way in and pull the wires taught for a good fit.
Final steps are ....
Temporarily hook it back up to the battery to make sure everything still works before you glue it all together !!!
Cut the stack to your required height and then thread the wires up through the stack and glue the stack on.
Use a hole punch to cut out a paper circle and glue it on the back of the heater to cover the hole and the back of the LED so no light escapes, paint it black to match.
Cut a small piece of plastic wrap/cling film or similar, scrunch it up and stuff it in through the fire box door opening. This will diffuse the light and make it look like a multi-faceted light effect with depth.
Glue the door on at your desired angle.
Weather lightly with some rust chalk on the rivet joints and some grey chalk under the door for ash.
It's basically just liquid rubber, if you have any 'rubber cement' or 'tire bead sealer' around in the shop, like me, then that should work just as well.
When it gets installed the stack will be cut to either the rafter height and the wires will run along the rafters and a new piece of stack will be added on top to go up through the roof.
Or ...
The stack will go all the way up to the inside of the roof and the wires will run along the inside of the roof ridgeline and then a stack will be added to the outside roof to line up with the stack below.
I haven't decided yet, I have the structure designed and built, but not the roof line yet, so it will depend on that, either way will be easy enough to finish and install.
we are all definitely excited to see what's coming next, and, where we can take it.
Awesome stuff.
Thanks for sharing. This is a good idea. And thanks for showing your wire routing as well, that's a good idea.
Jerry