
Howdy, Stranger!
It looks like you're new here. If you want to get involved, click one of these buttons!
Categories
- 922 All Categories
- 3 Picture Posting and Resizing
- 53 New Member Introductions
- 111 Off-Topic Forum
- 4 Photography
- 2 Resources
- 16 New Product Information
- 166 The SierraWest Forum
- 9 Brett's Blog
- 117 General News & Ramblings
- 3 Re-Release Information
- 6 Q & A about SierraWest
- 9 What Would You Like to See?
- 362 Builds
- 131 HO Scale Builds
- 155 O Scale Builds
- 59 Finished SW Build Pics
- 12 Miscellaneous Builds
- 187 Techniques
- 19 Working with Wood
- 20 Painting Castings
- 5 Masonry
- 23 Scenery
- 36 Tools and Supplies
- 21 Layout Planning & Building
- 38 Miscellaneous
- 24 Prototype Information
- 22 Reference and Research
My Sawmill build so far

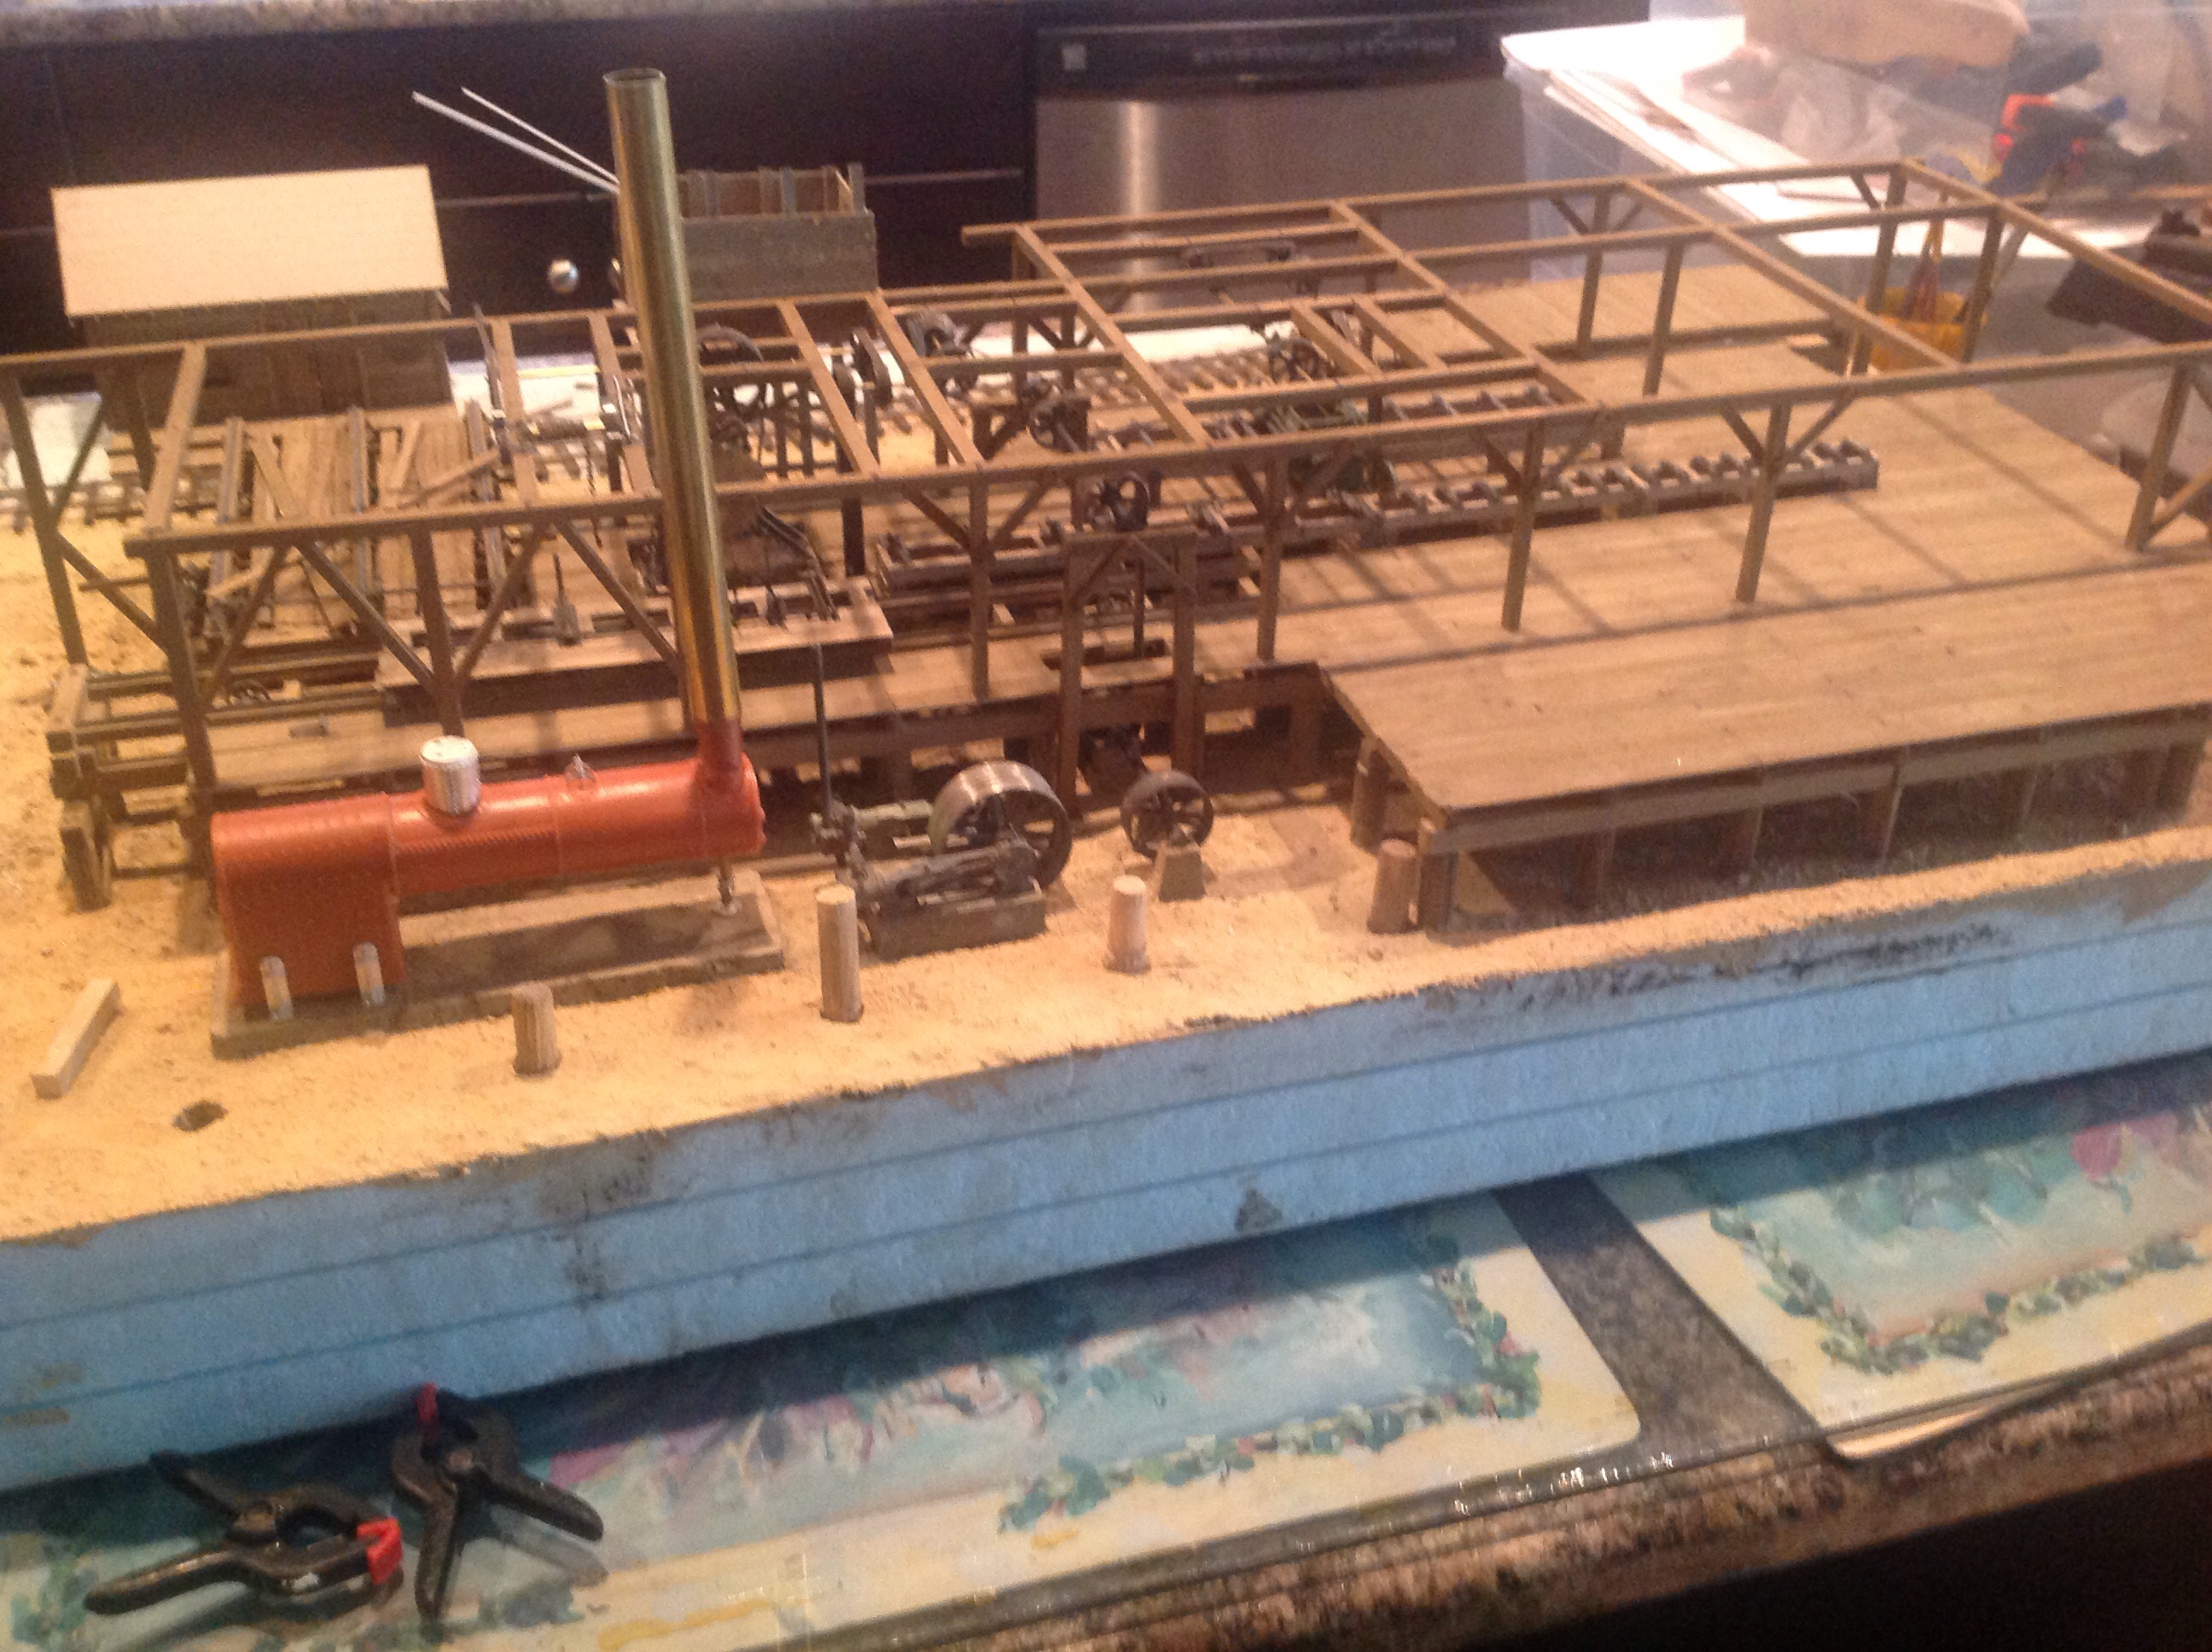
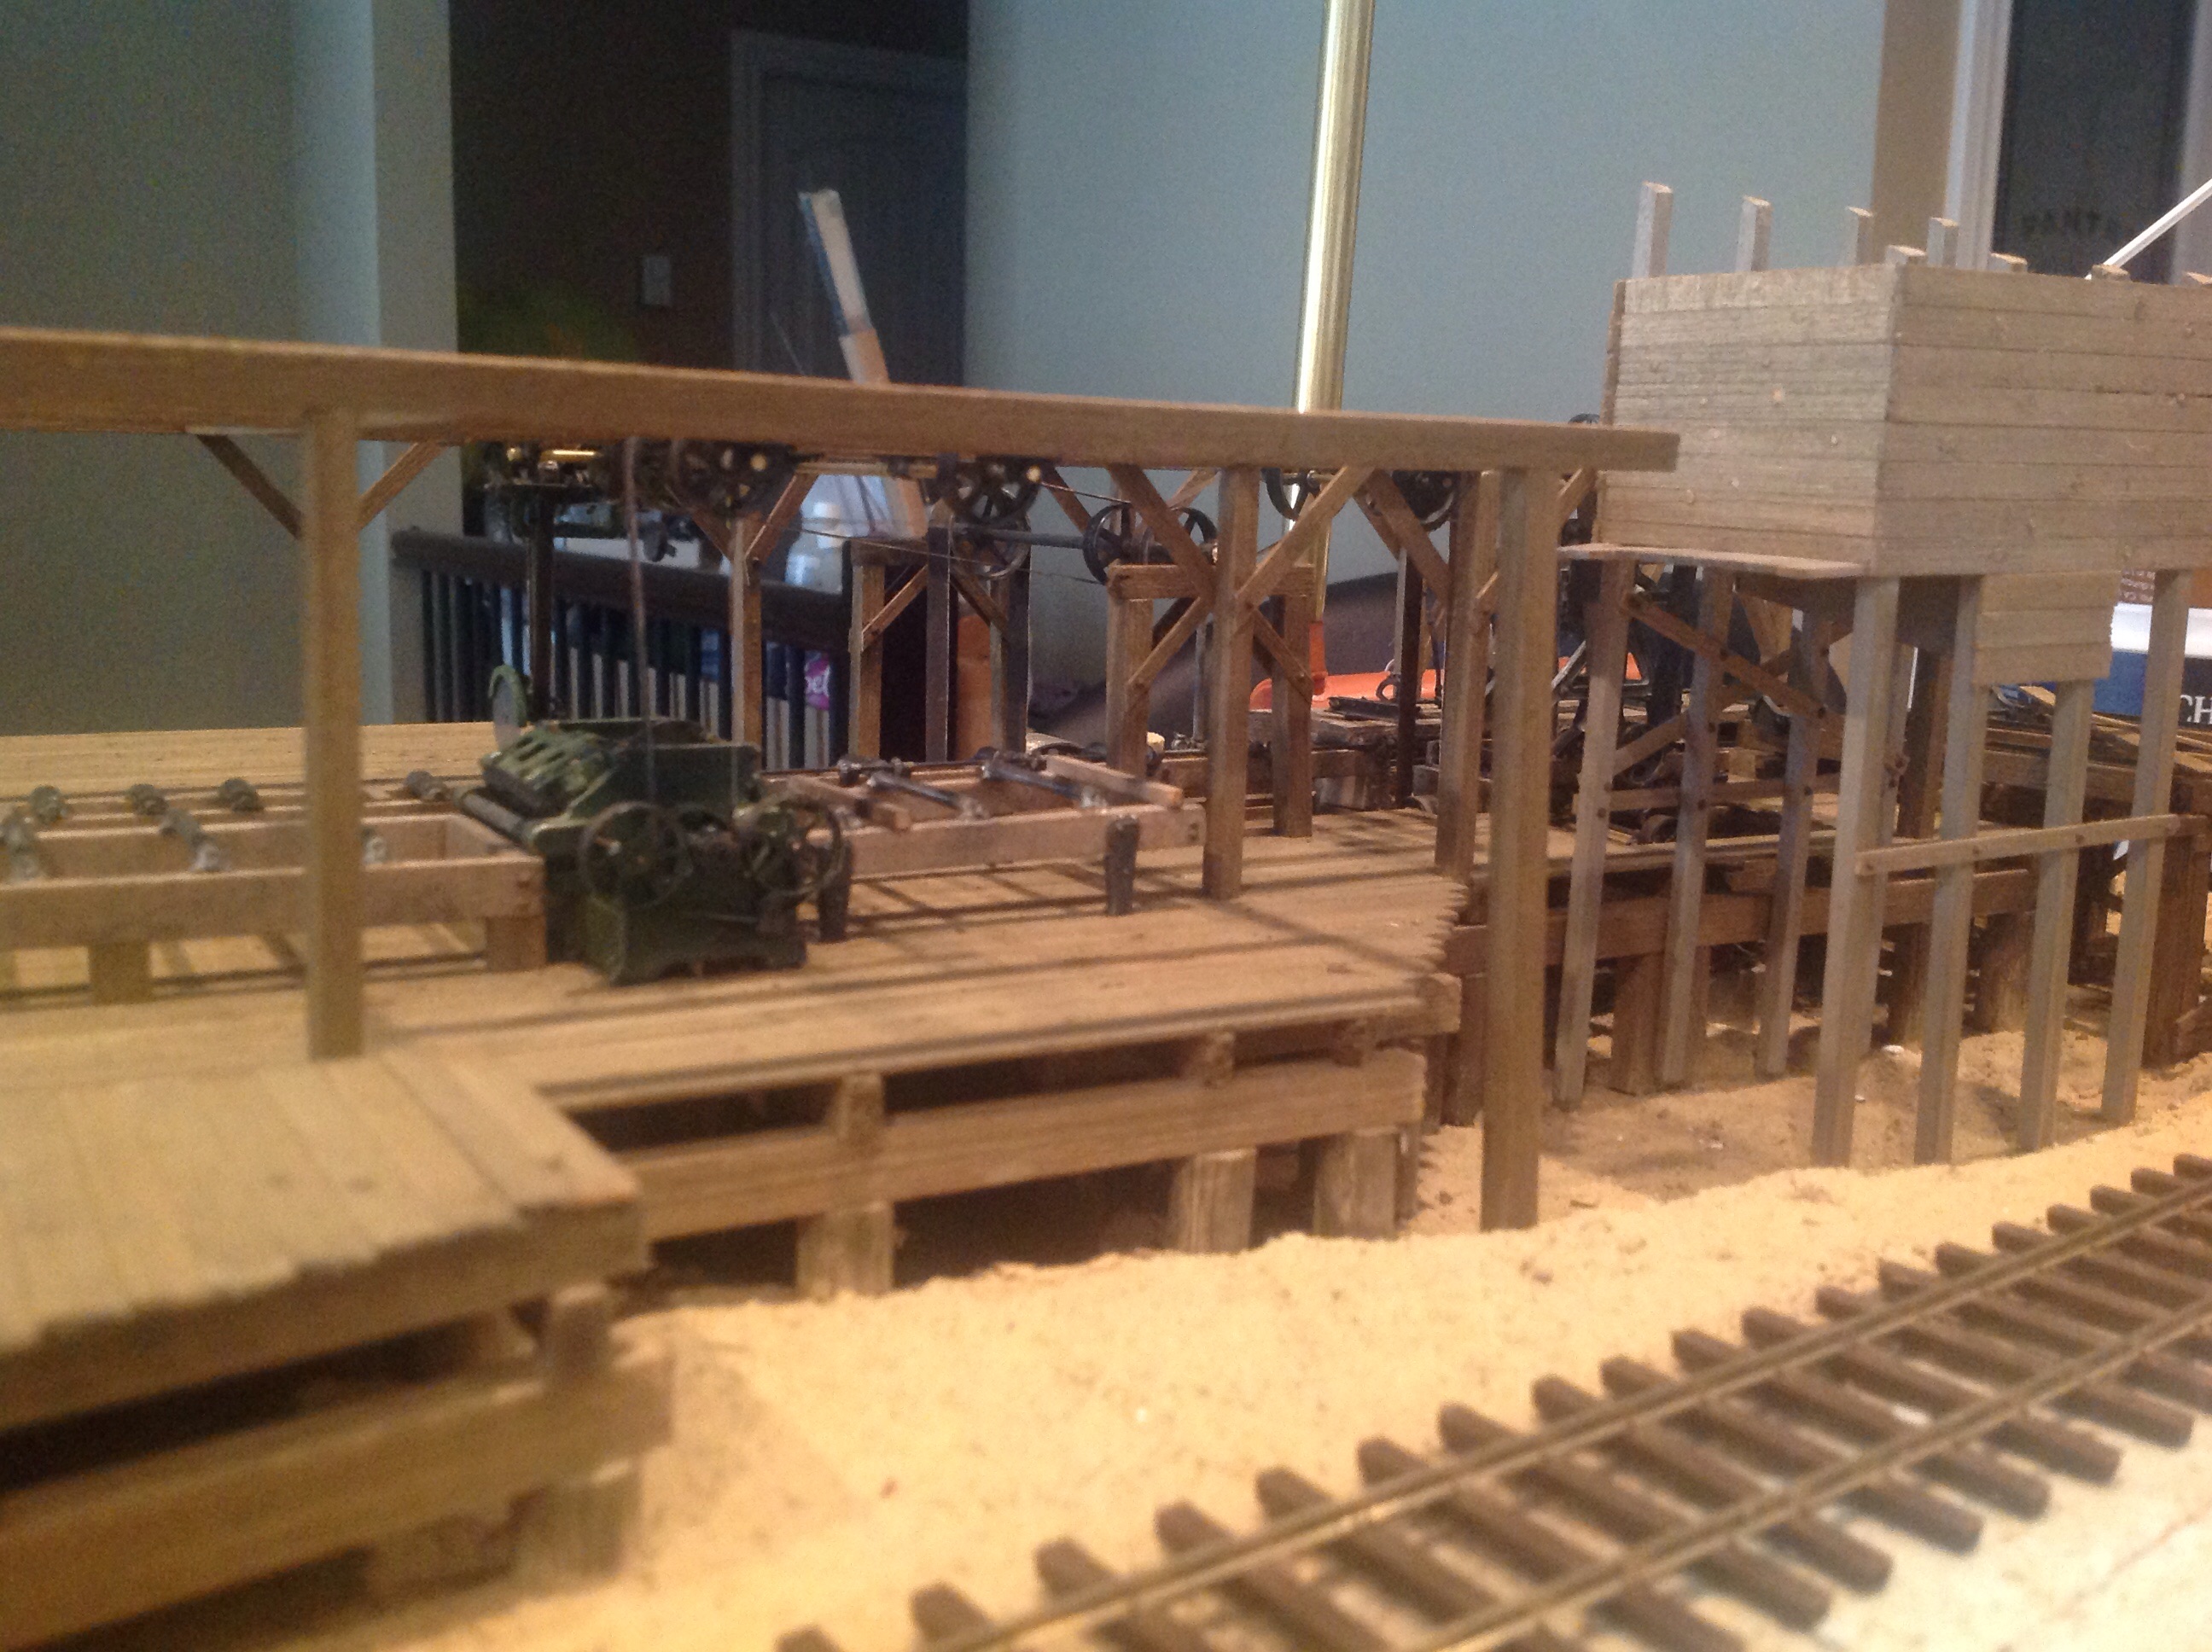
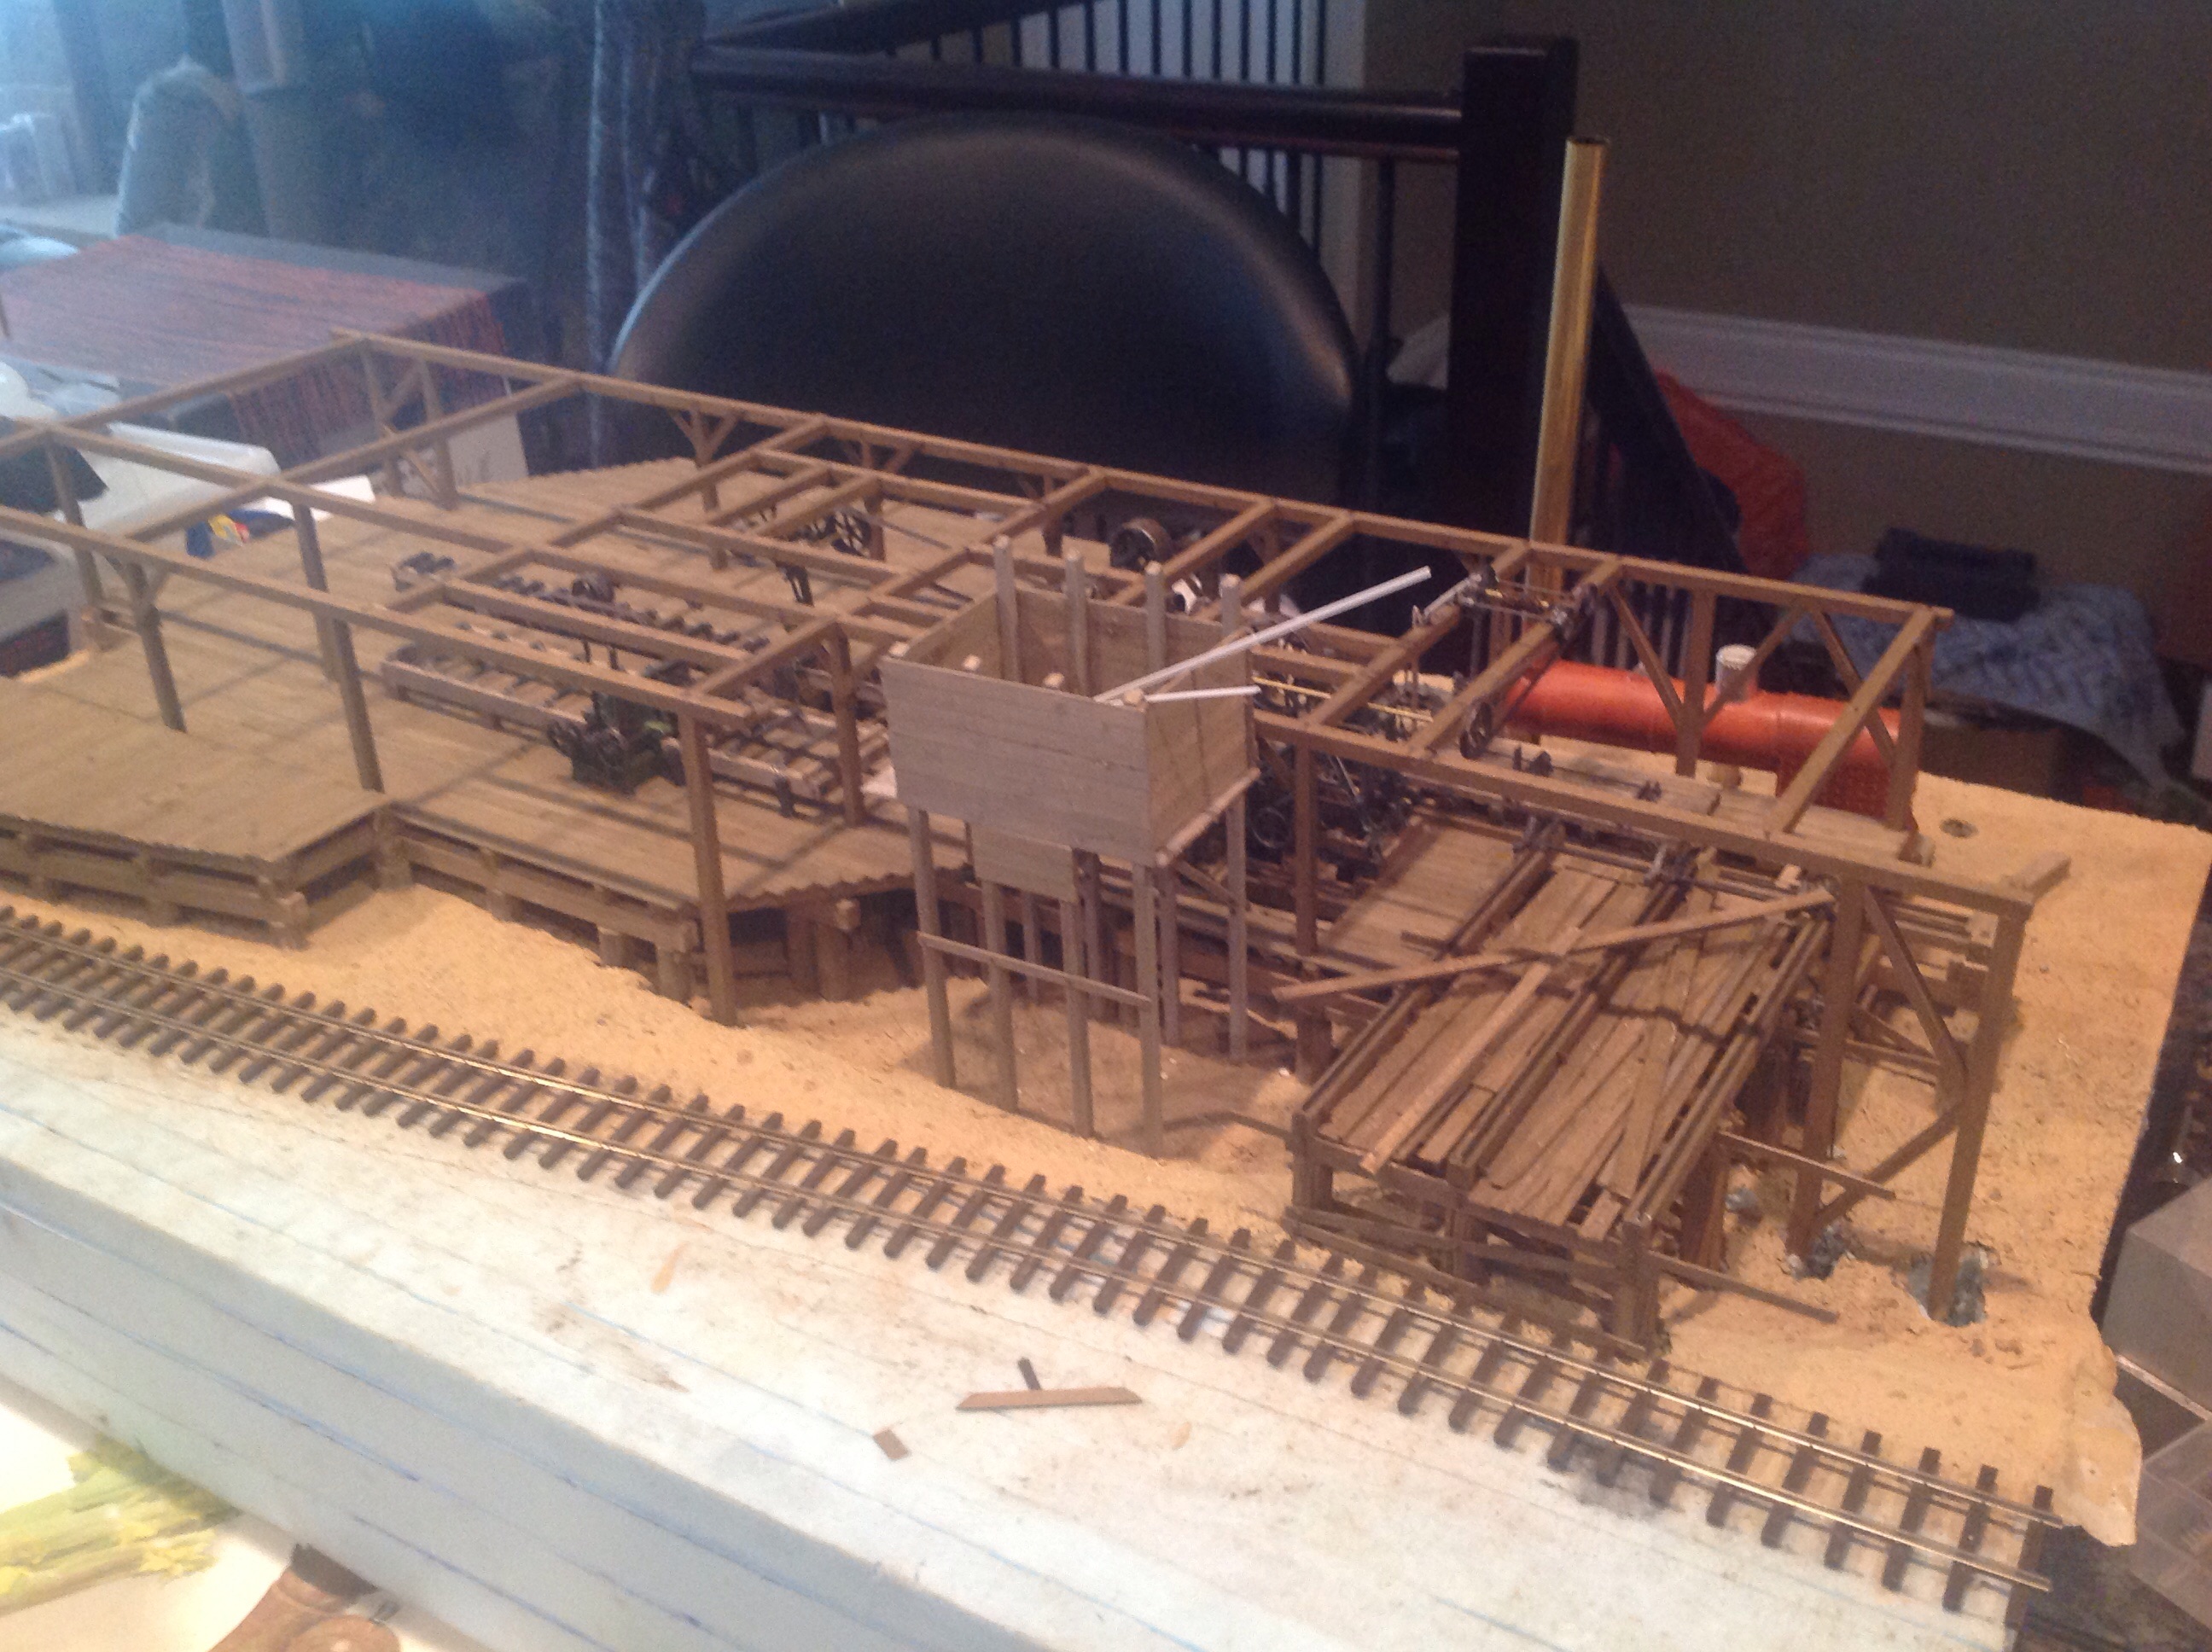
I've just got back into my model building after some serious health problems and this is where I'm at with my version of the sawmill. Comments/critiques are greatly accepted.
David
David
Comments
Your doing a very nice job on this build.
Jerry
David
David
Thanks for posting your build with us so that we can enjoy it as you build.
Karl.A
David
It is great to see you on here. Please make it often. Progress is great. Keep the pictures and reports coming . . .
John
You're basically at the point where I just used to sit there and look at it and think "wow !!'... and then it just keeps getting better.
The details are coming out great, the little "tool trolly" is particularly nice. Very precise and crisp work. The set of castings that make up this detail definitely make it one of my favorite pieces.
Picture 7 looking down the dead rolls really shows your floor off well.
Karl.A
Do you plan on weathering the boiler? I like the way it looks but may stand out as new against the mill.
Will you be adding sawdust to the floor? I was very pleased with the way it turned out in mine and would be happy to share how I did it if you are interested.
Karl.A
For starters-save some of the sawdust from weathering wood. If you didn't, prepare some of the roof planks and collect the dust.
I experimented with several different materials and several different adhesives before settling on this method which seems to have worked.
Color the sawdust with a pigment powder. I used AK North Africa Sand. It had to be colored to get some of the very fine dust on the machinery. The wood sawdust does not look quite right on the machinery. I started the sawdust as I was building the machinery by piling on the straight pigment and letting it settle onto the horizontal surfaces. I made a small scoop by crushing the end of an aluminum wire with a hammer to flatten it out. Once you are satisfied this can be set using mineral spirits or thinner. Just fill a brush with the liquid and touch it to the surface. It will do the rest. On the double husk I started adding the colored sawdust. If the sawdust was not colored with the pigment the colors would clash.
Right about where you are now, David is when you can start planning on adding the sawdust. Think of it as a time lapse. Put the castings in place that would have been there the longest. Trash cans, workbenches, clutter under the machines, etc. Now take some of your colored dust and start placing it around the machines with saw blades. Go out in the direction that the saw blade would have thrown the sawdust and along the rollers where the lumber would have dragged it.
When you think you have it about right take a soft, wide brush and start clearing foot paths in the sawdust. Gently sweep it towards something fixed like a machine or a post. You will start to see the accumulation around places that would naturally get that.
You can sprinkle some more of the powder or sawdust as you see fit until it's as messy as you like. Remember, this stuff would get everywhere.
Now fix it in place. The mineral spirits don't fix the sawdust very well. Diluted glue and matte medium leave a sheen on bare wood. I used a product from AK called Gravel and Sand Fixer. It's completely transparent and matte when dry. It will darken bare wood slightly so once I fixed my sawdust I put a very light coat over the entire floor. This was applied with a pipette.
I think that was all of the steps but if you have questions just ask. It really makes a difference having it there. And you really don't need a lot, just enough.
I will mock up a small area and do some experimenting.
Karl.A
John
John