
Howdy, Stranger!
It looks like you're new here. If you want to get involved, click one of these buttons!
Categories
- 920 All Categories
- 3 Picture Posting and Resizing
- 53 New Member Introductions
- 111 Off-Topic Forum
- 4 Photography
- 2 Resources
- 16 New Product Information
- 165 The SierraWest Forum
- 9 Brett's Blog
- 117 General News & Ramblings
- 3 Re-Release Information
- 6 Q & A about SierraWest
- 9 What Would You Like to See?
- 361 Builds
- 131 HO Scale Builds
- 154 O Scale Builds
- 59 Finished SW Build Pics
- 12 Miscellaneous Builds
- 187 Techniques
- 19 Working with Wood
- 20 Painting Castings
- 5 Masonry
- 23 Scenery
- 36 Tools and Supplies
- 21 Layout Planning & Building
- 38 Miscellaneous
- 24 Prototype Information
- 22 Reference and Research
Joel's Lineside Shed
Well time to dive back into some model building. I've been working on a small mining scene and wanted to build this little beauty for the foreground and hopefully upscale the bunkhouses from "essentials" for the background. 
I started with preparing the stripwood. I've experimented with quite a few methods in the last year and have settled on a slightly altered version of Brett's method. Not sure if it will be to everyones tastes but I find it saves a bunch of time and yeilds pretty nice variation in colour.
First of course is the texture. Since much of the wood is only textured on one side I used double sided tape and stuck it down to a pine board.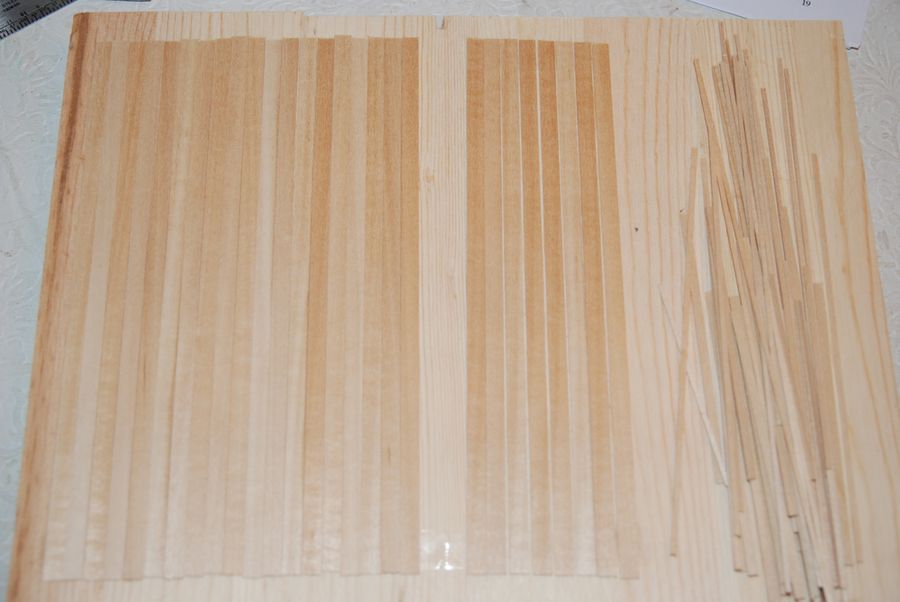
Then I used a few wire brushes ( I use the stiffer ones made to strip paint).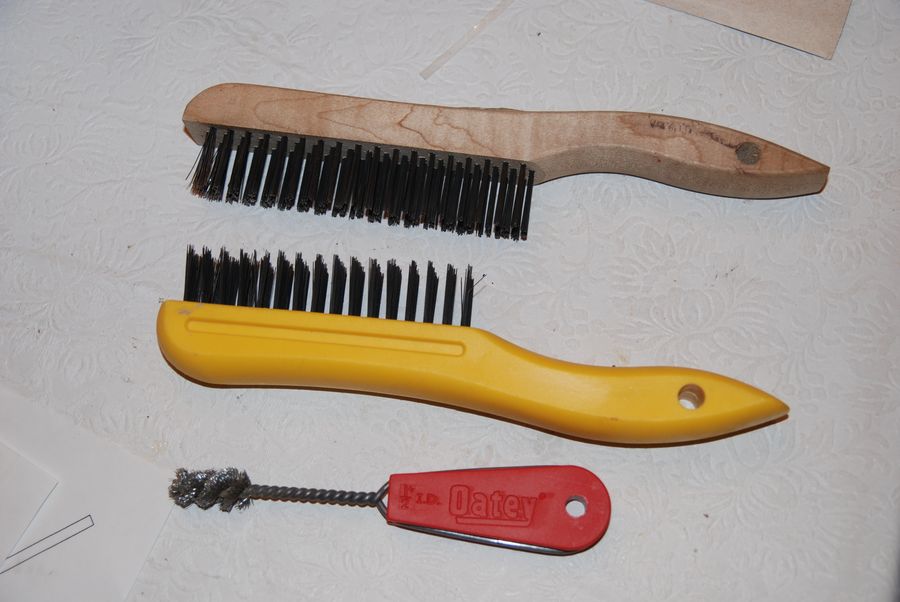
First I strike the boards randomly with the stiffest brush. This causes a bunch of tiny holes which may be smaller knotholes or deterioration from other sources. Then I brush the boards and really work some of the board ends.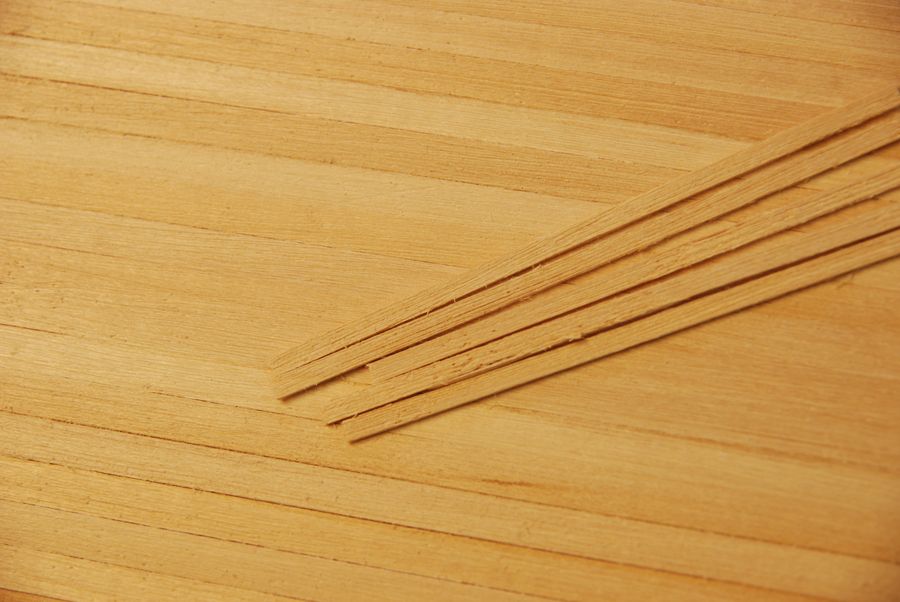
Then I drill many small holes up and down the board with my dremel. Usually I do a couple of sizes. The I scribe in some deeper lines with a dental pick and then I sand the surface with 400grit sandpaper. This is all really easy with the wood stuck on the board.
Then I take some asphaltum ( an aging glaze found in paint stores or Lowes) and paint it on. Sprinkle a bit of white chalk to vary the shade a bit and then wipe it all off. Pretty much the colour of 403.9.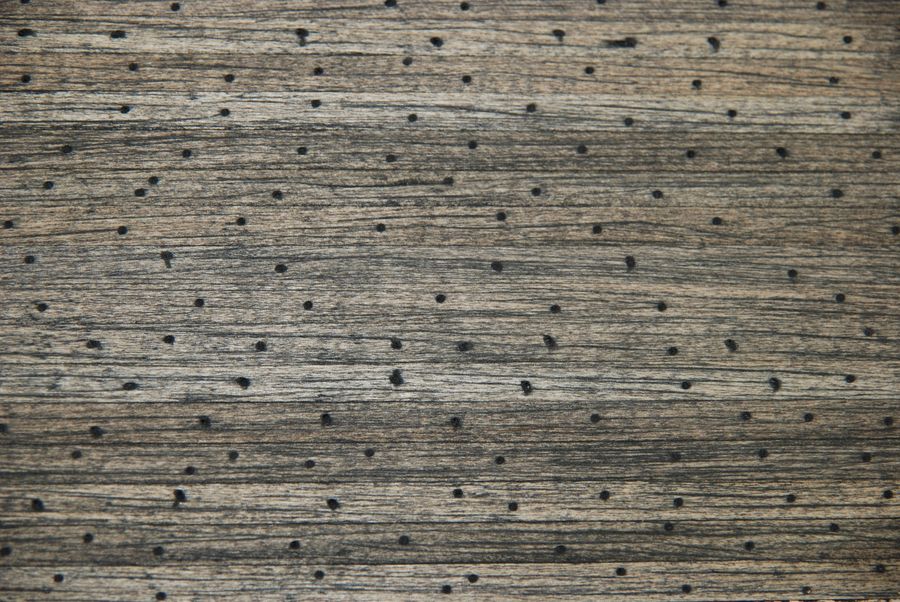 Now let it dry. BTW best with thin wood to remove from the tape now and colour both sides so there is less warping.
Now instead of drybrushing chalk or paint I take a stick of chalk (in this case 3) and rub a flattened side over the boards. if you press with minimal pressure the colour sticks to the raised portions and the "Grain" stays dark. I use a couple of browns and then a final coat of grey. then a quick spray of Fixative (less likely to disolve away the chalk than "Dullcoat").
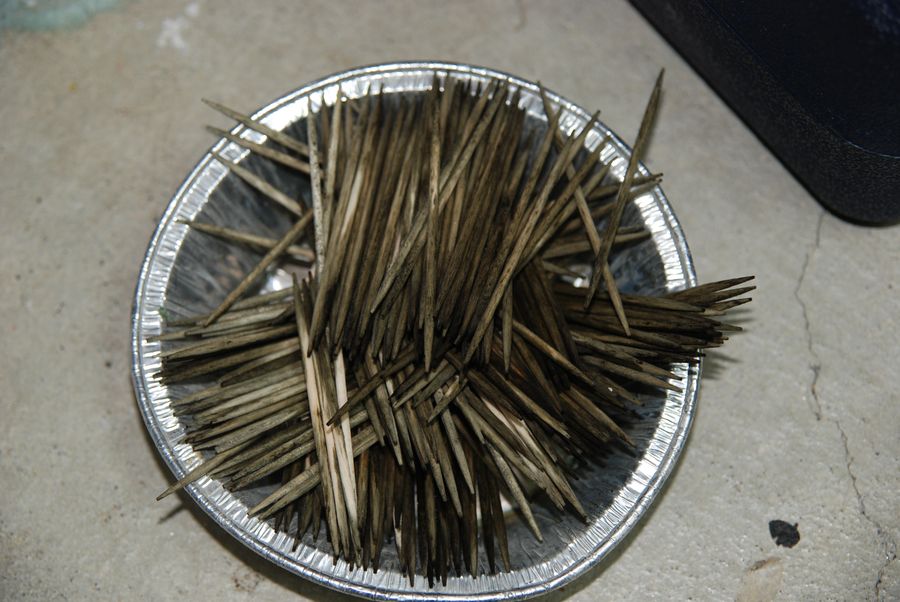
Meanwhile I tend to precolor my toothpicks by dipping both ends into AI and the ink wicks up. saves me the trouble of colouring each later and avoids the poorly staining gluey areas.
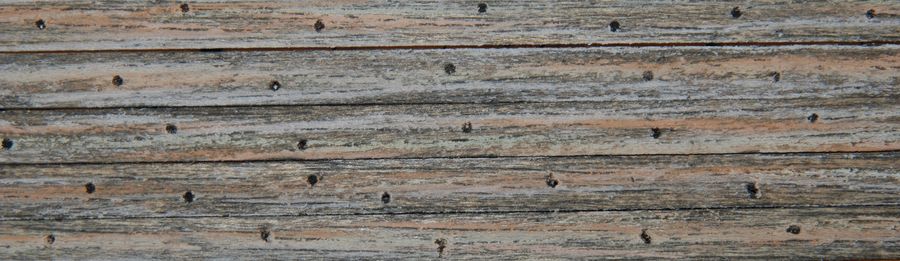
Now I glue the toothpicks in place removing almost all the glue before inserting at various angles. I rarely make the hole as big as a toothpick but usually just big enough to get 1/2 of the bevelled part insertted. You can twist and push a bit harder and get bigger knotts.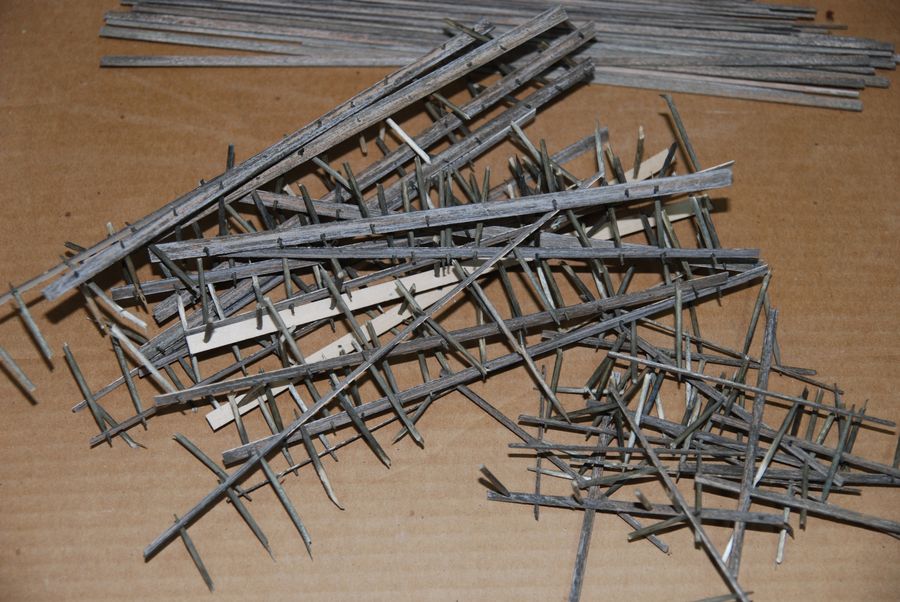
Now I use a rail nipper but on inspection I didn't like most of the results so I used a new single edged razor and sliced off the small nubbin of toothpick so it is almost flush.
Tah duh!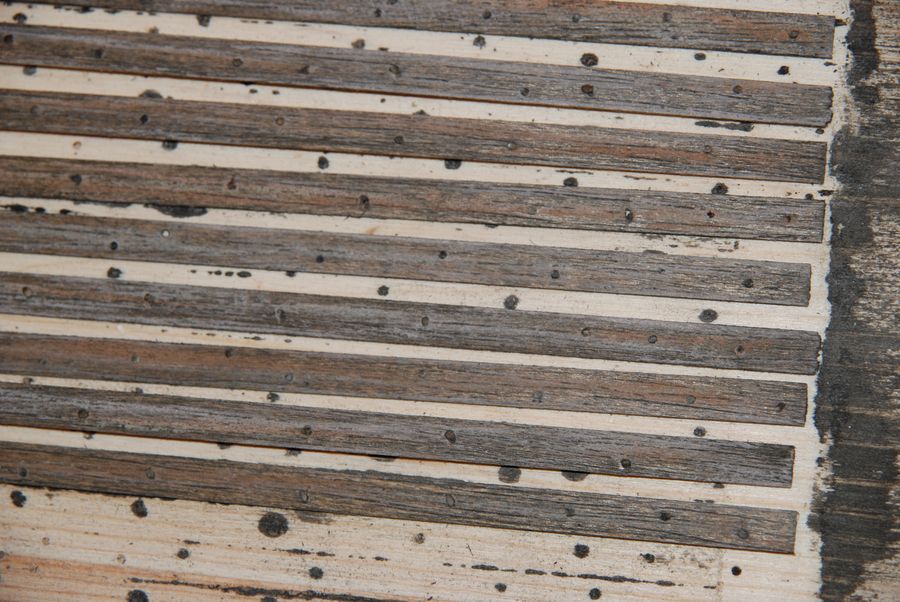
Now on to the walls....
I started with preparing the stripwood. I've experimented with quite a few methods in the last year and have settled on a slightly altered version of Brett's method. Not sure if it will be to everyones tastes but I find it saves a bunch of time and yeilds pretty nice variation in colour.
First of course is the texture. Since much of the wood is only textured on one side I used double sided tape and stuck it down to a pine board.
Then I used a few wire brushes ( I use the stiffer ones made to strip paint).
First I strike the boards randomly with the stiffest brush. This causes a bunch of tiny holes which may be smaller knotholes or deterioration from other sources. Then I brush the boards and really work some of the board ends.
Then I drill many small holes up and down the board with my dremel. Usually I do a couple of sizes. The I scribe in some deeper lines with a dental pick and then I sand the surface with 400grit sandpaper. This is all really easy with the wood stuck on the board.
Then I take some asphaltum ( an aging glaze found in paint stores or Lowes) and paint it on. Sprinkle a bit of white chalk to vary the shade a bit and then wipe it all off. Pretty much the colour of 403.9.
Now let it dry. BTW best with thin wood to remove from the tape now and colour both sides so there is less warping.Now instead of drybrushing chalk or paint I take a stick of chalk (in this case 3) and rub a flattened side over the boards. if you press with minimal pressure the colour sticks to the raised portions and the "Grain" stays dark. I use a couple of browns and then a final coat of grey. then a quick spray of Fixative (less likely to disolve away the chalk than "Dullcoat").
Meanwhile I tend to precolor my toothpicks by dipping both ends into AI and the ink wicks up. saves me the trouble of colouring each later and avoids the poorly staining gluey areas.
Now I glue the toothpicks in place removing almost all the glue before inserting at various angles. I rarely make the hole as big as a toothpick but usually just big enough to get 1/2 of the bevelled part insertted. You can twist and push a bit harder and get bigger knotts.
Now I use a rail nipper but on inspection I didn't like most of the results so I used a new single edged razor and sliced off the small nubbin of toothpick so it is almost flush.
Tah duh!
Now on to the walls....
Comments
the three in the top board and one in each of the middle and lower boards are examples.
Paul
Looking forward to more!!
Karl.A
Guess I'm just not a real big fan of that many of them.
Jerry
Is this an EXPO Show Model????
Jerry
To get an idea of where this is going here's an interior shot of a wall I'm working on and an exterior shot and yes Jerry the hope is to bring this model to the Expo if it is ready. Still a lot to build but I like to show something I'm working on...
Besides that what is inside with the gear showing????
Jerry
I started building the walls and glued down the siding. As a small deviation from the excellent instructions I always save the board ends and use them either where boards abut or on the bottom of walls where they might be seen. I've tried weathering the ends with brushes and knives and sandpaper but the cut end of the boards out of the box are always best. Maybe I just have to learn to be a better modeler. So when I put the strip wood guides down I then abut the chewed up board ends on the bottom of the wall, it saves time as I don't have to trim them later.
Also because my chalk application is random some boards do come out better than others so I try and sort them and use the best ones on the front of the model.
For the inside I used the same technique but no knotholes and a browner hue.
Now on to the battens...
cheers
Dave
Karl. A.
Then I cut the sheet into strips with a ruler. Making varying widths.
Then the asphaltum and rubbing chalk followed by fixative
Then I used a "chopper" to cut 1/2 long pieces. I used it like Kevin described whereby I would put the blade on the surface of the wood and then bend up and snap the wood to give a rough/worn appearance.
Then I experimented gluing some on the back side of another building:
Really quite pleased with my cheap alternative. Might actually use it as the boards for the bunkhouse walls.
Jerry
Karl.A
Now I'm starting on the bunkhouses. I photocopied the cardboard parts and enlarged them 181% so I got essentially O scale plans. I spray glued the back and pressed it on some cardboard and cut out the pieces.
I don't have a huge stock of stripwood so I decided to try using the birch veneer here too. It's my first scratch build ever so why not go all the way. I stained the veneer the same way except I used mostly 408.10 a very light grey chalk. Also instead of cutting random widths I used a piece of 4X10 stripwood and tried to make all the pieces similar.
It's a background building so I want less detail and so brushed the wall a bit with a wire brush (brass) which defused the grey a bit.
Jerry
cheers
Dave
I used the birch veneer extensively also when I started scratchbuilding. All of my early builds used it for clapboards and shingles. great stuff indeed. cedar sheet cigar box liners are also good for shingles. your local cigar store will just be throwing them away.
Dave check out Bills Twin mills build thread. he did individual shingles on one of the buildings, looks awesome.
Karl.A
I should have known you would have invented it before I came along. I haven't been able to track down any cedar sheets yet but I'm hoping to hit a few cigar stores this week.
I hand shingled my shipyard in HO but I used 1x8s and 1x10s and mixed in about 1/3 paper shingles. But that's in a different post/thread.
\Then snipped off and trimmed flat with a razor blade.
Now the difficult part. Another first. I'm going to make the windows. What a pain. I made a small jig out of cardboard with a small hole so I can remove the finished window pane.
Then used a dirty piece of plastic sheet (from an old overhead projector) and cut the "Glass". Then added the wooden frame (1X2) using a speck of ACC to hold it together. I
I added the mullion cut from the selfstick windowboard from the Lineside Shed kit. I cut thin strips (1X1) and stained with AI.
Then I removed it from the jig and touched the ACC to the edges and it wicked up and made the window nice and solid.
Whew, just 18 more to go....