Howdy, Stranger!
It looks like you're new here. If you want to get involved, click one of these buttons!
Categories
- 995 All Categories
- 3 Picture Posting and Resizing
- 58 New Member Introductions
- 120 Off-Topic Forum
- 4 Photography
- 2 Resources
- 18 New Product Information
- 170 The SierraWest Forum
- 10 Brett's Blog
- 121 General News & Ramblings
- 3 Re-Release Information
- 6 Q & A about SierraWest
- 9 What Would You Like to See?
- 407 Builds
- 145 HO Scale Builds
- 180 O Scale Builds
- 62 Finished SW Build Pics
- 15 Miscellaneous Builds
- 195 Techniques
- 19 Working with Wood
- 23 Painting Castings
- 5 Masonry
- 23 Scenery
- 37 Tools and Supplies
- 22 Layout Planning & Building
- 40 Miscellaneous
- 24 Prototype Information
- 22 Reference and Research
HO/HOn3 Backwoods Tie Mill
SierraWest Scale Models HO/HOn3 Backwoods Tie Mill...
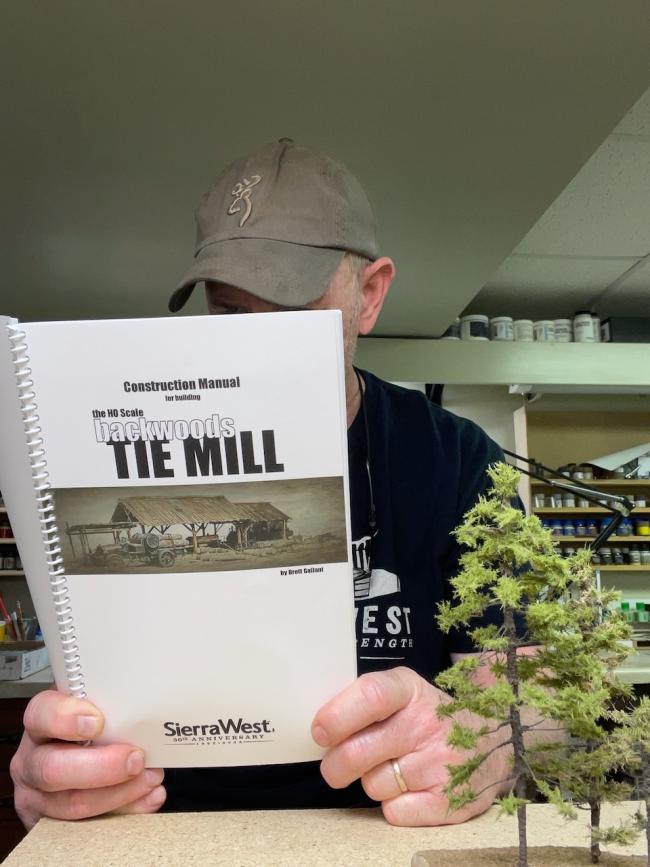
Is here! What is the first thing I do when I receive a SierraWest Scale Models kit?...you're looking at it...and so am I...the Construction Manual (aka Kit Bible) of course! Lets go back to the beginning as I'm getting ahead of myself.
The much anticipated HO/HOn3 scale version of the Backwoods Tie Mill is a reality. The O Scale kit was released first with those wise modelers beginning to receive their coveted kits. The following is what greeted me on my back door stoop just yesterday...
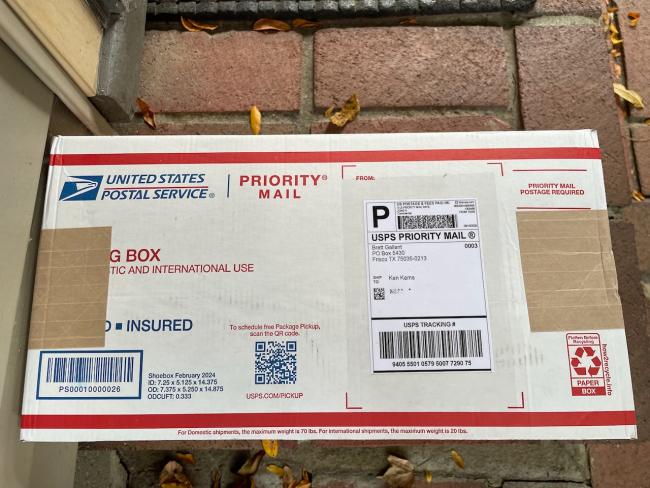
What every SWSM modeler looks forward to...
The Backwoods Tie Mill is SWSMs 30th Anniversary release and can't think of a better way to celebrate such a monumental milestone. Brett's ability to bring the backwoods charm and flavor to his model kits is amazing and a true testament to his vast knowledge and historical research of the subject. Couple this vault of knowledge with his stunningly detailed and accurate 3D printing, scene design/workflow construction, and the legendary construction manual adds up to an unbeatable combination that has launched SWSMs to the pinnacle of craftsman kit manufacturing.
I was fortunate to have gotten in on the first batch of Tie Mill kits to be packaged in the nostalgic "green box" that SierraWest has become famous for.
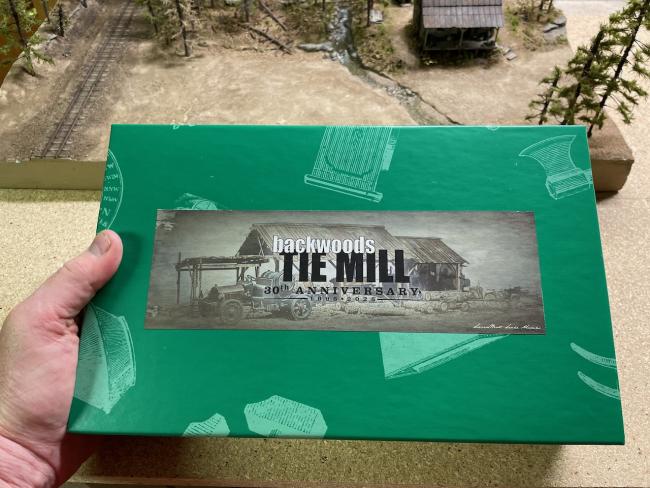
Sweet! The famous "green box" to add to my collection. Please note: DO NOT attempt to throw this box away after building this kit. Your local waste management firm WILL NOT pick these up and will return them to you!
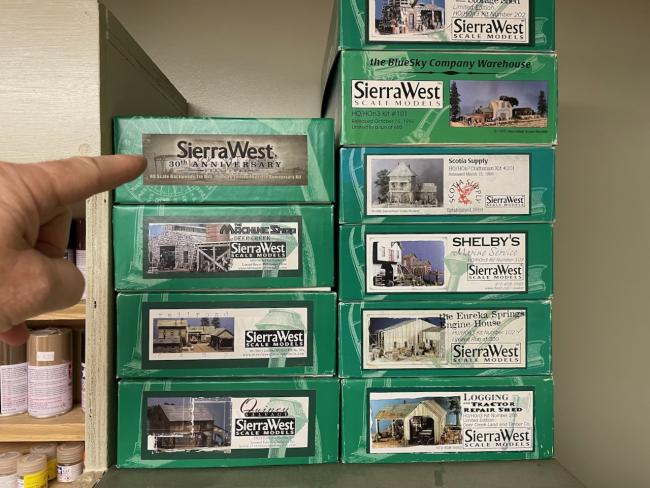
My collection of the "green box" kits. Kits that I have built are on the right, pending builds on the left. Top of the pile is the Backwoods Tie Mill!
A brief narrated unboxing of sorts where I give my thoughts on a few things is to follow here:
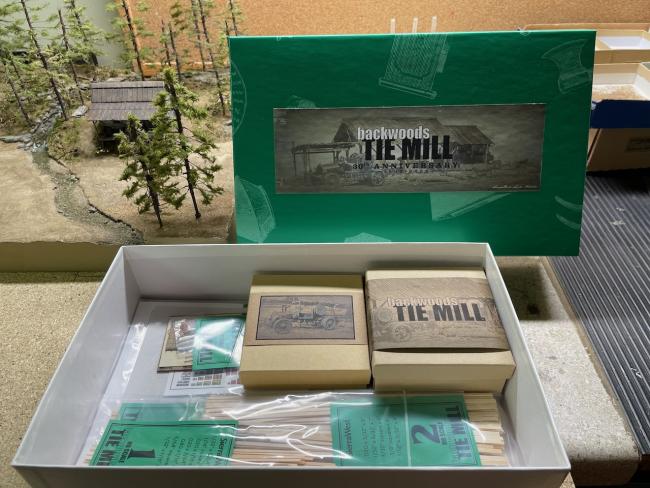
This is exactly how my kit was packaged after removing the overlay of secure packing material. Everything is perfectly arranged and in order. This box was shipped through the USPS and came just as well organized as you see here. I have never received a SWSM kit that had contents jumbled, broken, or missing. Brett packs the beautifully detailed 3D parts with the utmost care. Each 3D parts box comes with the beautifully illustrated stiff paper securing wrap (see below)
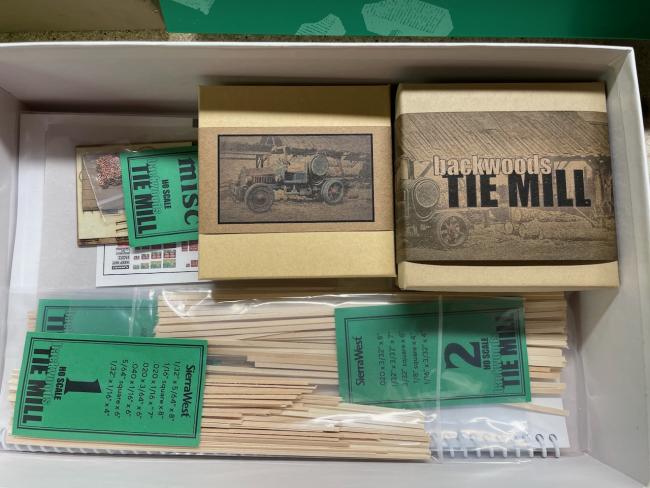
Nice shot of the 3D parts boxes. And yes, I save and collect/display all those illustrated paper wraps!...what?...doesn't everyone?
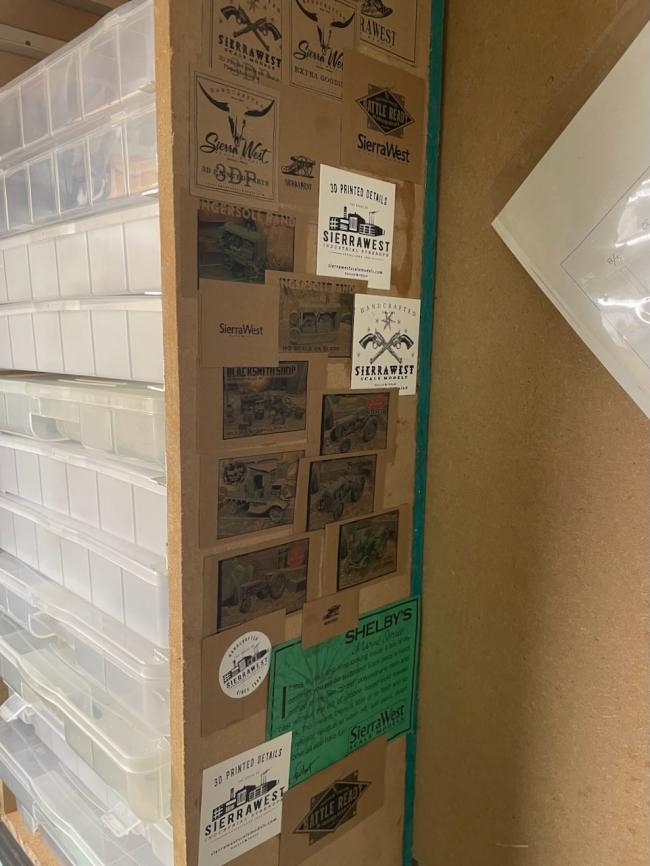
Detail parts storage with SWSM memorabilia!
Those two boxes in the previous photos contain some of the most incredibly detailed 3D parts I have ever seen! The filigree of those parts has to be seen to be believed. Despite the fine detail, from experience, they are easily painted and detailed with just common sense handling care. I absolutely love these parts. I will go over them in detail in the build thread to follow this intro.
The construction manual is, and always has been, just incredible and is as well known as the "green box" it comes packed in. In my hands, these manuals become well thumbed and have witnessed many sit down sessions with a cold beverage or cup of coffee. DO NOT underestimated the value of a thorough read, study, and understanding of the manual.
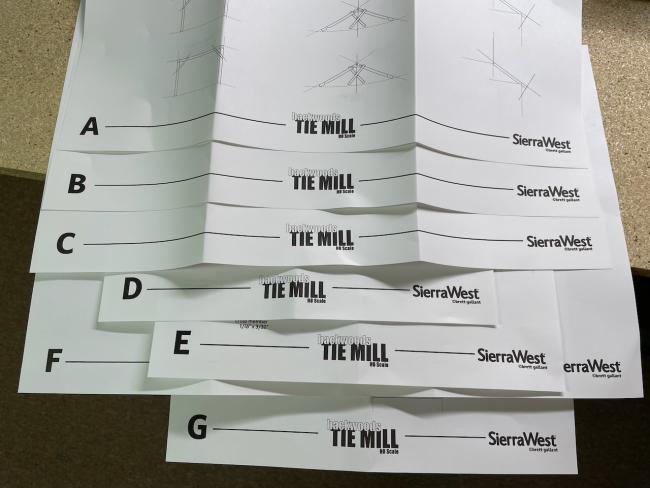
Take a moment and look at the size of this kit. By SWSM standards, this is a smaller kit with respect to the footprint and amount of actual structure size. However, look at this picture of the templates, cutting guides, 3D parts guides, floor-plans, etc. Seven sheets (A-G) of heavy paper plans to guide you through the build and layout process. SierraWest has your back!
Brett gives a wonderful history and introduction to the Backwoods Tie Mill in the Construction Manual so will not repeat that information here.
What follows will be a strict build thread of the Backwoods Tie Mill. No side bars, no getting off topic, just the meat and bones of building this awesome kit! Due to its size, I will spend a good amount of time going over minute details of how I'm building this kit. This is not and official forum build and will include my interpretation of the workflow and process of a tie mill. Next post we will get into the first step of the build...wood!...more later, Ken

Is here! What is the first thing I do when I receive a SierraWest Scale Models kit?...you're looking at it...and so am I...the Construction Manual (aka Kit Bible) of course! Lets go back to the beginning as I'm getting ahead of myself.
The much anticipated HO/HOn3 scale version of the Backwoods Tie Mill is a reality. The O Scale kit was released first with those wise modelers beginning to receive their coveted kits. The following is what greeted me on my back door stoop just yesterday...

What every SWSM modeler looks forward to...
The Backwoods Tie Mill is SWSMs 30th Anniversary release and can't think of a better way to celebrate such a monumental milestone. Brett's ability to bring the backwoods charm and flavor to his model kits is amazing and a true testament to his vast knowledge and historical research of the subject. Couple this vault of knowledge with his stunningly detailed and accurate 3D printing, scene design/workflow construction, and the legendary construction manual adds up to an unbeatable combination that has launched SWSMs to the pinnacle of craftsman kit manufacturing.
I was fortunate to have gotten in on the first batch of Tie Mill kits to be packaged in the nostalgic "green box" that SierraWest has become famous for.

Sweet! The famous "green box" to add to my collection. Please note: DO NOT attempt to throw this box away after building this kit. Your local waste management firm WILL NOT pick these up and will return them to you!

My collection of the "green box" kits. Kits that I have built are on the right, pending builds on the left. Top of the pile is the Backwoods Tie Mill!
A brief narrated unboxing of sorts where I give my thoughts on a few things is to follow here:

This is exactly how my kit was packaged after removing the overlay of secure packing material. Everything is perfectly arranged and in order. This box was shipped through the USPS and came just as well organized as you see here. I have never received a SWSM kit that had contents jumbled, broken, or missing. Brett packs the beautifully detailed 3D parts with the utmost care. Each 3D parts box comes with the beautifully illustrated stiff paper securing wrap (see below)

Nice shot of the 3D parts boxes. And yes, I save and collect/display all those illustrated paper wraps!...what?...doesn't everyone?

Detail parts storage with SWSM memorabilia!
Those two boxes in the previous photos contain some of the most incredibly detailed 3D parts I have ever seen! The filigree of those parts has to be seen to be believed. Despite the fine detail, from experience, they are easily painted and detailed with just common sense handling care. I absolutely love these parts. I will go over them in detail in the build thread to follow this intro.
The construction manual is, and always has been, just incredible and is as well known as the "green box" it comes packed in. In my hands, these manuals become well thumbed and have witnessed many sit down sessions with a cold beverage or cup of coffee. DO NOT underestimated the value of a thorough read, study, and understanding of the manual.

Take a moment and look at the size of this kit. By SWSM standards, this is a smaller kit with respect to the footprint and amount of actual structure size. However, look at this picture of the templates, cutting guides, 3D parts guides, floor-plans, etc. Seven sheets (A-G) of heavy paper plans to guide you through the build and layout process. SierraWest has your back!
Brett gives a wonderful history and introduction to the Backwoods Tie Mill in the Construction Manual so will not repeat that information here.
What follows will be a strict build thread of the Backwoods Tie Mill. No side bars, no getting off topic, just the meat and bones of building this awesome kit! Due to its size, I will spend a good amount of time going over minute details of how I'm building this kit. This is not and official forum build and will include my interpretation of the workflow and process of a tie mill. Next post we will get into the first step of the build...wood!...more later, Ken


Comments
Thanks Brett, and can't wait to get graining and staining!
Nice hearing from you Aaron and thanks. Yeah, those green boxes are such an iconic recognition of SWSMs. Make sure you post your work on your Mill.
Nice thing to say Al, appreciate ya! I hope to make it interesting.
However, we are still waiting patiently for the riverfront kits , so don’t put them off for too long , Brett !
Jerry
I'm going for wood with some character. With this kit the money with the wood is with detailing the roof(s) as all the structures, save for the cool little storage shed, is open air. However, I'm giving the framing the attention it deserves.
First order of business was to land on the finish for the framing wood and how I was going to color and weather the wood. As with any build, the wood and how it's treated sets the stage for everything else. Can't stress enough the importance of wood work. Much of how I arrive at my final wood finish is calculated trial and error. What I mean by that is, I know how the various stains, chalks, paints, etc. will look on any given piece of wood, but the trick is to get the combination that gives you the look your after. It comes down to layering.
Follow the manual and your wood will turn out absolutely grand, as will your entire model. Will following the manual give you the look of the wood I'm using?...no. Therein lies the beauty of board-on-board modeling with SWSMs, your wood is your wood. Don't be afraid to experiment on some scrap strip wood, you may be surprised at what your recipe looks like.
Following the manual I started with preparing the wood for the Main Sawmill Building. I like to work up my wood in small batches rather than all the wood at once. This results in some natural variation. After graining and detailing the wood I applied a base AI stain. This was followed by a light random layer of white craft paint with a small brush. After a few minutes when dry to the touch I ran each board through fine steel wool to remove most of the paint. This was followed by rubbing some brown colored pigments/chalk on my fingers then rubbing each piece of wood between said fingers.
the following shows the result:
Nothing fancy, just a weathered grayish brown with a hint of the white in some of the grain for added visual interest. I refer to "visual interest" often. What is prototypical does not always look good in 1:87 scale. I lean towards modeling details that provide visual interest rather than adhere to strict prototypical application. Prototypically, nail holes should never be utilized in 1:87 scale as they would never be seen, yet they add visual interest and your eye likes that!
Grungy hands at the bench. Shot of the framing posts. Disregard the top post with the dark brown end on the right...remember me talking about calculated experimenting...experiment fail! But, it does illustrate how a solid colored piece of wood is a bit...ehh...and unexciting to look at.
Once I had the wood looking close to what I envisioned, I built the three frame pieces. Note the added steel brackets for visual interest. There is a corresponding plate on the other side as well.
Much of the upper portion of these frame pieces will be hard to see once the roof is installed.
In hand for scale. A couple of the plates are slightly wonky, but without magnification...all good.
More later...Ken
I shall be racking my brains for ideas to make mine slightly different to everyone else’s, as is my wont. One idea , patent pending, is to replace some of the sawn posts with round poles , just one or two, to make it less uniform. I might even put a partial back wall to some of it for added protection. I quite like the idea of the saw being coupled up to the rear axle of an old tractor or truck (model T Ford or Mack ? ), rather than the stationary engine in the kit . Or even an ex-military vehicle if it is a post war set up .
terry
The Main Sawmill Structure Framing is almost done. Some minor tweaks and should be ready to go.
Inside of the Staging Shed Framing. That structure framing is on the bench right now and almost done. Dr. Grunge surgical fingers...ick!
And with it being ig 1:87 scale it no easy matter.
Wonderful staining and I like the angled metal plates.
Jerry
Being a grouping of open air structures I wanted to highlight the framing with as much visual interest as I could get away with. The angled plates are there for that reason and are functional in the end. The final structure in the trio that make up the sawmill building complex is about done and also has some interesting features added. I'll be posting that next.
Staging Shed framing completed.
The Main Sawmill and Staging Sheds were built with a fairly substantial appearance. I wanted the Sorting Shed to be a bit different and more lightly and hastily constructed. I used real pine twigs to represent the posts rather than the square strip wood provided. The remainder of the build went per the instructions.
Posts made from real pine twigs with most of the bark removed. Gives a real backwoods look to the construction.
I used NBWs for the attachment of the cross headers to the round posts. Here is a close up of the front left corner where the wood has weathered and the bolt is showing due to the missing wood. This is HO scale and tiny...oh and will never be seen once the roof is on! I know it's there...