
Howdy, Stranger!
It looks like you're new here. If you want to get involved, click one of these buttons!
Categories
- 920 All Categories
- 3 Picture Posting and Resizing
- 53 New Member Introductions
- 111 Off-Topic Forum
- 4 Photography
- 2 Resources
- 16 New Product Information
- 165 The SierraWest Forum
- 9 Brett's Blog
- 117 General News & Ramblings
- 3 Re-Release Information
- 6 Q & A about SierraWest
- 9 What Would You Like to See?
- 361 Builds
- 131 HO Scale Builds
- 154 O Scale Builds
- 59 Finished SW Build Pics
- 12 Miscellaneous Builds
- 187 Techniques
- 19 Working with Wood
- 20 Painting Castings
- 5 Masonry
- 23 Scenery
- 36 Tools and Supplies
- 21 Layout Planning & Building
- 38 Miscellaneous
- 24 Prototype Information
- 22 Reference and Research
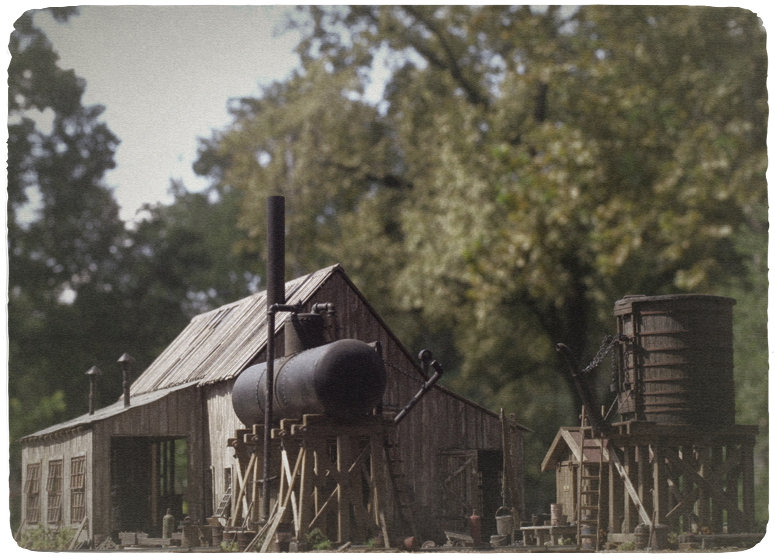
The "Loco and Service Shops" Scratchbuilt in O Scale. Karl.A

Back when Brett and I were working on the HO scale "Loco and Service Shop" kit and pilot model.... (available now, kit #208 http://sierrawestscalemodels.com/ckits/208/208.shtml ) I knew I wanted to build it in O Scale. The lines, the detail, the layout, everything about it was perfect in HO but it was just begged to be up-scaled.
As usually happens other things got in the way, I got side tracked by other projects, summer..... etc.
I finally got started on the project a few months ago and have made some progress. As things seem to be relatively quiet around here on the forum just now I figured I would post some updates of where I am on this build for the members here who might enjoy seeing it progress through to a completed diorama.
As always with my builds here on the forum please join in with any comments, ideas, criticisms, questions and just general input to the thread. It's always great to know that there is someone out there, following along.
I'm quite far along with many aspects of the build so the thread here will be playing catch up with me for a short while. This does not mean however that things are now 'set in stone'. I am always more than willing to redo a finished item if there can be a significant improvement, so, jump in and join in.
The HO kit..........
Karl.A
Comments
Jerry
Not sure how the exposed rafter ends work with a removable roof but if that is the case, it seems to work based on the photos...
Time to find some progress pics in the camera, back in a few....
Karl.A
To begin with I redrew the framing for the walls in CorelDraw and printed them off as templates. The walls were then built using stripwood precoloured with C&A. I used 408.3 for the framing.
The walls were then sided with 2x12's. The strip wood was coloured with grey on one side for the exterior and 408.3 again for the inside. The peeling paint technique from the manual was used to achieve a weather beaten finish as below.
Although I knew the exterior would be painted I still added knots as I knew they would be visible on the inside and also I was hoping for some interesting effects through the paint, several are visible here.
I was pretty pleased with the way the effect came out.
Hopefully I can find some earlier pictures tomorrow when I have more time.
Karl.A
Sanding would give a more worn/faded look due to the abrasion as opposed to a lifted/peeled look with the tape.
Karl.A
Happy Thanksgiving!
Outstanding build. The peeled paint effect is superb. The knotholes definitely add more character.
Do you plan to use the water tower and oil tank you built previously in this diorama ? Those models were simply amazing.
Jim
Yes the watertank, oiltank and sand house are destined for this diorama. I will do a quick recap of those builds here for the members who haven't seen them.
Karl.A
Karl.A
Although the Oil Tank is pretty much finished as previously mentioned and several of you have already seen it, here is a recap of the build as it happened for those members who haven't seen it.
The basic form for the Oil Tank is a section of PVC tubing. Sizing for this was based on the HO version.
The support framework could then be built.
Karl.A
looking forward to the rest of the build keep up the great modeling
Scott
I used some .005 styrene to make the metal sheets of the boiler. Rivets were added with a pounce wheel.
The styrene was glued with epoxy and held in position with rubber bands. A very messy business !
I had to install some spacers on the ends to avoid a taper on the next sheets.
The outside panels were added in the same way.
The dome was made from a smaller pipe found in the garage.
Wrapped with riveted styrene as before. I found some furniture sliders of
the right diameter for the rounded ends of the tank and dome
Test fit.
Next up was the flanges, gluing the components together,
clean up and a coat of paint.
Karl.A
I'll post another update shortly, I'm kinda rushing through these so as not to bore the folks that have seen it before but feel free to slow me down and ask a question if you have one.
Karl.A
I also made a couple of round plates, not sure what these are for but I've seen them on tanks so I made them....
Everything was epoxied together and all the epoxy ooze and finger prints were cleaned off when dry ready to paint.
The tank was painted with cheap rattle can spray paint from Home Depot, 99c can and very fine coverage.
I then started working on the piping, Some were adapted from the SierraWest castings and some were made from scratch.
Some more progress on the pipe fittings.
More later.
Karl.A
I set about re-creating this by adapting a SW elboe casting.
I added a copper sleeve spacer around the nipple and then filed the nipple down considerably.
I placed the 1/8" brass tube in my dremel and turned it using a jewelers file to obtain a "waist" in the pipe.
When fully assembled I was happy with the look that it gave to the fill valve.
I next moved on to making some brackets from sheet brass to hold the dispensing pipework away from the platform.
Unfortunately these are not visble from most angles, however the bands around the pipe are, and atleast I know they are there !
Karl.A
Various elements of the piping were then test fitted.
Some more brackets and things were made from brass sheet.
Karl.A
Next up was to make the access ladders for the tank platform and up to the dome.
A lampshade was added with a scale light bulb to the pump house.
That is how it will sit until it gets installed on the diorama and the tank gets weathered and everything gets touched up and blended in to the scene.
Next up will be the water tank.....
Karl.A
Karl tank looks fantastic. Can't wait for more
I'll start posting the water tank this evening Scott.
James, the tank took a little under a week. There wasn't a jig for the ladders, in the past I have made the rungs round as they should be, this time I got lazy. The padlock is a CHB detail part.
Alan I have bought HO kits and copied the templates at 181% to get O scale dimensions for scratch building.
Till later,
Karl.A
My eyesight is not up to the 'small stuff' these-days but the headband magnifier will just have to come into much use so to hell with it. The debit card will be hard hit in the next few weeks what with the sawmill coming out as well!
Oh well should keep our lord and master in funds for a little while longer.
Best regards
Alan