
Howdy, Stranger!
It looks like you're new here. If you want to get involved, click one of these buttons!
Categories
- 922 All Categories
- 3 Picture Posting and Resizing
- 53 New Member Introductions
- 111 Off-Topic Forum
- 4 Photography
- 2 Resources
- 16 New Product Information
- 166 The SierraWest Forum
- 9 Brett's Blog
- 117 General News & Ramblings
- 3 Re-Release Information
- 6 Q & A about SierraWest
- 9 What Would You Like to See?
- 362 Builds
- 131 HO Scale Builds
- 155 O Scale Builds
- 59 Finished SW Build Pics
- 12 Miscellaneous Builds
- 187 Techniques
- 19 Working with Wood
- 20 Painting Castings
- 5 Masonry
- 23 Scenery
- 36 Tools and Supplies
- 21 Layout Planning & Building
- 38 Miscellaneous
- 24 Prototype Information
- 22 Reference and Research
ever use SWM buildings in new ways?

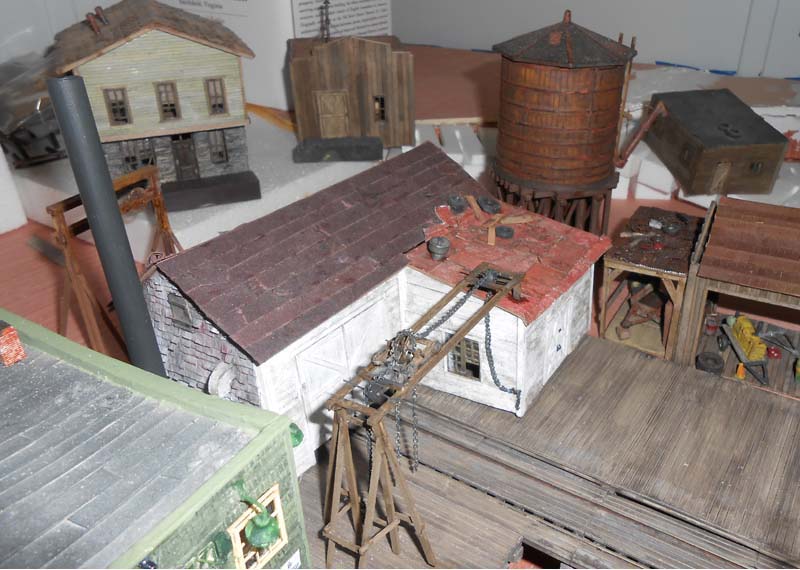
I often look at craftsman kits and come up with a new way to present them. I recently used my SW "railroad camp" in my layout harbor. Here are some pictures to show what I did. Please post comments and show how you used Bret's buildings on your layout or diorama. The railroad camp became harbor authority building that work with cargo arrivals and departures. you will notice that the docks are built while the harbor awaits scenic work. (on my layout I have not done any scenic work yet, (most of my bench-work is done, all three integrated levels) I will start scenic work once I have most of my buildings, bridges and other facilities constructed.
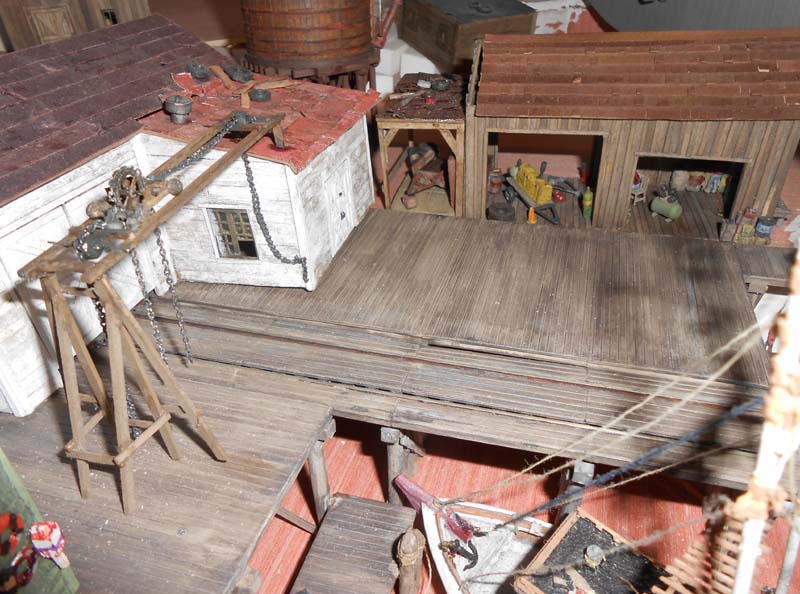
note that the roof top on the shop is not attached.
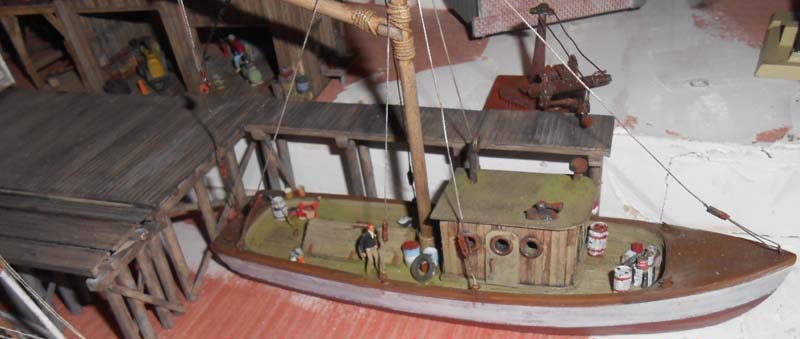
Here my version of the Jewel is renamed "BLIS" and it will be at the end of the same dock.
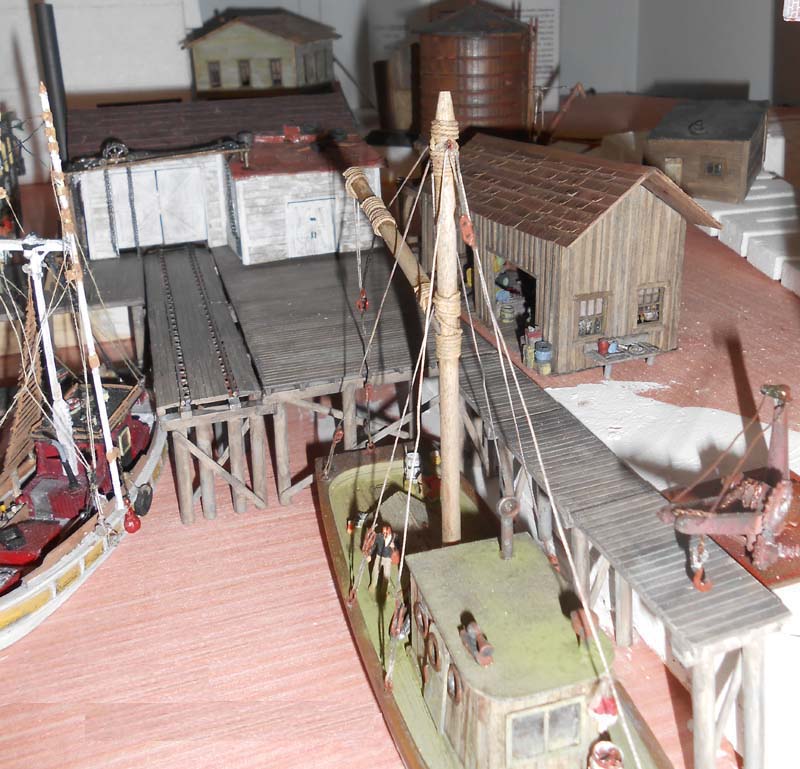
Yet another view showing all the kits.
I also built the "tidewater wharf" kit by builders in scale, I will add to those (once they are fabricated) SWSM "ship Yard" to complete the ship yard facilities on my layout. To me they should compliment each other showing that the area has important ties to ship building and repairs making a nice waterfront scene. My home town is near the Chesapeake bay shipping industries so it has a nice feel for modeling the local N&W mainlines.
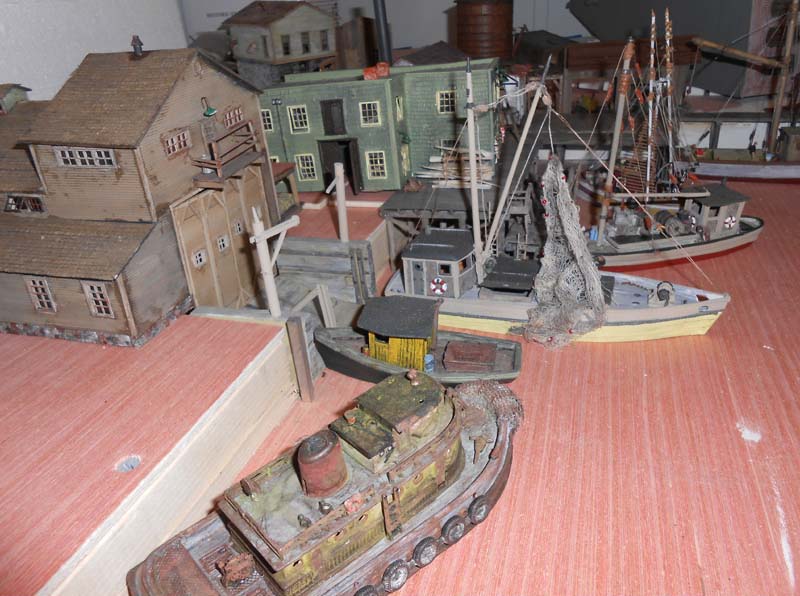
More SW buildings can be seen in the background. They await there final locations and stories. I am thinking perhaps across the street from the port AUTORITY facilities, next to the remaining buildings from "Tidewater Warf", they can be a surf shop, local tackle, small motor repair and other waterfront themed buildings. Please share your thoughts and ideas as I still need to commit them in some way to the layout.
note that the roof top on the shop is not attached.
Here my version of the Jewel is renamed "BLIS" and it will be at the end of the same dock.
Yet another view showing all the kits.
I also built the "tidewater wharf" kit by builders in scale, I will add to those (once they are fabricated) SWSM "ship Yard" to complete the ship yard facilities on my layout. To me they should compliment each other showing that the area has important ties to ship building and repairs making a nice waterfront scene. My home town is near the Chesapeake bay shipping industries so it has a nice feel for modeling the local N&W mainlines.
More SW buildings can be seen in the background. They await there final locations and stories. I am thinking perhaps across the street from the port AUTORITY facilities, next to the remaining buildings from "Tidewater Warf", they can be a surf shop, local tackle, small motor repair and other waterfront themed buildings. Please share your thoughts and ideas as I still need to commit them in some way to the layout.
Comments
I had been researching steam and air pipes, sizes, length of runs, wrappings and coloring for Colorado mines in the mid-late 30's. I'm getting really close to adding some of the piping to the pump house shown below. The piping will consist of 4 air pipes, each 4 inches or so in dia, and a single steam pipe of about 6 inches in dia. The steam pipe will be wrapped (an asbestos cover was used) and will run over the tracks to the horizontal boiler next to the hoist house. The air pipes will go to the mines, two into the vertical shaft mine and two into the mountain side mine entrance. Currently I'm thinking that I will place all of the piping entering/exiting on the right end wall of the pump house as one views the structure.
I'm using Brett's "O" Wood Cutter's Shack as the core structure of the pump house. I'll be adding additional stacks to the Wood Cutters shack along with a few more modifications.
Pictures of the main piping exiting the structure. This was only the first of a few more modifications to the structure/diorama.
The steam pipe is wrapped for insulation. The prototype wrap had a light texture to it, and this was a problem to overcome to have both the wrap lines and ‘texture’ as well as being able to create mock flanges with the material. After trying paper, masking tape, roofing materials, tissue paper and Kleenex, I identified a pair of materials which allow for easy creation of pipe joint flanges on the tubing and at the same time have the same texture as the rest of the pipe.
TOOLS AND TECHNIQUE: Steam Pipe Wrap
1. Bend brass tube to fit.
2. Clean brass tube with rubbing alcohol. (ETOH)
3. Apply 3M Double Side Transfer Tape (#465) to brass or styrene tube or wire.
4. Apply floral wrap (Panacea Floral Stem Wrap Tape, #60037-M, white ½ inch wide – obtained at Michael’s) keeping the floral wrap tight.
a) After applied, roll tube a lot between fingers to set wrap.
5.Cut Tarpaper stock to flange width (I used 3/64th inch wide flanges) and wrap strip of paper around the tube twice, overlapping the windings to create a flange.
a) Tarpaper stock used is Rusty Stumps Scale Models Tarpaper Roofing, #D5030, HO scale Black.
b) Use white glue to wrap the paper.(I coated the entire length of the paper being wound around the pipe with glue.)
6. Paint as appropriate. I used Vallejo Paints in the following mix:
a) 4 drops #153 Pale Grey-blue (Model Color series)
b) 1 drop #0919 Aged Pewter (Reaper series)
c) 2 drops wet water. ( 1:10 to 1:20, water:Flow-Aid)
7. Weather lightly with light dusting of pastel chalks, Rotten Stone, finely sifted dirt (sift through nylon hose) and light A-I wash. Possible addition of rust color(s) in spots may suggest rusting of underlying pipe.
For the piping valves I used Western Scale Models O-scale Miscellaneous set of Pipe Fittings, kit # M-80 and HO kit #MH-81, for the steam and air pipes.
The following process was used on the pipe valve castings to this point:
1. Clean the castings of mold lines and remove any flash.
2. Dip in bath of ETOH for approx. 30 minutes.
3. Dip in bath of Blacken-It for approx. 2-3 minutes. Rise well in clean water bath.
4. Buff with cotton tee shirt and/or buffing wheel in motor tool at a slow speed.
Note that the pipe valves and small piping are to be painted. I will probably use Vallejo Old Steel, followed by a rust wash, but this is to be determined.
My intent was to have the smaller air pipes passing behind the larger wrapped steam pipe, but I may have to put the smaller pipes in front. The smaller air pipes will be easy to create from the smaller tubing. Coloring will consist of just Blacken-it , with a buffing after treatment followed with a light rust wash. Flanges at pipe joints will be created from slightly larger brass or plastic tubing cut to size and fitted over the air pipe.