
Howdy, Stranger!
It looks like you're new here. If you want to get involved, click one of these buttons!
Categories
- 922 All Categories
- 3 Picture Posting and Resizing
- 53 New Member Introductions
- 111 Off-Topic Forum
- 4 Photography
- 2 Resources
- 16 New Product Information
- 166 The SierraWest Forum
- 9 Brett's Blog
- 117 General News & Ramblings
- 3 Re-Release Information
- 6 Q & A about SierraWest
- 9 What Would You Like to See?
- 362 Builds
- 131 HO Scale Builds
- 155 O Scale Builds
- 59 Finished SW Build Pics
- 12 Miscellaneous Builds
- 187 Techniques
- 19 Working with Wood
- 20 Painting Castings
- 5 Masonry
- 23 Scenery
- 36 Tools and Supplies
- 21 Layout Planning & Building
- 38 Miscellaneous
- 24 Prototype Information
- 22 Reference and Research
Opinions Please
After years of procrastination I've decided to get to work on a "Lighting the Sierra West Kit" project. Through those years I've done a lot of lighting projects but haven't built any SW kits. So... I figure that if I'm going to light a SW kit I better learn to build a SW kit. I had the two little HO shed kits on the shelf and thought that that kit would be a good start. No sense goofing up the O'Neills or Deer Creek mine kits. Techniques have evolved through the years so I've been reading the old shed kit instructions, the new O'Neills instructions, the University videos and the great posts on this forum. Enough cutting of the bait; now it's time to go fishing.
Below is the result of my first attempt. I wanted a general non-painted, sun-faded look.
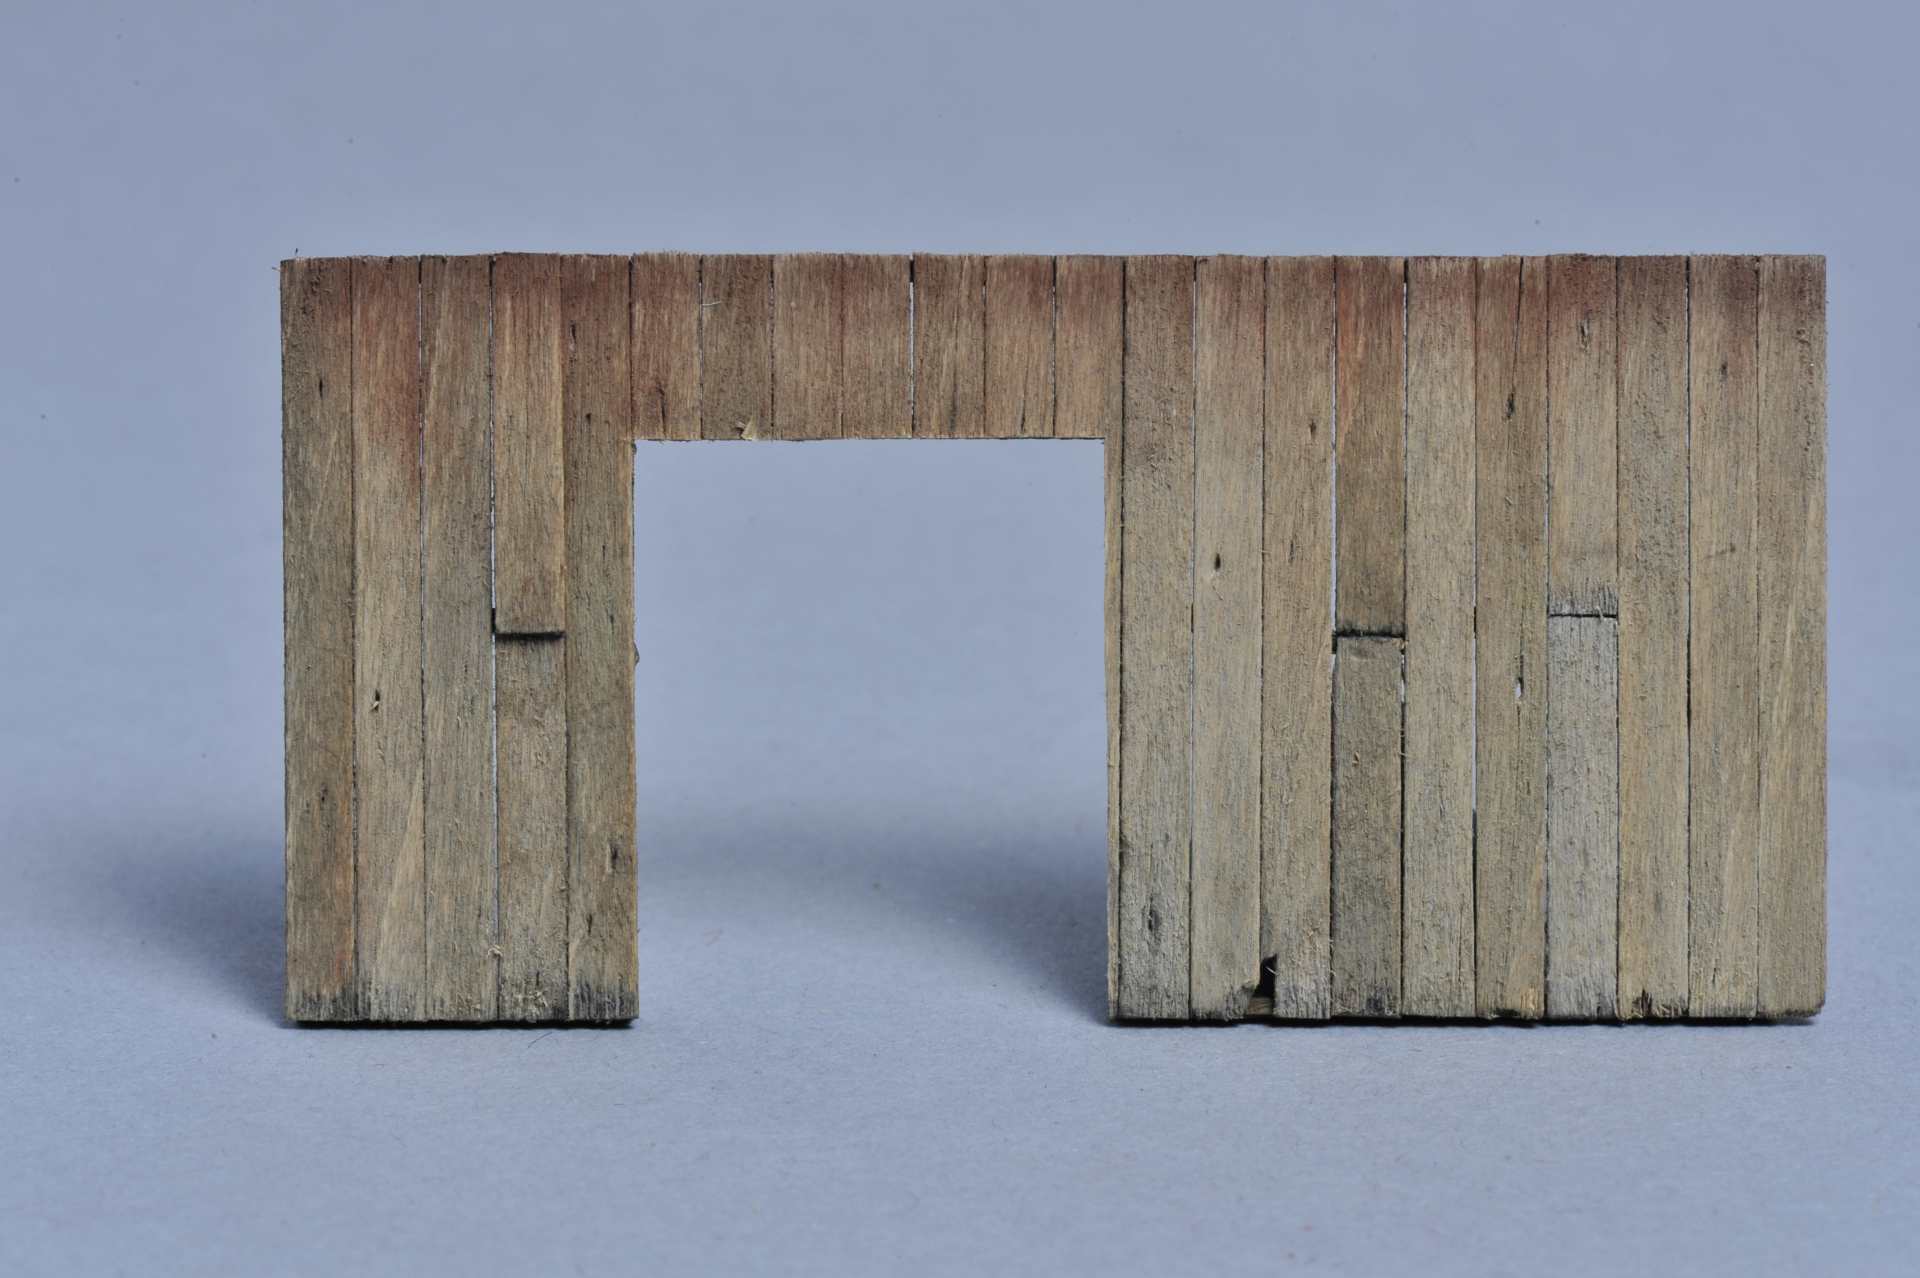
My observations:
1) Not sure I like the fuzzies so I'll re-read the thread on the fuzzies.
2) The best wood ends (to me) were the natural ends of the boards right out of the kit. However, you only get two of these per stick and you gotta make your cut boards look like them.
3) It helps to start at the traps at each end of the wall rather than start at one end and get carried away. Or - read the instructions more than once.
4) Treating the wood, cutting and brushing the end and re-treating the end to make it blend going darker at the end is not all that fun.
5) I like brushing on dry chalk with a short stubby brush.
Now it's your turn. Have at it. I'm looking for constructive criticism. I've got some catching up to do on the SW front.
The Other Bill
Below is the result of my first attempt. I wanted a general non-painted, sun-faded look.
My observations:
1) Not sure I like the fuzzies so I'll re-read the thread on the fuzzies.
2) The best wood ends (to me) were the natural ends of the boards right out of the kit. However, you only get two of these per stick and you gotta make your cut boards look like them.
3) It helps to start at the traps at each end of the wall rather than start at one end and get carried away. Or - read the instructions more than once.
4) Treating the wood, cutting and brushing the end and re-treating the end to make it blend going darker at the end is not all that fun.
5) I like brushing on dry chalk with a short stubby brush.
Now it's your turn. Have at it. I'm looking for constructive criticism. I've got some catching up to do on the SW front.
The Other Bill
Comments
The picture I posted isn't showing up despite the file size being <200K.
Any help would be appreciated.
As far as fuzzy there is a 10 ways to get rid of most of them. I run my wood through a brown piece of paper bag. it doesn't hurt the grain but gets most of the fuzzes off.
Jerry
I can see my image in Explorer but Chrome seems to be having a bad time with it. I don't know if the image size (rather than file size) is too large. I used a macro lens and wanted to show as much as possible - good or bad.
The last treatment the wall saw was a few swipes with some 600 grit.
Bill
I think you did a wonderful job on the siding. The fading looks great and once the roof is on...even better. Your weathering of the wood is just how I like it and your response on line item #4...now Bill...you must savor this part of the build like a fine wine or choice cigar, it sets the tone for everything there after...I'm not right am I? Welcome to the forum Bill, pleasure "talking" with you...Ken
I'm with you on the fuzzies. They drive me nuts. Barely visible to the naked eye, so leaving them presents no problem. But I always use steel wool to remove as much of them as possible.
You are right about the board ends out of the box. I'd like to send a pile of those 8 inch pieces of strip wood to wherever that saw is and have them re-cut into 2" lengths.
Terrific color and texture on this wall! Absolutely looks sun-bleached with a hint of original color at the top of the boards--very natural, realistic effect.
About the only suggestion I could offer is with the grain of the wood--the real grain. (and this is just a personal thing for me.) See the second board from the left at the bottom? That grain pattern jumps out at me and can give away to the viewer that what they're seeing is a model. I try to watch for those areas and pieces that have a "speckled" look. I'll cut around those areas and save the bad-grain pieces for hidden or less obvious locations. Likewise, I keep an eye out for the most flawless wood and use it in high visibility places.
Hope it's okay that I mentioned it!
There's a lot of ideas churning around in my head regarding the path(s) to take regarding a lighting kit. Brett and I discussed the skills required to do lighting some time ago. He feels that anyone with the skills to do one of his kits would have the skills to work a soldering iron. I agree. However, I've found out through the years that if I were to play a word association game with my fellow modelers, I could say "solder" and they would say something like "ebola virus." I could say, "soldering iron" and they would say, "slow painful burning death."
I've got my work cut out for me. ;-)
I'm at the point now that I equate soldering the small surface mount LED's to a mild flu and not the Ebola virus.
I think the fade and weathering on your wall is excellent. I like the weathered board ends, the size of the knots and the color fade at the top of the wall. I've used 0000 steel wool for the fuzzies and found it doesn't remove too much of the grain. Great modeling!
SteveF
As for lighting, modelers (me) are scared of ohms, resistors, tech talk.... I just want to know where to put wire 'a' to connector 'b' and not have to work out the rest. A lighting kit will be a great addition to so many of Bretts kits and definitely a top seller to those of us who like to follow great instructions to a satisfing result.
Karl.A
I've got a 9-5 job that keeps me busy so the lighting kit can be a labor of love as far as I'm concerned and doesn't need to be a top seller. I think we can all agree that Brett's castings have been left in the dark long enough.
Bill S.