
Howdy, Stranger!
It looks like you're new here. If you want to get involved, click one of these buttons!
Categories
- 923 All Categories
- 3 Picture Posting and Resizing
- 54 New Member Introductions
- 111 Off-Topic Forum
- 4 Photography
- 2 Resources
- 16 New Product Information
- 166 The SierraWest Forum
- 9 Brett's Blog
- 117 General News & Ramblings
- 3 Re-Release Information
- 6 Q & A about SierraWest
- 9 What Would You Like to See?
- 362 Builds
- 131 HO Scale Builds
- 155 O Scale Builds
- 59 Finished SW Build Pics
- 12 Miscellaneous Builds
- 187 Techniques
- 19 Working with Wood
- 20 Painting Castings
- 5 Masonry
- 23 Scenery
- 36 Tools and Supplies
- 21 Layout Planning & Building
- 38 Miscellaneous
- 24 Prototype Information
- 22 Reference and Research
HO O'Neill's Fabrication Non-build thread

Since Ken Karns has a fabulous official build thread going I won't clutter it up with a photo of what I've got going here. Ken is really good and while group builds can be fun and they do have their place, they can get confusing and in my opinion if others want to share their builds they are sure welcome to chime in here.
If you bought early you were able to buy at a great price a neat little welding car to put on the siding by O'Neills, or add it to your work train. I started by priming all of the resin and metal castings for O'Neills, and then my new SWSM paint set arrived and it was an easy decision to dive right in decorating the little welding car. What a fun little project- the car is essentially two castings- a white metal frame and under-body and an incredible one piece resin deck, bin with dozens of details molded in, and bench and cabinet. Both types of castings represent wooden beams, and I sprayed the resin black with Krylon Camo, and the white metal frame was dunked in JAX Pewter Black and buffed with my Dremel.
Then I got to try out most of my new 36 color paint set- what a treat to use these Reaper paints that Brett is marketing. They are terrific to use, cover in the thinnest coat possible, and dry incredibly quickly. In fact, if you are going to use Brett's new technique on weathering the tanks with your scratch brush you better be quick!
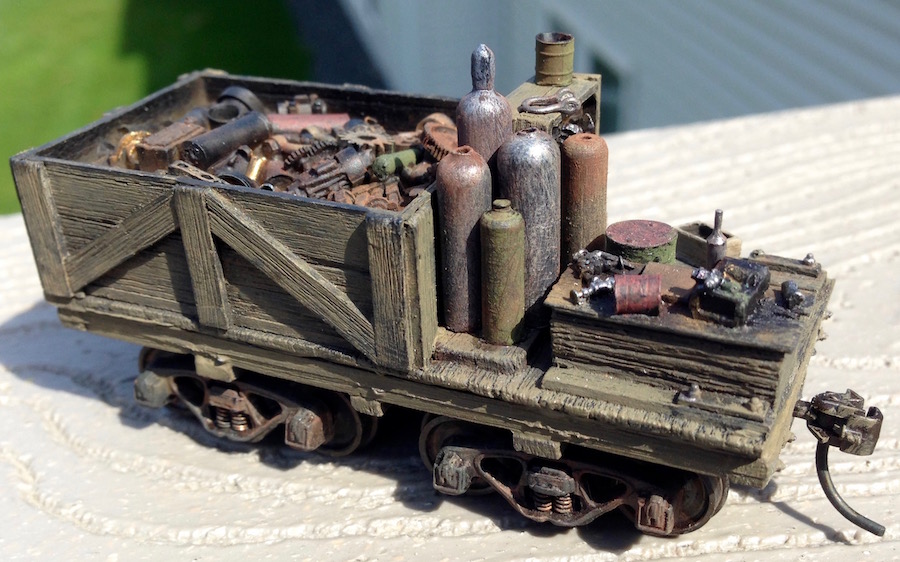
Here are two shots of the mostly finished car- it still needs some touch-up, more powders, an oil spill or two, a couple of chains holding the tanks in place, etc.
This is not a step-by-step, but DTR (a golf term for down-the-road- Kevin O'Neill was a great golfer!) I will show some progress shots. Others welcome to do so as well.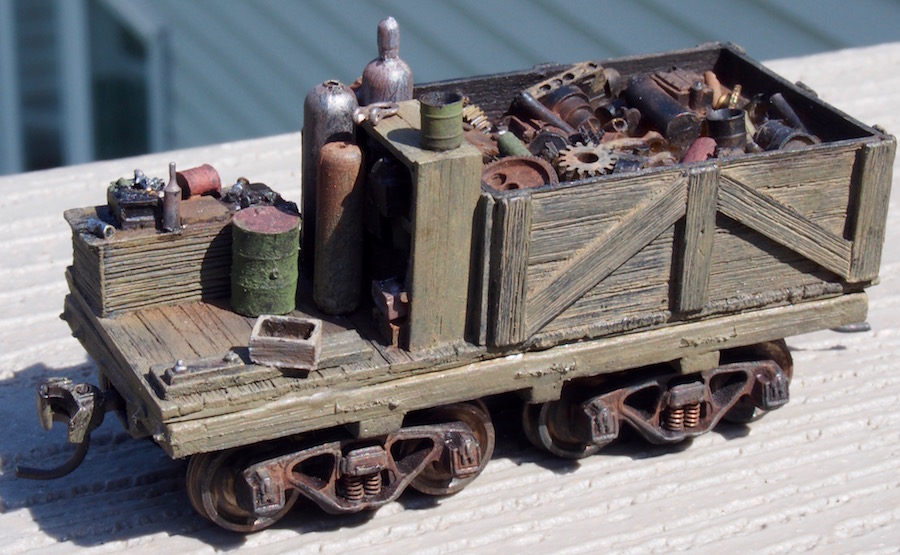
If you bought early you were able to buy at a great price a neat little welding car to put on the siding by O'Neills, or add it to your work train. I started by priming all of the resin and metal castings for O'Neills, and then my new SWSM paint set arrived and it was an easy decision to dive right in decorating the little welding car. What a fun little project- the car is essentially two castings- a white metal frame and under-body and an incredible one piece resin deck, bin with dozens of details molded in, and bench and cabinet. Both types of castings represent wooden beams, and I sprayed the resin black with Krylon Camo, and the white metal frame was dunked in JAX Pewter Black and buffed with my Dremel.
Then I got to try out most of my new 36 color paint set- what a treat to use these Reaper paints that Brett is marketing. They are terrific to use, cover in the thinnest coat possible, and dry incredibly quickly. In fact, if you are going to use Brett's new technique on weathering the tanks with your scratch brush you better be quick!
Here are two shots of the mostly finished car- it still needs some touch-up, more powders, an oil spill or two, a couple of chains holding the tanks in place, etc.
This is not a step-by-step, but DTR (a golf term for down-the-road- Kevin O'Neill was a great golfer!) I will show some progress shots. Others welcome to do so as well.
Comments
Jerry
Thanks
SteveF
Yes Steve I did use Brett's technique. I'm at work at the moment and don't recall the specific colors, but if you bought the kit, he identifies which ones to use in the manual. This is not my first rodeo with craftsman structure kits, but it is my first SWSM kit, and everything I've read says "follow the manual". In my reading of past build threads elsewhere, most folks who had problems seem to have had them because they didn't follow the manual, so I'm being pretty OCD about that! I applied chalk just about the way you would salt a piece of corn on the cob, and the wood seemed a little too light, so I went back and did it again. I let it all dry overnight both times. I got it pretty wet with the alcohol. Spreads the color out nicely!
SteveF
Two things I model by, and have since I started...
Brian Nolan - "Don't be afraid to try it, the worst that can happen is you have to try again"
Everyone Else - "Just follow Brett's instructions"
SierraWest instructions are definitely the best modeling education you will get.
Karl.A
Karl.A
Karl.A
You'll see what I mean about the lip formed on the back side of the wall once you get to installing the corner trim, and this will illustrate the reason for the sanded bevel on the other opposing wall...Ken