
Howdy, Stranger!
It looks like you're new here. If you want to get involved, click one of these buttons!
Categories
- 920 All Categories
- 3 Picture Posting and Resizing
- 53 New Member Introductions
- 111 Off-Topic Forum
- 4 Photography
- 2 Resources
- 16 New Product Information
- 165 The SierraWest Forum
- 9 Brett's Blog
- 117 General News & Ramblings
- 3 Re-Release Information
- 6 Q & A about SierraWest
- 9 What Would You Like to See?
- 361 Builds
- 131 HO Scale Builds
- 154 O Scale Builds
- 59 Finished SW Build Pics
- 12 Miscellaneous Builds
- 187 Techniques
- 19 Working with Wood
- 20 Painting Castings
- 5 Masonry
- 23 Scenery
- 36 Tools and Supplies
- 21 Layout Planning & Building
- 38 Miscellaneous
- 24 Prototype Information
- 22 Reference and Research
The Tool Shed Again By a First Time Sierra West Builder
This is my first Sierra West kit build. I joined the forum in late 2013 just in time to purchase the Tool Shed kit #3005 before it sold out. As I understand, it was originally offered as part of the Logging Camp Essentials kit released in February 2008. Later in 2008 it was released as one of the“Craftsmen Kit University Series” of smaller kits, so I surmised it would be a good starting place for me. I model branch line SE US and plan to have structures in a good state of repair for the most part. The Shed will not be line side, but rather a small support building - the diorama will be without track.
As this kit was released in 2008, the instruction manual calls for Floquil paints. At first I planned to try to follow the manual as closely as my old paint supply would allow, but since I lacked key colors, I decided to use chalks instead.
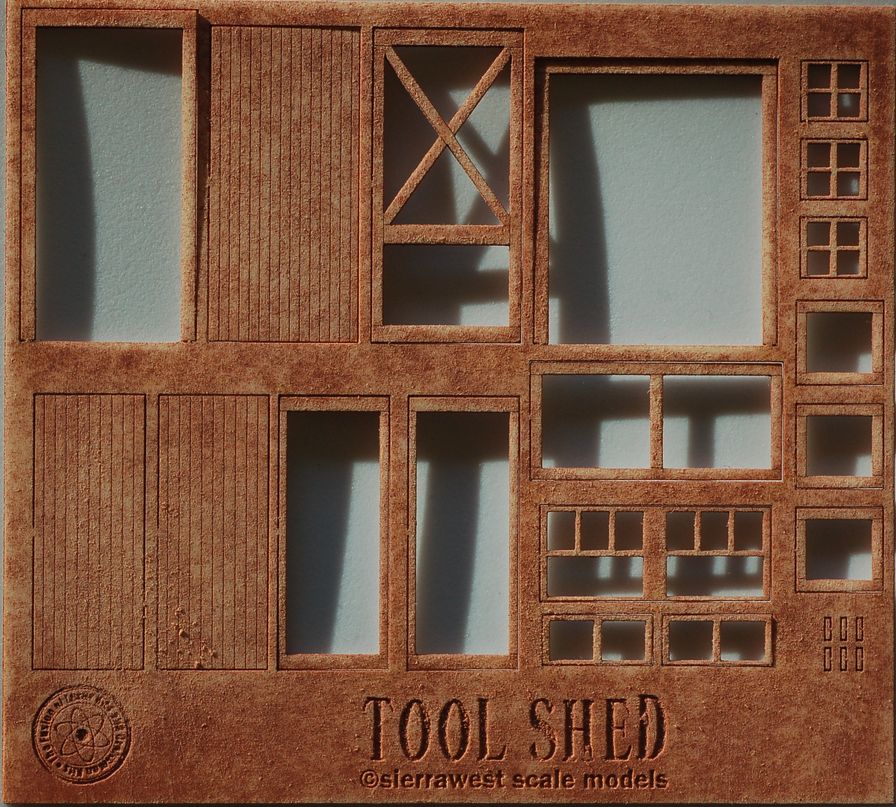
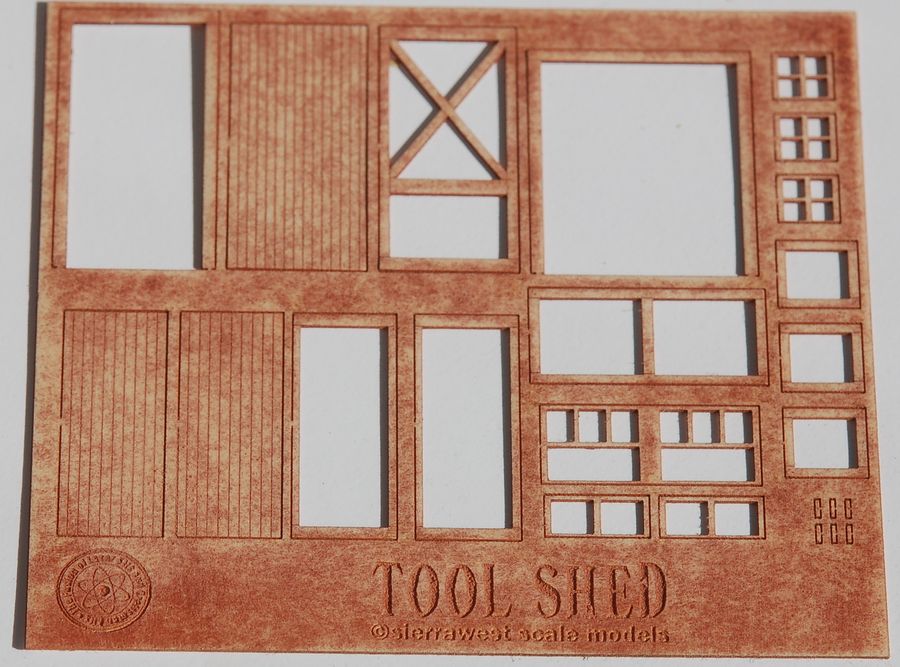
Brett's instruction calls for painting the sheet of laser cut doors and windows with Floquil Boxcar Red. I thought that Krylon Red Oxide primer would be a good substitute. Very bad decision! You can see the bubbles and poor texture. What I learned – spray a test sheet first to make sure your spray can is working properly.
I had to sand much of the paint off, but much of the coloration remained.
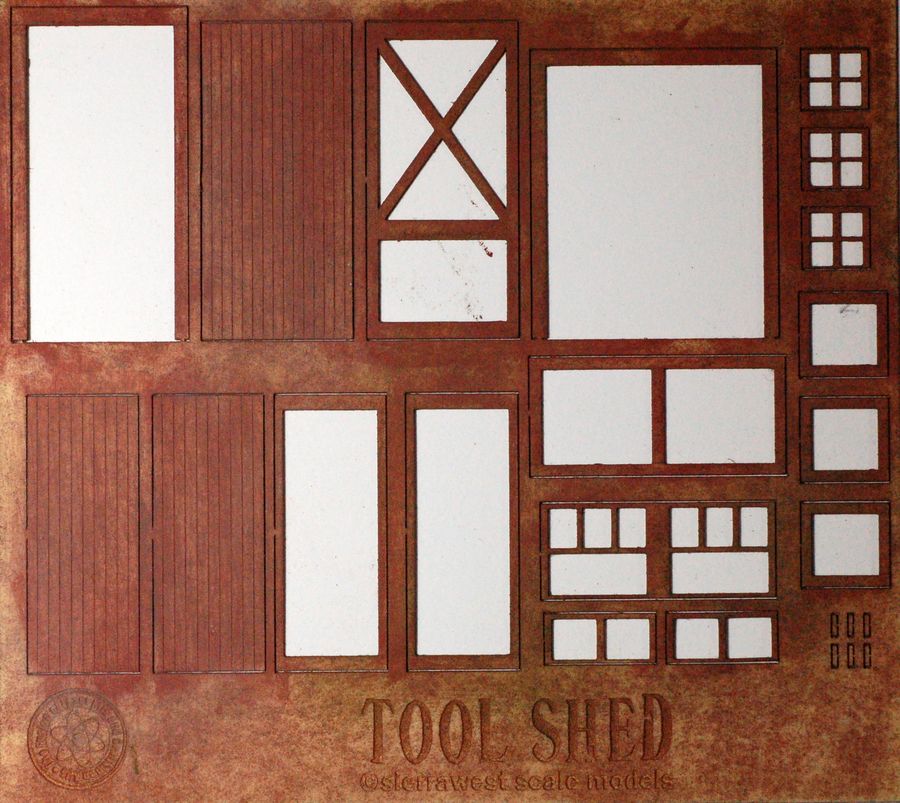
I then used Rembrandt 343.5 Caput Mortuum Red and 99% alcohol to paint the windows and doors.
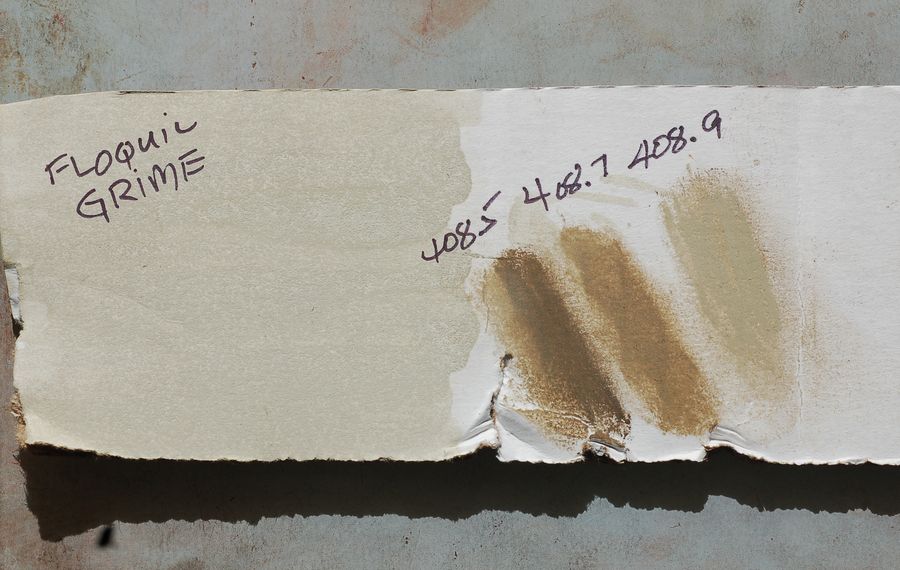
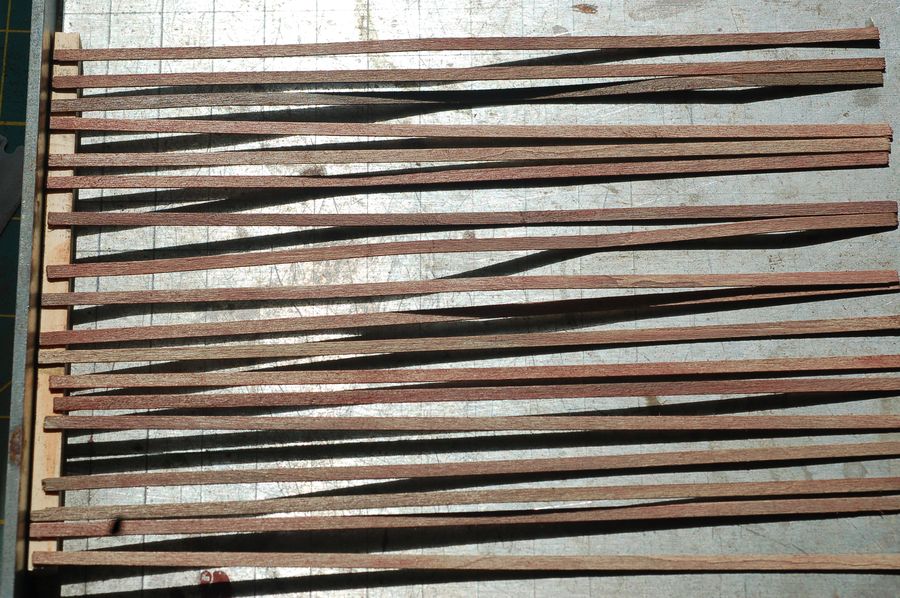
Now on to the stripwood. Instructions call for staining the wood with Floquil Grime. I did have a small bottle of that, so I tried to find a chalk that would give a similar color. Seems that Rembrandt Raw Umber 408.9 fills the bill. So after using both a brass “toothbrush” and the Micromark Eurotool wire brush to distress the strip wood, I stained with 408.9.
For the Faded Red Siding – I used the Rembrandt 343.5 and alcohol on one side only.

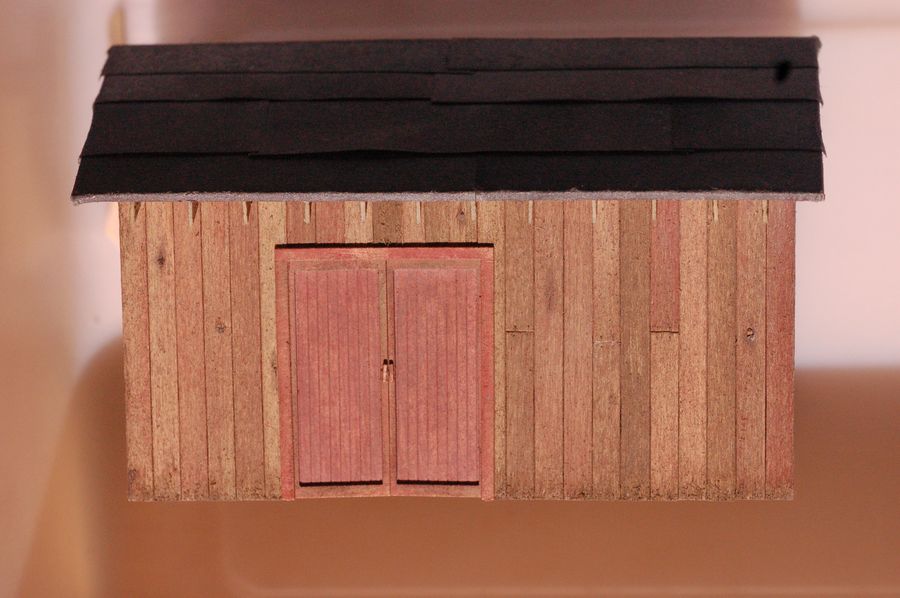
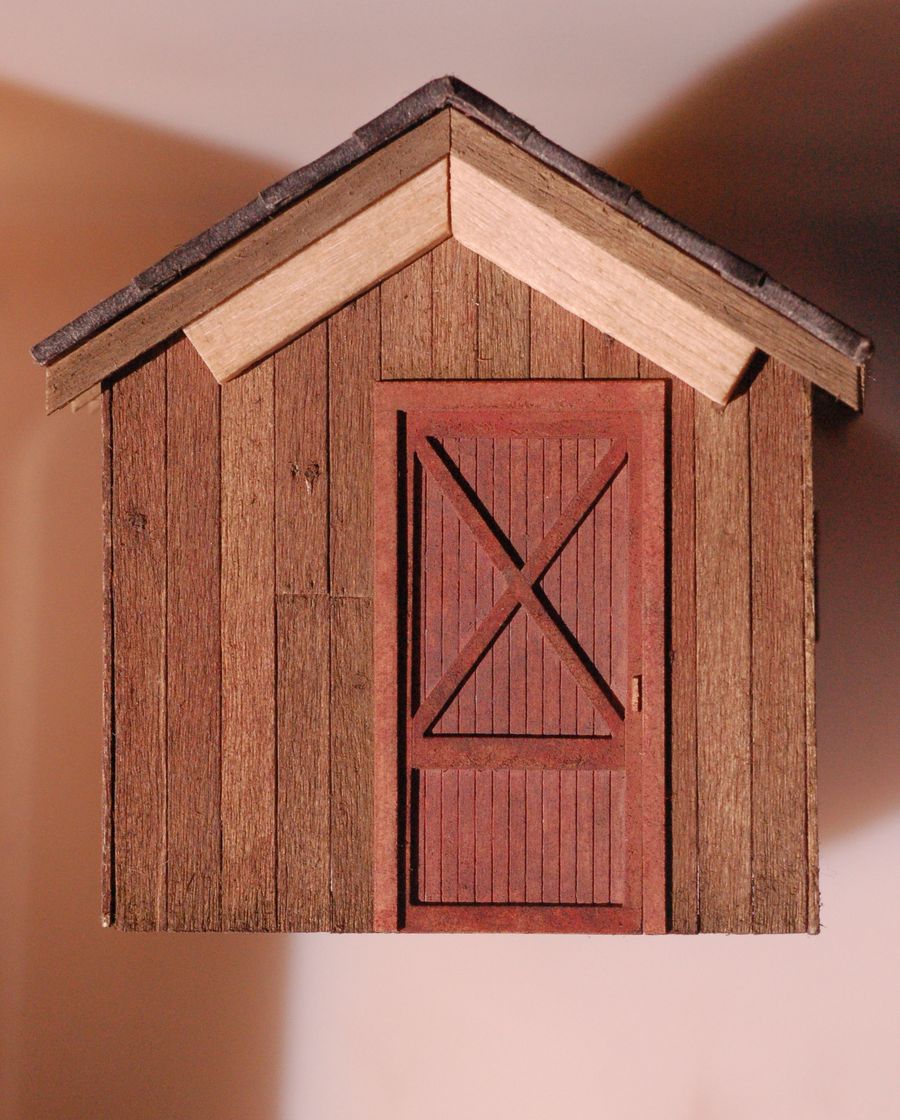
On to the Board on Board:
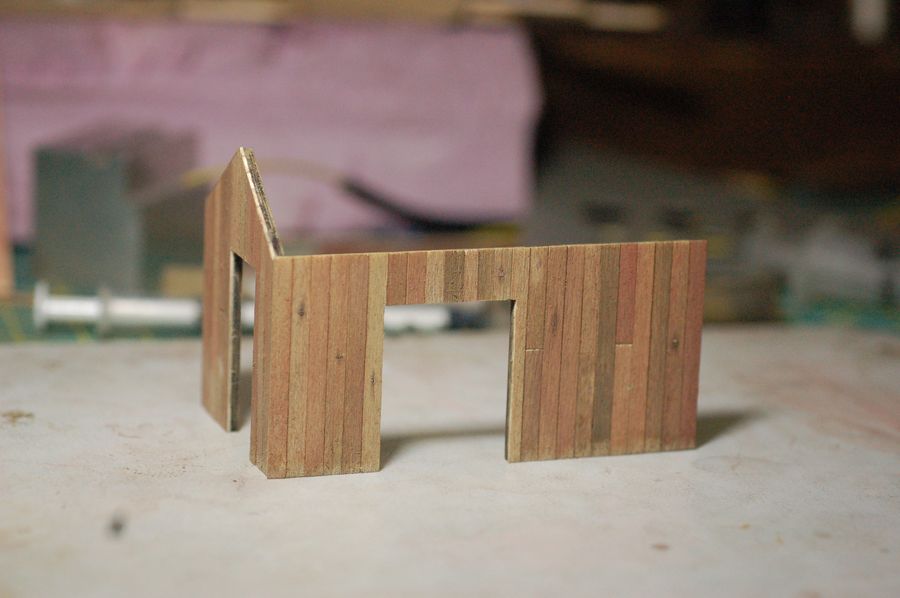
I haven't done board on board for almost 20 years – the last being a Campbell kit, so it was great getting back to this level of modeling. This was my first attempt at knot holes. I wanted them to be no larger that 2 scale inches, but using toothpicks, I failed on several occasions, too many knots were larger than I wished. I used the fairly new Elmer's Carpenter's Wood Glue Max to secure the toothpicks as it is “stainable”. I stained with A/I from behind and was pleased with how that turned out. What I learned – drill a hole smaller than the final size you desire and don't push too hard.
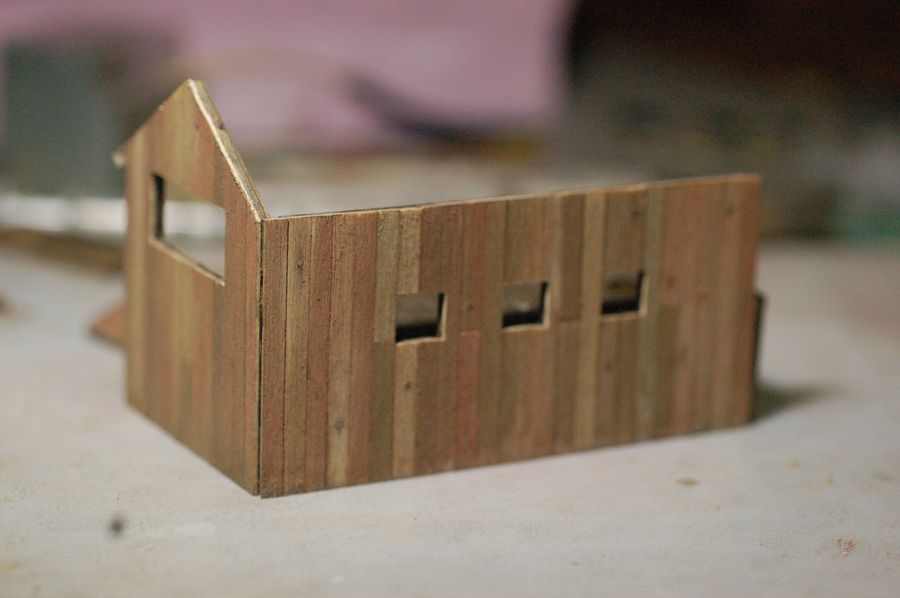
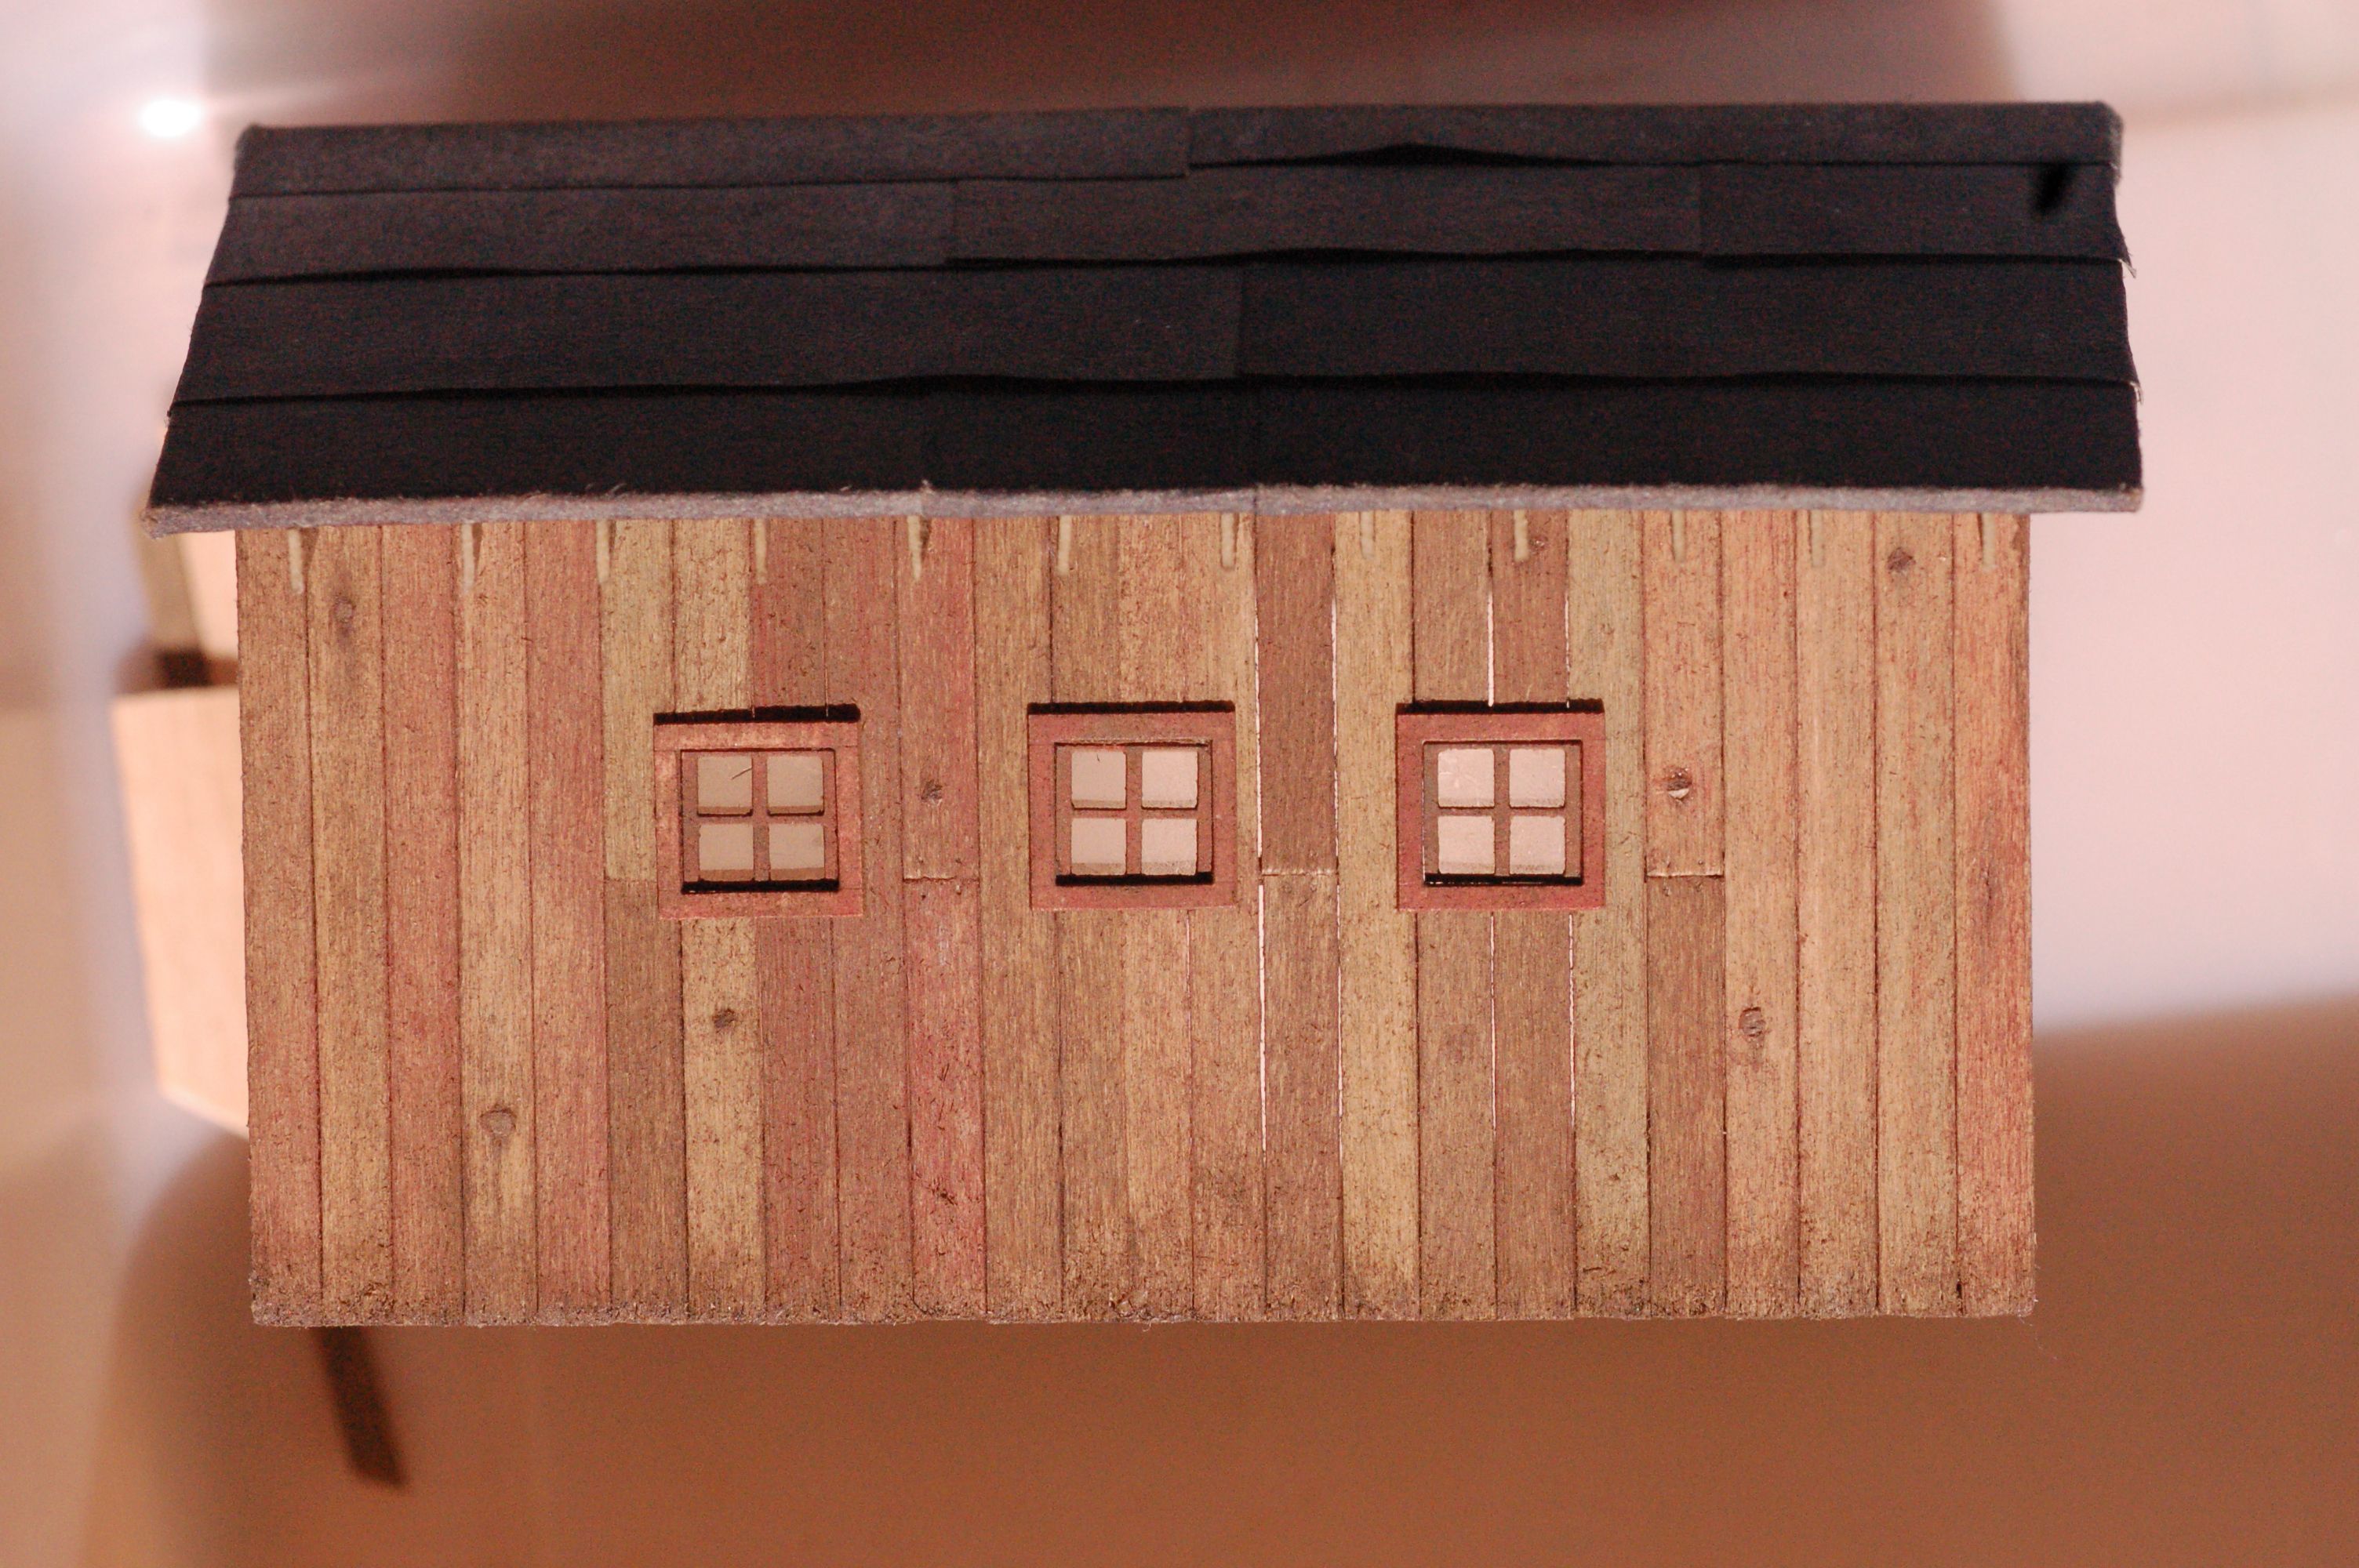
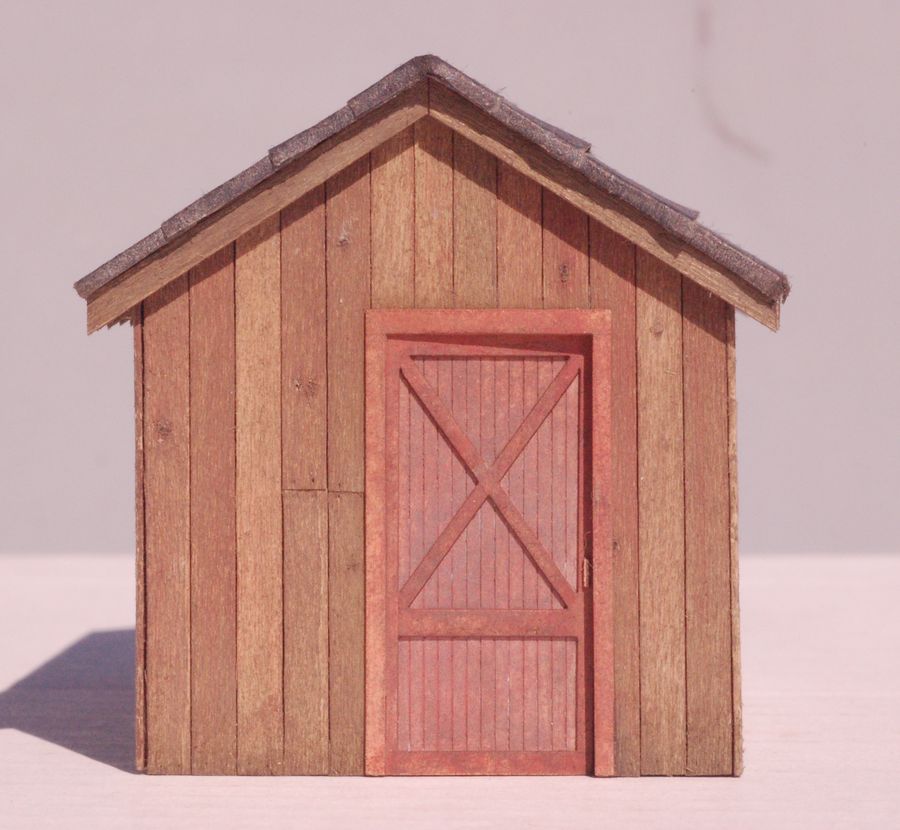
Here are snapshots of walls just leaning against each other with available light on the bench. There is very limited depth of focus, but the color is fairly accurate.
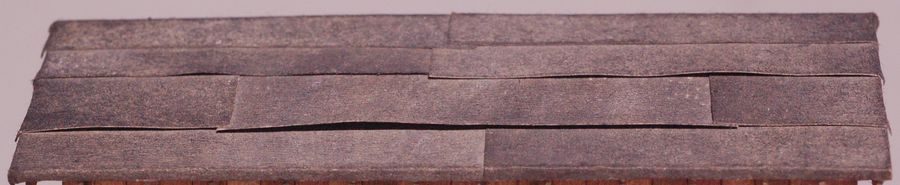
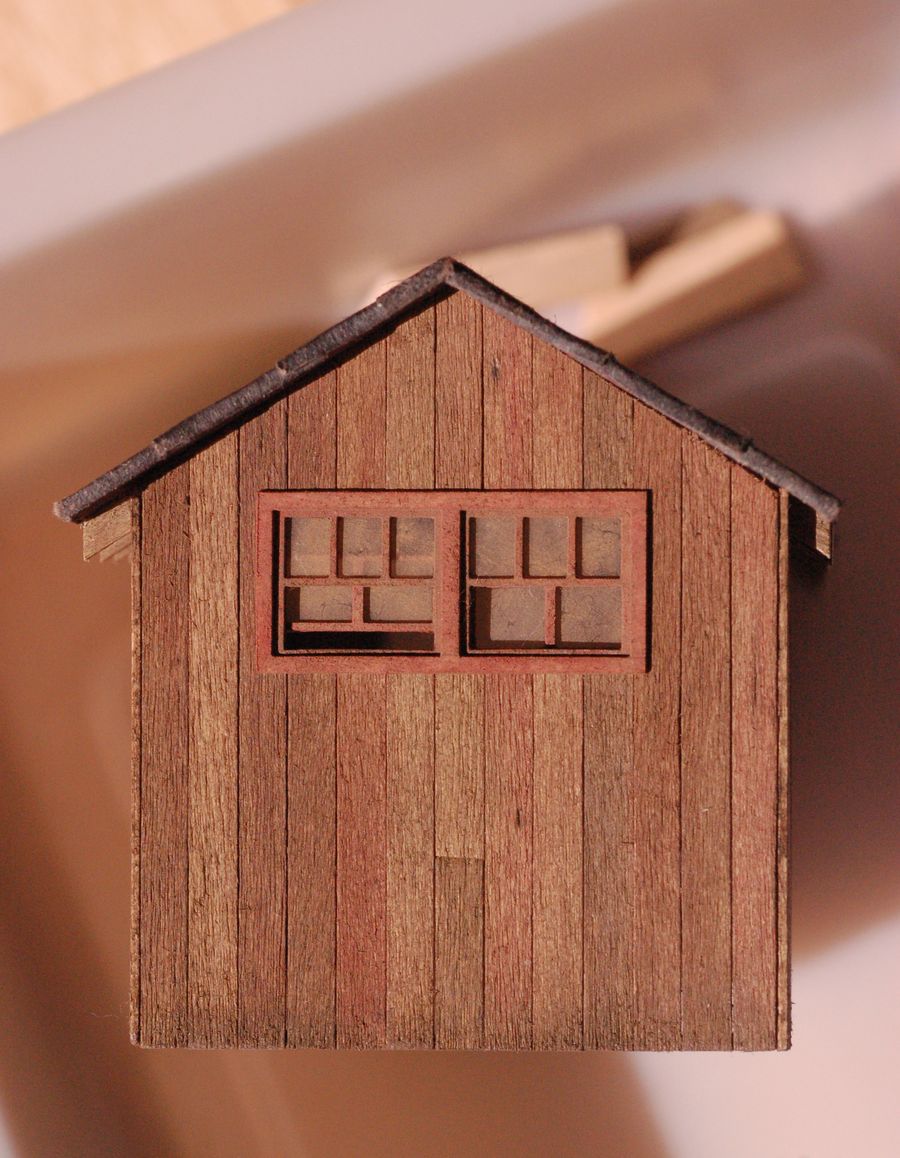
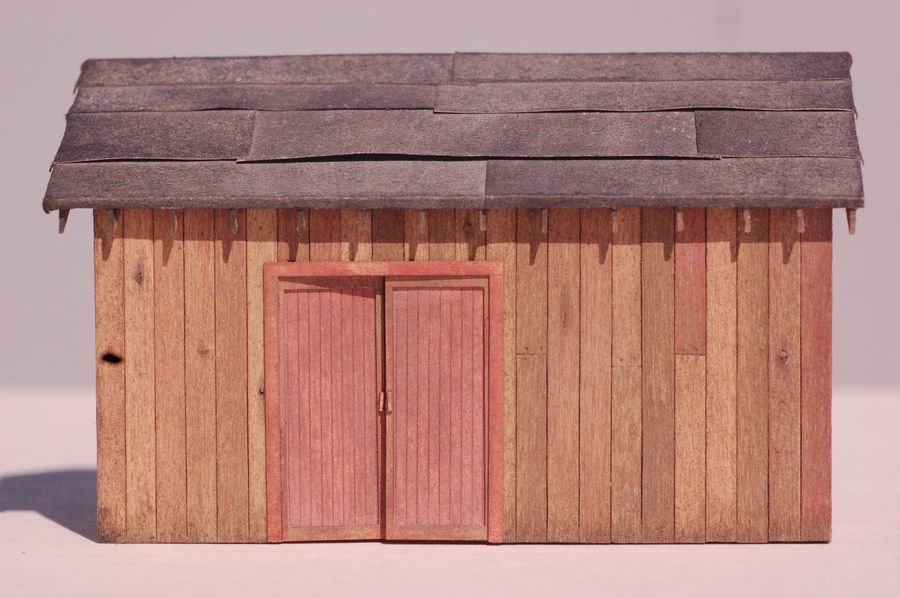
I like the tar paper method that Brett used in this kit. I made an error cutting the strips – a wandering ruler, I guess. When I finished gluing everything together, I noticed that a few strips were wider than others. Should I call the roofers to redo it? Color not accurate in this photo.
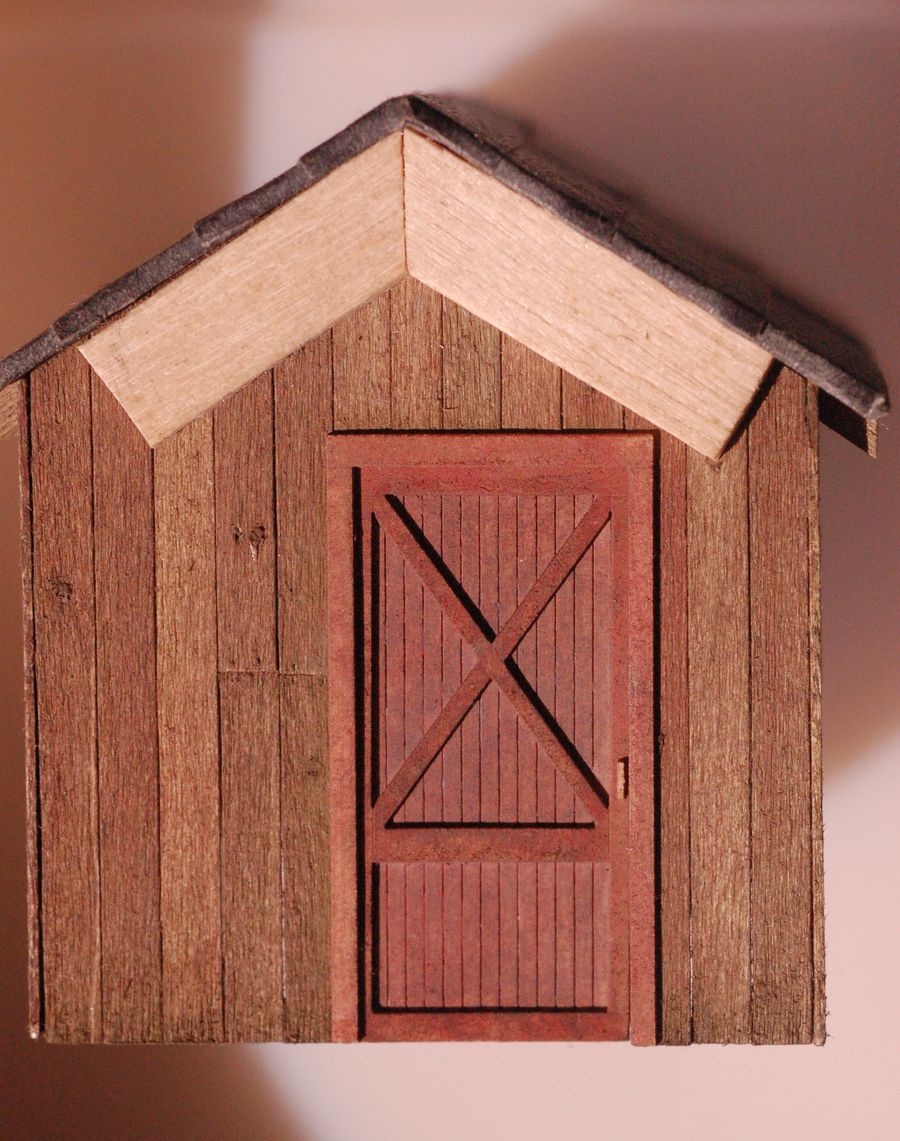
On to nails, windows and doors. I don't like nail holes that stand out, so I err on the sometimes hard to see side. Doors were no problem except for the handles. Due to my less than precise cutting of the back wall window openings, I had difficulty gluing the windows in place. I finally cut a strip and glued it to the upper window framing – this did the trick. The strip is thin enough that it is not visible. I then glued walls together, glued on roof, etc. I made an error in roof placement. Not quite centered left to right. There is slightly over a mm difference. I also didn't get the left front corner on the right wall snug enough leaving a little gap. Thanks to Brett's copious details, it won't be quite as noticeable.
When I got ready to install the full length rafters, I needed some sort of jig. A piece of Popsicle stick seemed to be the correct thickness on one side and two thicknesses on the other. I cut them to fit and placed wax paper between the jig and the rafters just in case any glue oozed out to prevent removal of the spacer.
Here are a few photos of the building as as of late Feb. The black dot on the lower left in the next photo is dust inside the camera.
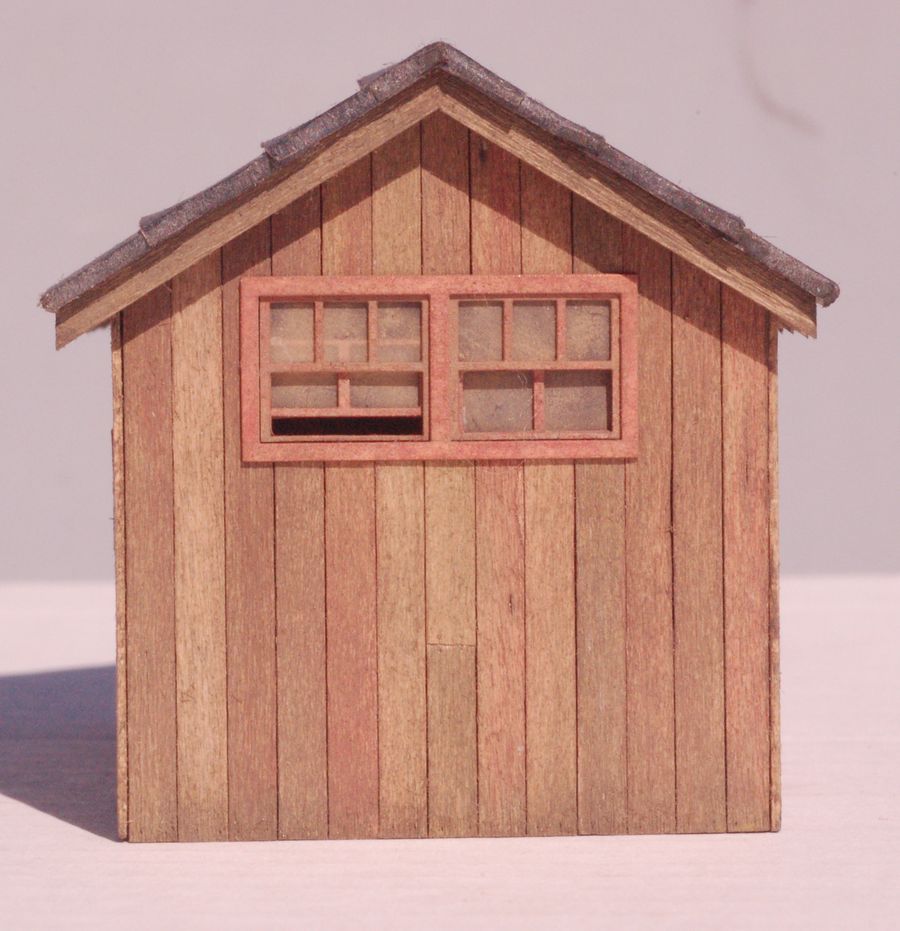
At this point I noticed that the photos were showing some color distortion. The old Nikon D50 sensor was failing. My new camera has arrived. I've almost completed painting the details and, hopefully, I'll get some good photos tomorrow to add to this build.
Fire away with comments. I've been intimidated by the outstanding skills that members of this forum display and never hope to attain that level of modeling. That said, I will strive to improve with your guidance.
David U
As this kit was released in 2008, the instruction manual calls for Floquil paints. At first I planned to try to follow the manual as closely as my old paint supply would allow, but since I lacked key colors, I decided to use chalks instead.
Brett's instruction calls for painting the sheet of laser cut doors and windows with Floquil Boxcar Red. I thought that Krylon Red Oxide primer would be a good substitute. Very bad decision! You can see the bubbles and poor texture. What I learned – spray a test sheet first to make sure your spray can is working properly.
I had to sand much of the paint off, but much of the coloration remained.
I then used Rembrandt 343.5 Caput Mortuum Red and 99% alcohol to paint the windows and doors.
Now on to the stripwood. Instructions call for staining the wood with Floquil Grime. I did have a small bottle of that, so I tried to find a chalk that would give a similar color. Seems that Rembrandt Raw Umber 408.9 fills the bill. So after using both a brass “toothbrush” and the Micromark Eurotool wire brush to distress the strip wood, I stained with 408.9.
For the Faded Red Siding – I used the Rembrandt 343.5 and alcohol on one side only.
On to the Board on Board:
I haven't done board on board for almost 20 years – the last being a Campbell kit, so it was great getting back to this level of modeling. This was my first attempt at knot holes. I wanted them to be no larger that 2 scale inches, but using toothpicks, I failed on several occasions, too many knots were larger than I wished. I used the fairly new Elmer's Carpenter's Wood Glue Max to secure the toothpicks as it is “stainable”. I stained with A/I from behind and was pleased with how that turned out. What I learned – drill a hole smaller than the final size you desire and don't push too hard.
Here are snapshots of walls just leaning against each other with available light on the bench. There is very limited depth of focus, but the color is fairly accurate.
I like the tar paper method that Brett used in this kit. I made an error cutting the strips – a wandering ruler, I guess. When I finished gluing everything together, I noticed that a few strips were wider than others. Should I call the roofers to redo it? Color not accurate in this photo.
On to nails, windows and doors. I don't like nail holes that stand out, so I err on the sometimes hard to see side. Doors were no problem except for the handles. Due to my less than precise cutting of the back wall window openings, I had difficulty gluing the windows in place. I finally cut a strip and glued it to the upper window framing – this did the trick. The strip is thin enough that it is not visible. I then glued walls together, glued on roof, etc. I made an error in roof placement. Not quite centered left to right. There is slightly over a mm difference. I also didn't get the left front corner on the right wall snug enough leaving a little gap. Thanks to Brett's copious details, it won't be quite as noticeable.
When I got ready to install the full length rafters, I needed some sort of jig. A piece of Popsicle stick seemed to be the correct thickness on one side and two thicknesses on the other. I cut them to fit and placed wax paper between the jig and the rafters just in case any glue oozed out to prevent removal of the spacer.
Here are a few photos of the building as as of late Feb. The black dot on the lower left in the next photo is dust inside the camera.
At this point I noticed that the photos were showing some color distortion. The old Nikon D50 sensor was failing. My new camera has arrived. I've almost completed painting the details and, hopefully, I'll get some good photos tomorrow to add to this build.
Fire away with comments. I've been intimidated by the outstanding skills that members of this forum display and never hope to attain that level of modeling. That said, I will strive to improve with your guidance.
David U
Comments
David U
You have made a good start on the SWSM kit trail. It does take a bit of time to adjust to the chalks but you seemed to have made the transision very well. The colour variation in the boards is great and the knots are noticable enough.The age of the boards vs. the age of the roof seem to be off, maybe its the photo? I would suggest you order your next kit now. LOL.
Marty
Thanks for looking in. I think the color is off. I'm hoping to find time today to take some updated photos with the new camera. I'm way ahead of you on the kit order! LIneside Storage Shed and Wood Cutter's Shack are on the shelf and Brett will be shipping the Deer Creek Mine soon. Although with summer gardening season coming up, I may not have enough modeling time to make much progress. I'm an avid hobbyist fruit grower with 300+ trees to fiddle with. That's a lot of 1:1 work.
Brett,
Thanks so much for the comment. Glad you liked the jig. I need all the help I can find or think of.
David U
Way to go! The Lineside shed is a fun build, when your done that the Wood Cutter shack will be phenomenal. For 35 years I grew and competed in showing dahlias and became well known in those circles. When I returned to modelling, thank you Brett, I had to make a decision on where I wanted to spend my retirement. The dahlias had a good run, but the railroad modelling won out. Sometimes you just have to pick one and be the best you can at it. All a personal choice.
Marty
The colour and variation in the walls is great, such an immediate visual on the
benefits of board by board modeling.
You've obviously mastered the chalk colouring methods. The more you use them
the more you will discover how incredibly versatile they are and will develop many
ways to use them, manipulate them and discover new effects and finishes.
Knots came out really well, the subtle staining turned out just right. Judging by your results so far you have a nice touch. Everything looks aged and faded and has a good few years on it but nothing is run down and is still in good shape.
The build has a lot of visual interest and variety without going too far.
I'm looking forward to seeing your details.
Thanks also for taking the time and pointing out the "what you learned".... this is great
and helpful information for many of us here on the forum.
Karl.A
Great tip on trying out the spray can on a piece of scrap first !!
The 'spitting' is often caused by a bad nozzle. I have saved several different nozzles from 'good' cans after they were empty.
Clear out the nozzle by inverting the empty can and blowing out the remaining propellant.
Remove the nozzle and save it so that you can swap it out next time you come across a bad or clogged one.
Karl.A
I had tried to use custom white balance with my old camera using a white background. I think I will either use a diffuser or gray card in the future. I have a LED Uberlight on my bench. I tried it several days ago with the new camera, but was not pleased with my results. I'll keep experimenting with lighting. Pictures posted today were shot RAW with late afternoon sunlight and were adjusted a little with the Nikon program that comes with the camera. I'm new at that. I usually use Gimp when I really need to manipulate things.
Marty,
I'm looking forward to starting the Lineside Shed. I think I will build it before I do a diorama as I want to incorporate both on the same base. I've been doing the fruit thing for 40 years. I really enjoy testing (and tasting!) new and unknown old varieties. We have an active group in the area that I help with and teach grafting to the newbies. I do need to slow down with that as I get older. One problem with my area of north California is that we don't have enough rainy, cold or hot weather to drive one inside.
Karl,
Thanks so much for your comments. Your and Brett's videos and tutorials were instrumental in lessening the learning curve with the chalks. I watched and re-watched your detail painting tutorial. I hope some of that comes through with the detail photos that I'll post soon. I still haven't finished the metal castings – they are blackened and buffed.
Hope someone avoids the problem I had spraying the windows/doors with spray paint. I always clear the nozzle after I spray and have never had significant problems in the past. That said, I'm not usually spraying something so critical. I had read your comments about saving nozzles on a previous thread and have a few saved already.
Shed is not glued to the platform yet.
Now some pictures with details set in the places Brett suggests with the kit photos. Thanks to Karl Allison and the late Kevin O'Neil's wonderful tutelage, I was not completely lost when I started this journey. I have a lot to learn and need lots of practice. That darn camera sure does show how sloppy I am sometimes.
>
Below are closeups of the details. I'm satisfied on the whole. I didn't get the saw right and will probably rework the drum. I painted outside the lines a few times, too.
Suggestions and criticism welcome.
David U
As for the true sander....
before you cut your big piece of wood into tiny legs use the sander to square off the end of the main piece.
(Because I generally have 20 things going on at my bench at any given time I mark the sanded end where the glue will go with a pencil dot so that I can keep track. )
Cut off your first leg. You now have a leg with one true square end with a dot on it that will be glued to the structure/deck/dock. The other not so square end will sit in the dirt, no problem.
True sand your main piece of wood again, mark the sanded end and then cut off another leg.
Repeat this process for as many legs as required.
You will now have all the legs you need, each with one perfectly square (and marked) end for gluing to the structure/deck/dock and they will all be the same length.
Cutting all your legs first and then trying to sand them may sound quicker/easier, but, trying to hold those tiny legs square in the sander is next to impossible, plus the fact you will be slightly altering their length in each case. Two causes of frustration that are easily avoided.
Hope this helped and is what you were asking.
Karl.A
I hear you about the camera thingy and getting white balance correct and such. I found that having any white in the image things look off. Thats why I use the green cuttung matt and a cluttered background, with out or bright objects, when I take pictures. The camera does a better job at getting white balance and exposure. However, when I do serious studio work (studio lights, backgrounds, etc) I take a picture of a colour correction card and set white balance against that.
Marty
Thank you oh wise one! Why didn't I think of that??? Makes perfect sense. Thanks for the acetylene tank approval. Hope you and Brett have a safe and productive trip to the EXPO.
Marty,
Appreciate the passing grade.
I found out about the white thing last week. I took a series of photos on a stark white background as some photo folks suggest. Just didn't work for me. Hard to get correct exposure even with spot metering. So yesterday, I went back to a gray background – a primer sprayed piece of cardboard. Worked better, but your method may be even better. Talk about a cluttered background – that's my bench! I have misplaced my gray color correction card, haven't done any serious photography since my old Nikon F film days and hours in the darkroom dodging and burning. I'm having fun.
MCRR,
Good thoughts. So far I haven't driven the wife nuts. Yesterday we had to stop on a busy city street to take the ultimate peeling paint photo in downtown Healdsburg. I really need to work on my story. That part of the hobby has not been given enough thought. Thanks for prodding me along that path.
Appreciate the complement on the work. I noted improvement in my techniques as I moved along this small build and thanks for checking in.
David U
I guess I'm a glutton for punishment, but I like to make my lights from scratch - I used some ngineering.com products to make them. They have a good line of parts that scale well using surface mount LED's. These lamps were made from the 18” HO scale aluminum lampshade, 6” escutcheon, 0.018” stainless steel tubing, #36 magnet wire I had on hand and warm white 0603 LED's that were purchased on ebay. You can also buy LED's from ngineering, Evans Designs or other model railroad suppliers as well as electronic parts suppliers like Mouser and Digikey. There is a definite learning curve working with small LED's as with so many things we do in this great hobby. I'll be happy to add some lamp making tips in the techniques section if I have any requests.
After making the lamps, I painted the shades with green craft paint and then with gloss coat. All of the gooseneck shades I've seen are shiny.
I made a jig to facilitate drilling holes in the lampshades and escutcheons.
The escutcheons are rather fiddly being an HO scale 6” or approximately 1/16”. You must drill a hole in the center and then thread the bugger onto the tubing. I think the frustration is worth it as it finishes off the installation nicely. Here the escutcheon is positioned for drilling.
And the end result. I then used a 400 grit sandpaper stick to remove the ragged edge made by the drill. I did that on the lampshade also.
The tubing and escutcheon is painted with Reaper blackened steel and given a light dusting of 411.3.
Before installation another test is done. I test at each stage of construction to insure that everything is still working properly. It is somewhat easy for the tiny parts to be damaged or a solder connection to come loose. I usually build 6 or 8 lamps at one time and even after making several dozen, an occasional light doesn't work.
LED's require a current limiting resistor or other means to control current so they don't fizzle out. This is glued to the inside of the Shed and two wires are soldered on and brought out under the Shed to power the LED's.
Back soon with installation on the Shed.
David U
Have you ever tried those pre-wired LED's sold on eBay?
David U
Marty
Bill, I have not used the prewired LED's, but if you don't already have a variable heat soldering iron with a tiny tip, you would probably be wise to go that route unless you are like me and want to do it all!
David U
I installed the lights with epoxy. Had some problem with this, as despite my care, epoxy showed up in unexpected spots. I picked it off as well as I could and used chalks to cover my tracks.
Here it is.
Lights on.
And at night to keep the vandals at bay.
Next, I need to place the details and start the scenery. This will be a real challenge for me. I'll probably just copy Brett's wonderful pictures and try to use Karl A's methods used in his tutorial “Dirt, Details and Dioramas” in the Scenery section of Forum Techniques. Thanks again Karl for that one as well as the detail painting tutorial and all the other things you contribute to the group and hobby in general. (I do see you stepping out to a least one other forum).
David U
Marty
DJ
James, Thanks for looking in - your approval and complements are really appreciated. The magnet wire is coated with an insulating resin like material such as polyvinyl. This is actually burned off at the same time that you tin the wire prior to soldering it on the LED. It is a little work and somewhat tedious, but like most things, one gets better with practice. I think I now have a good system.
HI DJ. How are things across the pond? Thanks for the approval. I get the tubing from ngineering.com. They are a great site with lots of helpful information. I started with their methods, but have modified them to work better for me. They do international shipping. I imagine their rates would be reasonable as their domestic shipping is the least expensive I have found. The tubing I use is thin walled stainless steel that measures 0.018 inches outside diameter. I have no problem threading 2 36 guage magnet wires through a straight tube. It gets a little more challenging when the tube is bent, especially in the Gooseneck configuration. I now thread the wire first, bend with a pliar that has one round jaw and then solder the LED.
loved everything about it.
Karl.A
I think that your Tool Shed Build was my first to study when I joined the SW clan. I have continued to watch your builds and marvel at what you accomplish. You are both an inspiration and an intimidation! I will never reach your level of modeling sophistication.
That said, I'll keep trying to improve. Just hope these old eyes and steady hands hold up.
What's next – well, I need to post the final details and maybe actually do the diorama. I have just a couple of things I want to do first.
On the bench is the Line Side Storage Shed. Siding is chalked. Knots are done. Need to do a little distressing of board ends before I glue on the siding.
After that I have the Wood Cutter's Shack and the MINE! Need to take it easy and hopefully not make too many errors. I'm planning to do a more detailed build this time so I can get more feedback.
Karl,
Thanks for looking in. I know you have been busy with the EXPO and getting the BOSS moved.
David U
I look forward to following your progress on the details.
(as you mentioned following Bretts pictures, that's all I ever do when building the kits.
basically I think that if Brett has spent so much time working on the perfect placement
and positioning of details for the pilot model, then that is the optimum composition.
Size, height and flow are all meticulously worked out, why change it ?... but hey that's just me....
I look forward to seeing your next steps.
Karl.A
If I can't find any tube here on this side of the pond I order it at ngineering.
DJ