visit sierrawestscalemodels.com

Duluth Company

edited August 2013 in HO Scale Builds
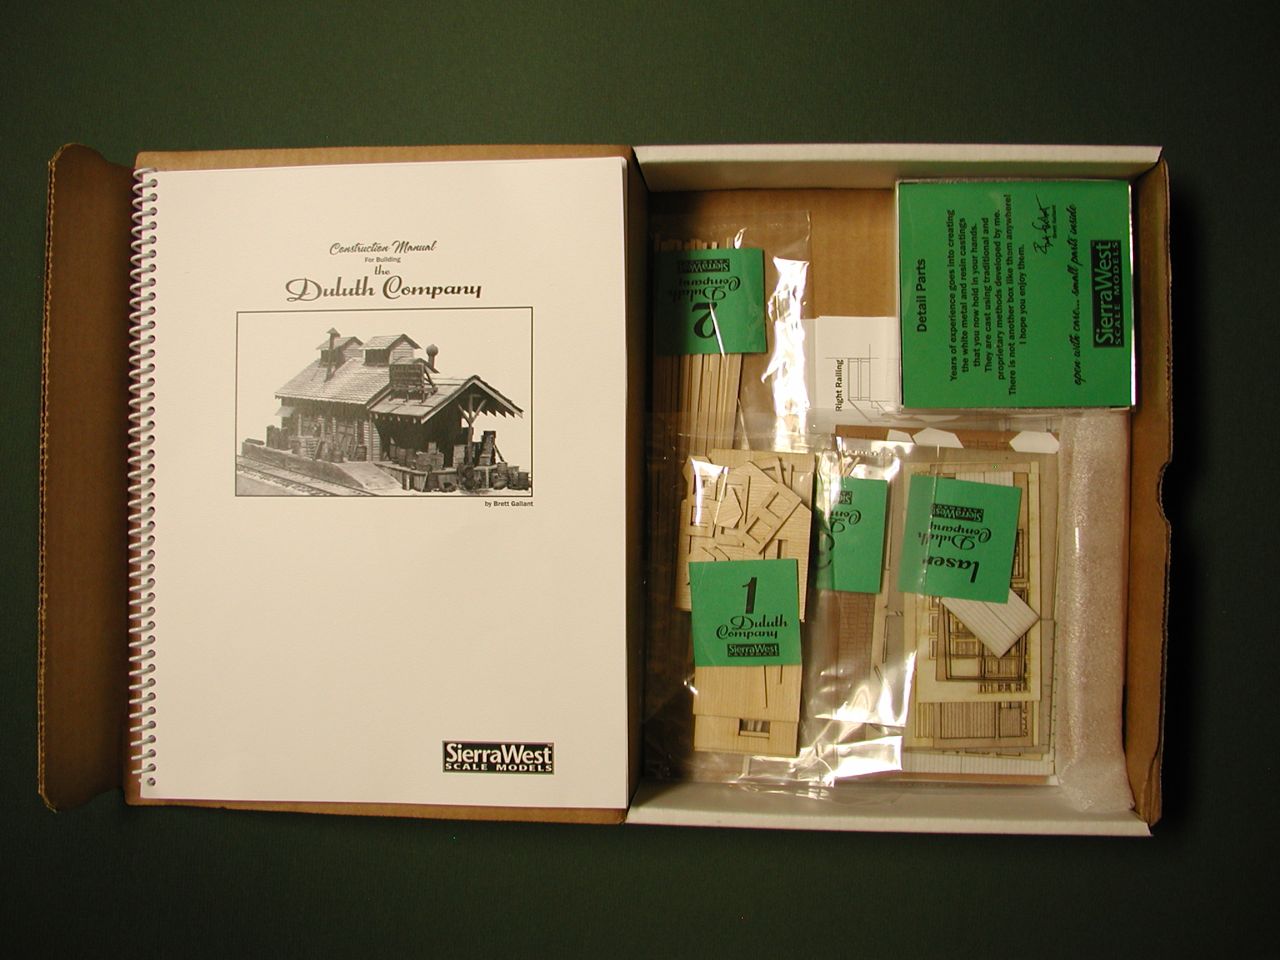
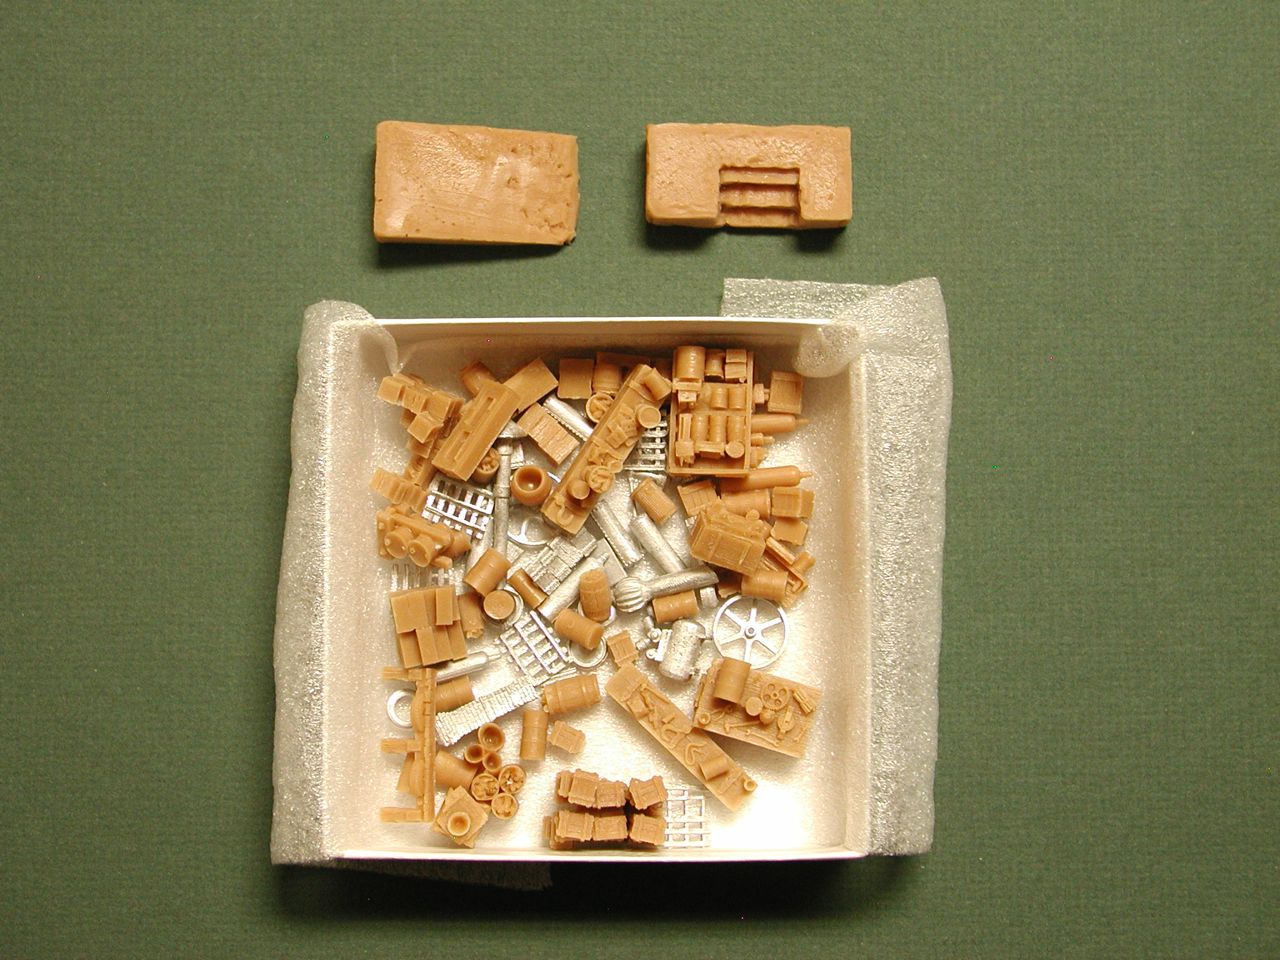
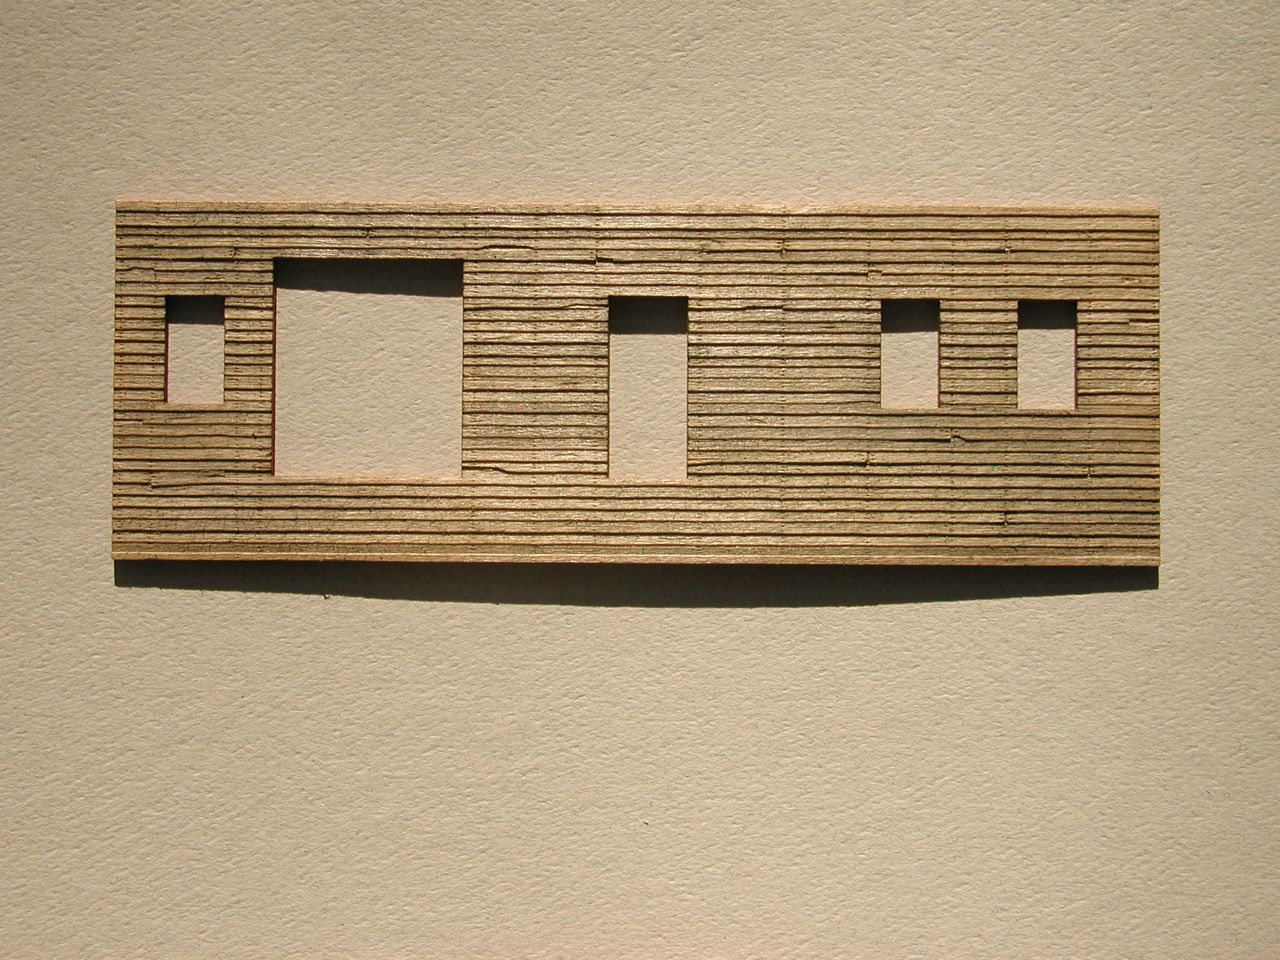
With the Backwoods Water Tank & Storage Shed build done I have decided to begin work on Brett's re-offer of Duluth Company Plumbing Wholesalers. This kit (No. 3004) was released in April of 2007 and sold out soon after. Brett re-offered this kit recently and of course I jumped at the chance to pick this build up. I decided on Duluth for a couple of reasons. Duluth's main structure is laser cut clapboard siding which I have not yet worked with. This siding is utilized in other SW builds I will be doing so getting my feet wet here was one goal. The shingle treatment, and concrete resin castings are also things I haven't done...and ya just got to love the covered yet open loading dock! Lots of detail, lots of character, should be a blast. I have included a picture of my first go at weathering and detailing a clapboard wall. More later....-Kimageimageimageimage
«13456711

Comments

  • edited August 2013
    I'm really looking forward to following your build of this kit Ken and seeing what you do with this great offering.
    Wonderful design work from Brett and loaded with those awesome castings we all love, resulting in another masterpiece. One of the first kits I bought from Brett.

    We're all going to enjoy this one....

    Karl.A
  • Excellent start . Wall looks really great. No bandaids used while peeling back those boards? I used a few on the fuel depot several months ago. Looking foward to an excellent build again and following along.
    Jim
  • I see forward follow to this build, the last one was terrific so I know this gonna be good

    DJ
  • I'm really enjoying this build already. Have all the clapboard done and the freight and access doors done. Will be posting a few pics soon.

    Karl, I have perused your finished build on Duluth, as I found it on a pointed web search. Once again, a build to motivate and aspire to! I like this one as it has a great "feel" to it and a bit more sophisticated feeling with the clapboard, doors, windows, concrete...but just asking to be weathered to that been around awhile look. Am going for a dirty, dusty look from being beside the tracks for years....we'll see...

    Jim, Haven't lacerated myself yet but it was in the back of my mind as I fiddled with that micro clapboard! Fuel depot has a bit more surface area I suspect so my time is coming.

    Thanks DJ, glad you'll be checking in time-to-time as I value your input.
  • Here are a few pictures of progress on walls and doors...image
    Walls "dirtied" up a bitimageimageimageimageimage
    Freight and access doors. These are not stuck together yet as I'm not sure I'm done with them.
  • I wasn't happy with the weathering on the doors yet so I attached the door trim and then ran a very small amount of dilute white glue along the bottom edge of the freight doors then dabbed on real dirt with my chalk brush to simulate the dirt and grung that would accumulate and get trapped along this bottom edge...??image
  • Oh, and filled in the missing row of nail holes on one of the walls...
  • I like the detail of the dirt on the bottom edge at the doors I keep that in mind.
    Nice coloring to, give a nice warm feeling, just like a real old building its needs to have some charm ;)

    DJ
  • Good looking start Ken, walls and doors look good. It's the extra little touches that make a big difference. Nice work.

    Karl.A
  • DJ, The color of the walls looks a bit anemic in the pictures but they are a bit more rich looking in actuality. I thought the dirt made a big difference if you scrutinize each door.

    Karl, Thanks and these laser cut doors and trim are a bit more challenging to weather. I really enjoy doing what I can to get there with them. As I remember, you took me to task on the doors for my Tool Shed build and so glad you were on top of that! Since then I have paid particular attention to that process and like doing it.
  • Ken the dirt on the bottom of the walls is a nice touch, I'll have to remember that one for my next build.
    Are you going to leave the building as weathered raw wood? or will you apply some paint colour to the walls?.
    cheers
    Dave
  • Hey Dave, Well...actually the walls were lightly colored with a Floquil Depot Buff diluted wash and then before completely dry very lightly brushed with the brass brush giving it the aged dirty look. The pictures make it look like the walls need a blood transfusion! They look a bit more "colorful" in actuality and I'll try and get some outdoor pictures that give a more accurate reflection of the true tone which is a muted yellowish color (ie Depot Buff) I did however, want to stray from the classic bold yellowish color that I have seen on this build and get a more toned down dirty trackside look. That gives the dirt on the bottom of my doors some plausibility! I also used Polly Milw. Road Maroon rather then the Box Car Red, which the manual calls for, on the door trim which leans towards the brownish red side. Again, pictures make the trim look brown. Ken
  • The finished doors and windows are installed. A bit better on capturing the actual coloring of the walls. Still a bit washed out compared to what's in front of me. I am going for a mild worn look but more on the dirty and unkept side like a trackside business would be. I weathered the doors and windows mostly with fine powdered real dirt and some chalk. I detailed one rear window that has a deck below it so the "stuff" on the sill would be at a correct height for LPs to place it there while working right outside the window. Will see that later...next is the assembly of the four walls and the roof work.
    Kenimageimageimageimageimageimageimage
  • edited August 2013
    Really looking great Ken, everything is nice and subtle as it should be, but far from dull and boring. Very nice.

    Karl.A
  • Thanks Karl, really enjoying the work on the windows and doors. Good preparation for Essentials!
  • Hey Ken,
    The walls look fantastic. The nail holes are really well done ( I am always in a quandary about adding them). It looks like a little more dust has settled on the bottom of the windows. I don't know if it the picture or not but I like the effect. Nice effect with bottle and rag in the window! With all the cool things you have done so far, you wont have any problems with Essentials. You don't need any warmup for Essentials that is for sure!

    Jim Richards
  • Hi Jim, with nail holes for HO scale, less is more for sure. The nail holes need to be there on this type of siding in particular but they need to be small and subtile and that's what I was shooting for. Dirty doors and windows from being track side and I side used real dirt sifted really fine. I cut the bottle off another casting to put on the window sill! Just glued up the 4 walls and will post that result soon......thanks for following along...Ken
  • walls look great, wonderful job do far...
  • Thanks Brett, I had a blast with the siding, windows and doors. Such a treat to work with such high quality materials. On to the next order of business.......Ken
  • Great start. Particularly love the colouring and dirt at the bottom of the doors.
  • Hey Joel, Thanks for the note. First time trying real dirt for weathering and like the look so far. I have posted a few pics of the completed and assembled walls. Although indoor shots, the color is a bit more in line with actual. Working on the roofing and cupolas.imageimageimageimageimage
  • Just noticed how the flash made the corner trim where it meets the siding look white like bare wood...yuck...I added a shot without flash to show this is an artifact of the flash not that I didn't color the corner trim all the way around.....like you were all thinkin! Kenimage
  • Hmm.......

    Karl.A
  • Karl, OK...you're not goin to leave me with just a Hmm are ya? Really....it was just the flash I swear...
    Ken
  • Here are a couple of pictures outside with the roof on and shingles up to the point where the cupolas are put on. Shingles are detailed and weathered later...Kenimageimage
  • edited September 2013
    Very nice outdoor shots. I like the color and overall run down look alot. Very nice Ken and I if I must say a perfectly manicured yard in the background for such a nicely rundown building (LOL). Great job!
    Jim Richards
  • Hi Jim, Yea, workers have their priorities messed up. Pictures give the feel of a bit more run down building than it looks in front of me. Next series of pics will be with the roof and cupolas done which add a good bit of character to the build. Thanks for the note and always good to "talk" with you...Ken
  • Sorry Ken, I forgot I had posted that, I was just going to mess with you a little, but I got distracted for a few days.

    The walls look terrific and the doors and windows are superb. I really like the collected dust effect you achieved on the glass, very nice.

    The soda bottle holding the window open is a nice touch also....

    Look forward to seeing the roof and cupolas.

    Karl.A
  • Ken that looks great. I love the colouring youve achieved on the siding.

    The weathering on the wood (whatever the structure is sitting on) is also very cool.
  • Hey Karl, Thanks for the note and ya know...I'm sensitive to your subtlety and a "hmm" was an ominous sign...I just knew you were going to take me to task on the white corner trim! Havin a blast with this build as usual.....

    Technical question....wouldn't you assume that with a double hung window, the lower sash, when opened, would stay open by itself through the inherent construction of the double hung window? I'm reluctant to prop open every open window I build as it may get to be too much of a good thing. I'm thinkin more like....one here and there on ones that won't stay open due to age.

    Hi Wes, nice hearing from you. Thanks for the thumbs up on the build...so far...
    The nicely aged wood Duluth is sitting on is the top rail of my deck....maybe I'll cut some off and buck it up for some strip wood for my next build?
Sign In or Register to comment.