
Howdy, Stranger!
It looks like you're new here. If you want to get involved, click one of these buttons!
Categories
- 923 All Categories
- 3 Picture Posting and Resizing
- 54 New Member Introductions
- 111 Off-Topic Forum
- 4 Photography
- 2 Resources
- 16 New Product Information
- 166 The SierraWest Forum
- 9 Brett's Blog
- 117 General News & Ramblings
- 3 Re-Release Information
- 6 Q & A about SierraWest
- 9 What Would You Like to See?
- 362 Builds
- 131 HO Scale Builds
- 155 O Scale Builds
- 59 Finished SW Build Pics
- 12 Miscellaneous Builds
- 187 Techniques
- 19 Working with Wood
- 20 Painting Castings
- 5 Masonry
- 23 Scenery
- 36 Tools and Supplies
- 21 Layout Planning & Building
- 38 Miscellaneous
- 24 Prototype Information
- 22 Reference and Research
Machine shop at Deer Creek
Evening all.
After a big change in my life over the last couple of years I finally decided to get my act together.
I have a few (quite a few) of Bretts' kits sitting in packing boxes for the past couple of years I decided to break one out and have some fun.
I had started the machine shop at Deer Creek some time ago by building the water tank and thought I might go the whole hog and build the rest of the diorama.
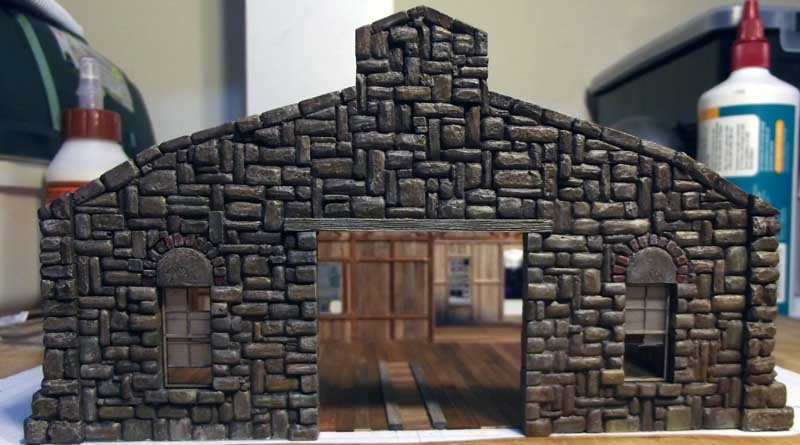
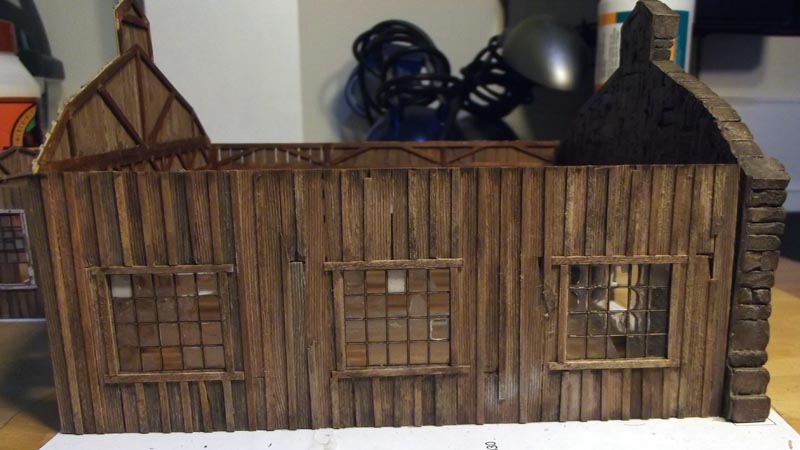
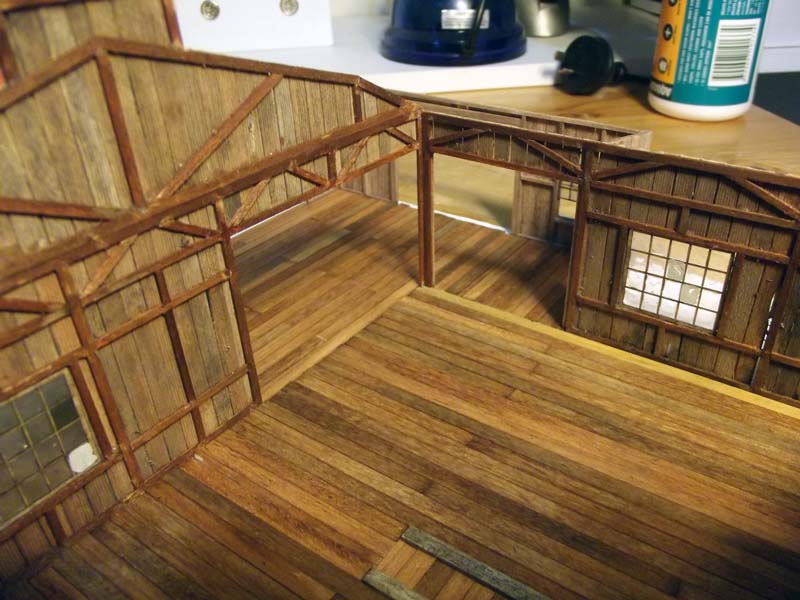
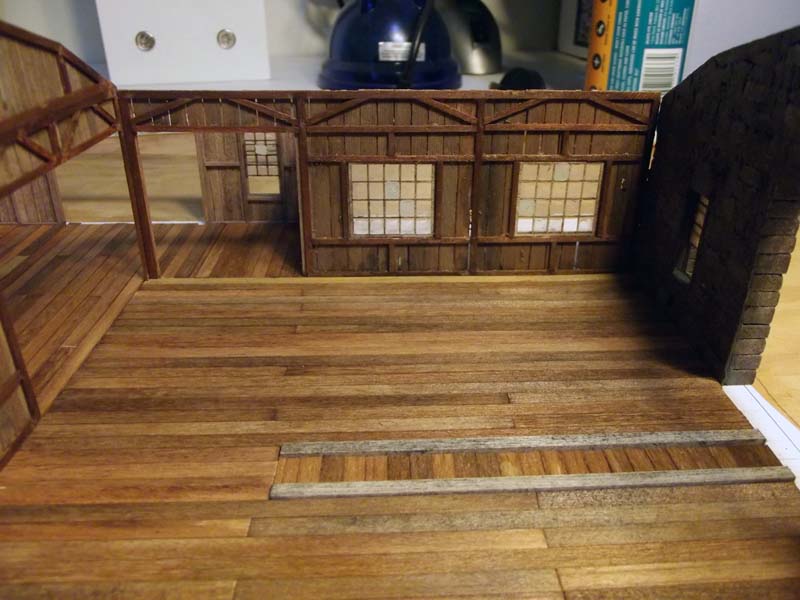
Having cut a piece of good plywood (with a blunt handsaw, hence a slightly bigger piece than called for in the instructions) I set about building some walls and painting the front wall casting.
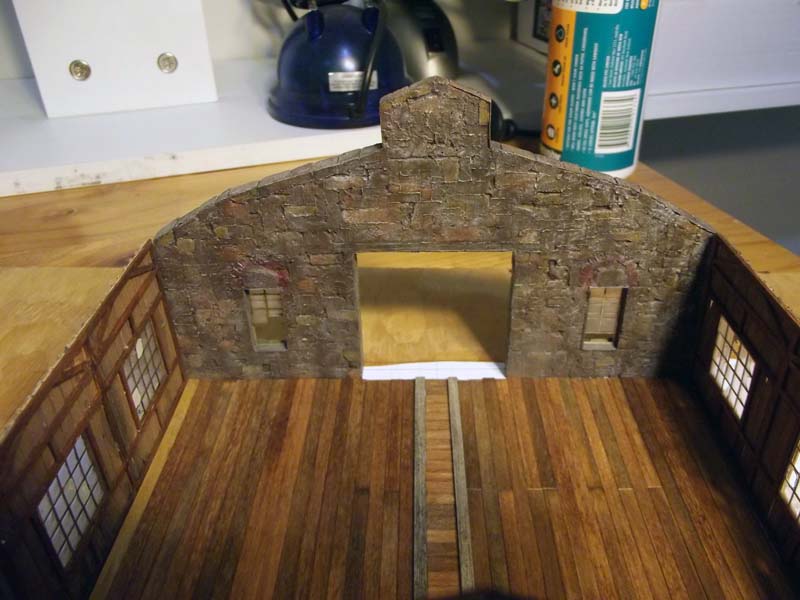
The main building is weathered as though it has been around longer than the machine shop extension which is relatively new.
For some reason the stone front wall looks shiny in the photos, I'll have to wait for a clear sunny day to take some better photos.
The colour of the flooring is a stain called old blackwood which I believe stains pine to create a colour similar to baltic pine, this then had a wash of black a/i on the main shop floor.
Here are the results of the last couple of days efforts.
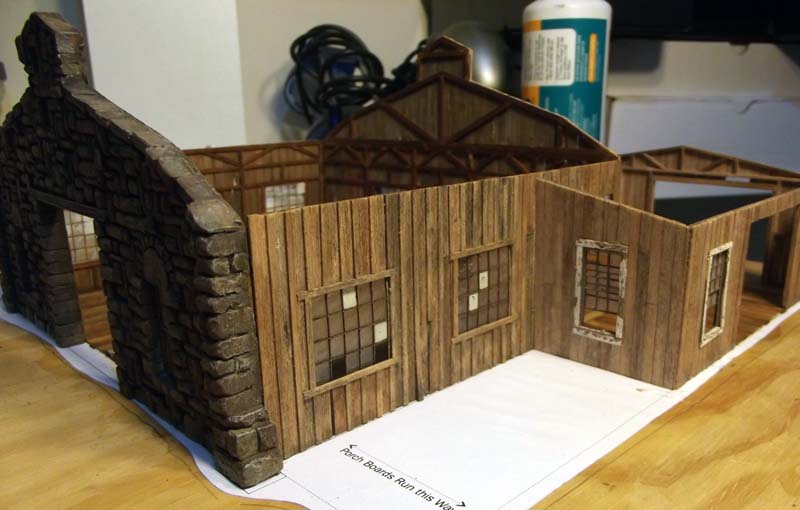
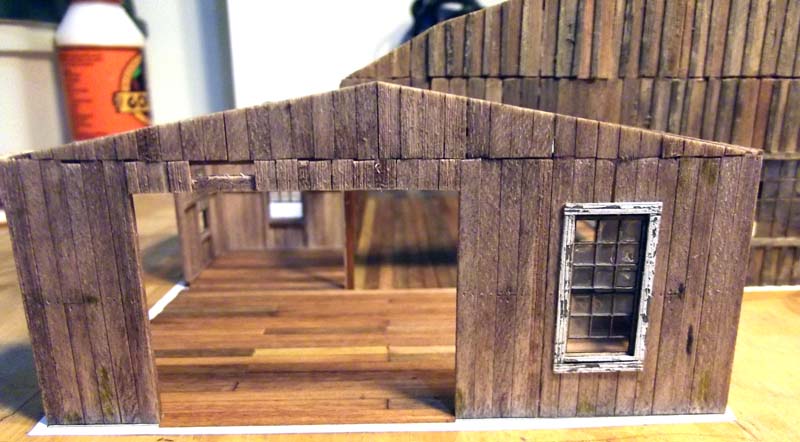
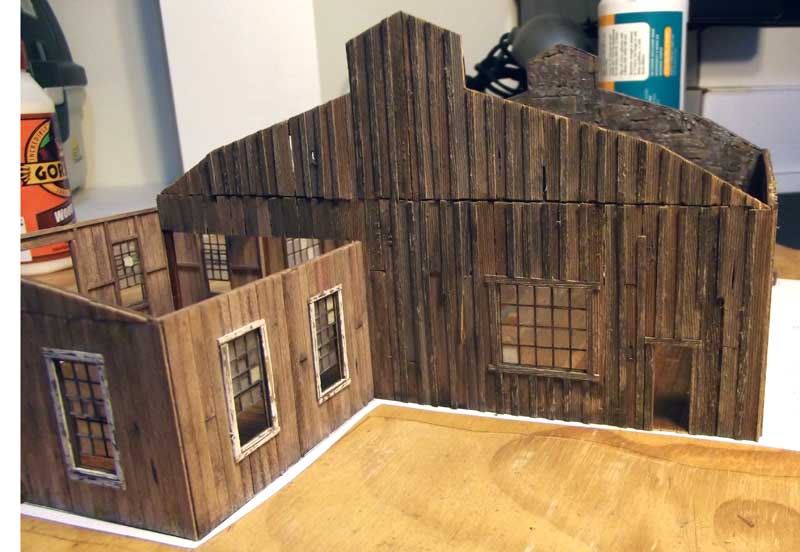

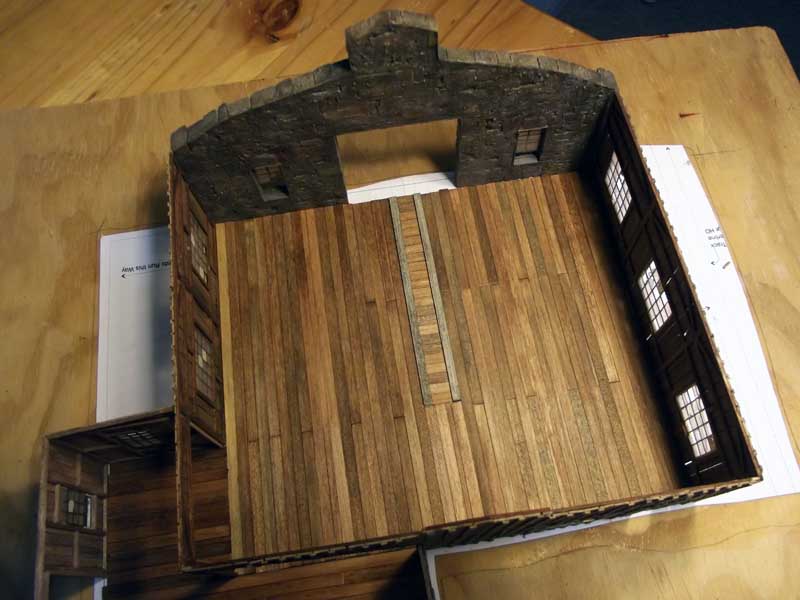

Might take me a while to finish but at least I'm feeling motivated to get something done.
cheers
Dave
After a big change in my life over the last couple of years I finally decided to get my act together.
I have a few (quite a few) of Bretts' kits sitting in packing boxes for the past couple of years I decided to break one out and have some fun.
I had started the machine shop at Deer Creek some time ago by building the water tank and thought I might go the whole hog and build the rest of the diorama.
Having cut a piece of good plywood (with a blunt handsaw, hence a slightly bigger piece than called for in the instructions) I set about building some walls and painting the front wall casting.
The main building is weathered as though it has been around longer than the machine shop extension which is relatively new.
For some reason the stone front wall looks shiny in the photos, I'll have to wait for a clear sunny day to take some better photos.
The colour of the flooring is a stain called old blackwood which I believe stains pine to create a colour similar to baltic pine, this then had a wash of black a/i on the main shop floor.
Here are the results of the last couple of days efforts.
Might take me a while to finish but at least I'm feeling motivated to get something done.
cheers
Dave
Comments
Looking foward to seeing what you do with this kit. I have only seen a few finished pictures on the Sierrawest web site. This looks like a really great kit with lots of character and you are off to a great start. I really like the walls and windows, you have given the outside walls and windows a nice aged patina. Did you do this with chaulks or stains? Keep it coming.
Jim
Karl. A
thanks Jim, the walls are coloured with a combination of chalk and inks using Alcohol and thinners.
Thanks Brett, my premise with the windows is that they have been recycled. I can imagine the fun with the casting.
Karl I hope I can do it some justice, I haven't built one of these types of kits for quite a while and am trying not to rush to finish it.
We had some sunshine today so I took a couple of photos outside, gives a better representation of the colouring.
Built the crane today trying something different for the aged gray colour I think it turned out quite well, may need a tad of darkening.
I used a similar method on the engine porch.
I have also darkened the interior flooring, looked great as a house floor but not so much as an industrial floor. I'll give it more weathering once the track is laid properly and some of the casting are painted.
The water tank was completed some time ago and I haven't quite finished it yet although I'm generally happy with the colouring and weathering on it.
Thanks for following comments always welcome, I have a thick skin so feel free with the advice.
cheers
Dave
Really nice job, that water tank is beautiful.
Karl.A
The water tank side will be a little "greener" than the crane side which I am looking at making more industrial.
for some strange reason the casting appear shiny or wet, Seem to be an anomaly of the camera.
Might have to borrow my good camera back from my daughter.
cheers
Dave
Brownbr thanks for the comments, I'd like to take more progress type shots but the lighting I have is not great for this. One day I'll invest in some decent inside lighting.
Kkarns thanks, I've been enjoying your backwoods water tank build, really need to make comments more often.
Karl thanks for the compliments, lighting really makes a big difference for taking photos.
cheers
Dave
Once I work out placement I'll make a start on some final scenery work in this area.
Suggestions most welcome.
cheers
Dave
I like the stacks laying around and you may be able to camouflage the out of scale ends with another casting laying close to it.
KK neither of us, you have to do things when you have the time.The ties are the same size more or less but the ones for the track are sunk in to the ground and are darker. However I decided to thin them a bit as they do look larger, possibly from the old forced perspective thing.
brownbr yes they do look a bit too red, I'll leave them until I get more scenery down and do a bit of blending to tone them down. I'd love to do tie plates but have already glued the track down. I have an idea that might work and will have a play with that.
Thanks Joel and Wes, weeds have begun growing still playing with which ones will give me the look I'm after.
spent some of today doing the mill engine porch. Photos below. I'll be doing a bit more blending and chalking once the glue dries, then work on the roof.
I have to say there is certainly plenty of entertainment value in Bretts' kits on a cost versus benefit basis, cheaper than any other form of paid entertainment.
cheers
Dave
There is definately alot of bang for your buck in Brett's boxes.
Karl.A
I've been playing with the scenery a bit and thought I would try to replicate the "buries in the long grass" look of the junk piles at my brother-in-laws farm.
I bought a noch grassmaster some years ago and have never used it and thought it might be time to give it a go. Comments and suggestions would be appreciated. When I first did it I wasn't sure I liked it as it seemed a bit too green but having looked at it a few times the underlying green looks quite good in real life.
I've tried to maintain patches of dirt around some of the details.
Also put the roof on the mill engine shed and added some of the internal details. Need to do a bit more with the roof.
cheers
Dave
I think the added weeds is cool. One question though, I thought the idea of the Noch tool was to get the fibers to stand up straight. It looks like your weeds have been trampled through. It might be my small screen (I'm viewing on phone not computer.)
Keep up the good work!
thanks for the comments. The weeds do look trampled, I ran my finger lightly over them to make them "not so straight". I'd recommend practicing on a blank before using it on a proper project.
Did a bit of dulling down and made a start on the roof. Not sure if I like the grey at this stage but it does look better in person. I'm "mossing up the other side of the roof at the moment will post pics when I'm happy with that.Stupid me picked the "lots of roof side" to do this on.
Added another pile of rusty objects (from an old tank kit) will add weeds and blend later.
I'm thinking of putting some activity inside the main building, possibly a flat car or box car under repair. I've placed a logging bunk in there to get a feel for size.
The machinery belts are in place, not the best job but it's really hard threading these with the overhead gear in place. Looks quite reasonable with the roof on though.
Have been quite busy lately so not a lot of posting. I really need to make an effort to post some construction type pics but it's usually dark when I model and my lighting is not great for photos.
cheers
Dave
all suggestions welcome.
cheers
Dave
cheers
Dave
Shay the water hoses are bendable wire included with the kit, I spent a fair bit of time molding them to the details.
Thanks Ken, working on different types of trees to see which suit best.
Did a little bit of work on some doors and scenic polishing.
I added some colour with a plant that could either be thistles or a plant in Australia called both Pattersons curse and salvation Jane.
Added the doors to the workshop. The hinges were made from rusty coloured paper with a piece of styrene rood for the hinge pin. The "bolts" to attach the hinges to the door are dabs of acrylic lead light paint applied with a toothpick, gives a nice dome shape, although I need to spend a bit more time getting them all even sized.
Again suggestions most welcome.
cheers
Dave
I also wondered about 'the' shovel
Karl.A