
Howdy, Stranger!
It looks like you're new here. If you want to get involved, click one of these buttons!
Categories
- 923 All Categories
- 3 Picture Posting and Resizing
- 54 New Member Introductions
- 111 Off-Topic Forum
- 4 Photography
- 2 Resources
- 16 New Product Information
- 166 The SierraWest Forum
- 9 Brett's Blog
- 117 General News & Ramblings
- 3 Re-Release Information
- 6 Q & A about SierraWest
- 9 What Would You Like to See?
- 362 Builds
- 131 HO Scale Builds
- 155 O Scale Builds
- 59 Finished SW Build Pics
- 12 Miscellaneous Builds
- 187 Techniques
- 19 Working with Wood
- 20 Painting Castings
- 5 Masonry
- 23 Scenery
- 36 Tools and Supplies
- 21 Layout Planning & Building
- 38 Miscellaneous
- 24 Prototype Information
- 22 Reference and Research
The Backwoods Water Tank & Storage Shed

Here's a real classic! Kit No. 202 Released March 1997 and long since sold out as most of Brett's outstanding kits usually become quite quickly. Let me preface this modest, but for me quite challenging, build with my thoughts on the subject of Brett's kits that are no longer available through SierraWest.
I called Brett and expressed my take on the subject as follows; just as Brett is committed to producing the finest scale model kits available on the planet, his customer base should be just as committed to do whatever we can to promote and help grow SierraWest. I told Brett I will never purchase a SierraWest kit from another source if it is one that Brett still has available or is planning to make available in the near future. I made this call as I obviously did not purchase the kit featured here from Brett for reasons already noted. Brett expressed his appreciation and this reflects my philosophy and, albeit small, support of SierraWest.
I wanted to put down a more structured thread on this build such as the ones I have so much enjoyed following. I'm starting out slow and featuring a few pictures of the kit and it's contents with a few comments.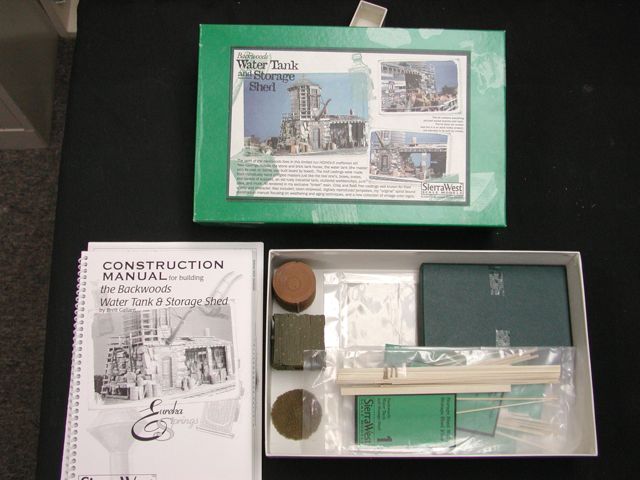 The Backwoods Water Tank & Storage Shed Kit No. 202 March 1997
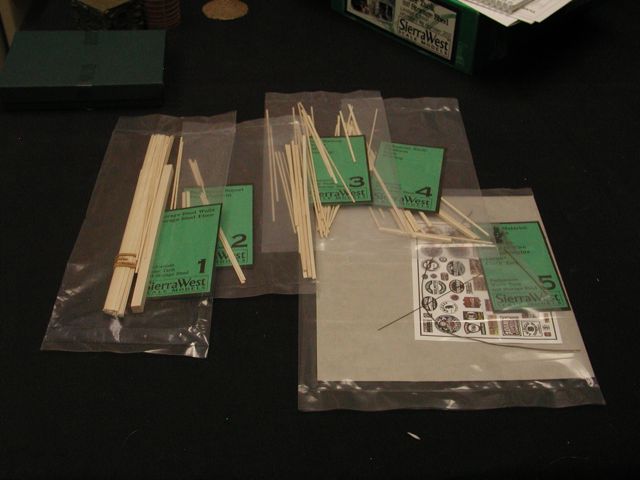 Shot of the strip wood bags, looks manageable!
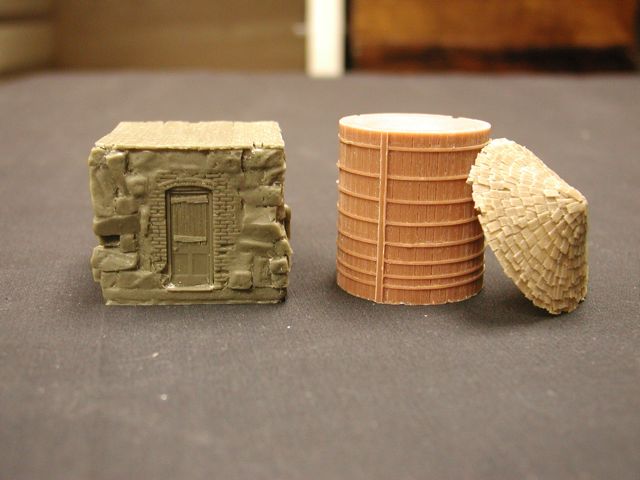 Here are a few of the main castings; The single piece resin cut stone pump house, water tank, and resin water tank roof.
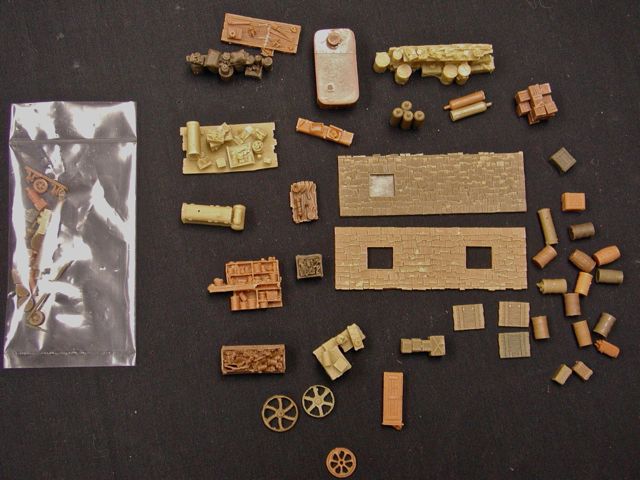 Shot of all the castings. Note the lack of any metal castings and the emphasis on grouped resin castings.
I called Brett and expressed my take on the subject as follows; just as Brett is committed to producing the finest scale model kits available on the planet, his customer base should be just as committed to do whatever we can to promote and help grow SierraWest. I told Brett I will never purchase a SierraWest kit from another source if it is one that Brett still has available or is planning to make available in the near future. I made this call as I obviously did not purchase the kit featured here from Brett for reasons already noted. Brett expressed his appreciation and this reflects my philosophy and, albeit small, support of SierraWest.
I wanted to put down a more structured thread on this build such as the ones I have so much enjoyed following. I'm starting out slow and featuring a few pictures of the kit and it's contents with a few comments.
The Backwoods Water Tank & Storage Shed Kit No. 202 March 1997Shot of the strip wood bags, looks manageable!Here are a few of the main castings; The single piece resin cut stone pump house, water tank, and resin water tank roof.Shot of all the castings. Note the lack of any metal castings and the emphasis on grouped resin castings.
Comments
Jim, Should have fun with this one as it will be my first go at stone and brick work. The pump house will make or break this build!
Alan, glad you agree and that you got what I was trying to convey. You put it down quite well and thanks for expanding on the concept.
I decided to go with a deep backwoods feel where the cut stone would be damp and moss covered. The other builds I have seen, the pump house is much lighter stone giving more of a western look. I wanted this to look like is was tucked under some fir trees and heavily shaded and damp. Anyway, my first attempt at stone and brick work. A few more minor details are going to be added. On to the water tank....-K
I like the idea of the stone being damp and moss covered. Keep posting those progress pics.
Might give more definition to each stone.
Wes, the pump house and water tank are big chunks. Yea, seemed to me that it would make sense to be a damp area. Anyway, makes my dark pump house fit in better to that scenario!
Bryan, thanks I checked out AK interactive but did not locate the "slime green" wash. Will look again.
Alan, good suggest. Will try either some darker chalk run in with pra, or AI.
Larger pics were/are just fine. They are showing up for everyone and certainly were not removed by administrators. As long as the file size does not exceed 150k or so the image can be as big as you dare to show us !!!
Elliot had the same problem last week not being able to see his own pics while we were all enjoying them.
Keep up the great work and progress reports.
Karl.A
Your work looks really awesome, its actually quite unbelievable how goog it looks knowing you just started doing this kind of stuff a little while ago.
Could you give the real rookies out there a run down on who you got the stone pump house so nicley detailed. A step by sep scenario so to speak....
Thanks a lot in advance. us-okrim
A medium to dark green chalk will give you the tint you are looking for, plus you can build up a little texture with the chalks, kinda like heavy rust, but green, to show growth. Also work in some colour variation by mixing in some white for a lighter green to show highlights.
There are a plethera of chalk colours, plus an infinite mixing ability/variety, if needed.
Wargaming paint such as "Angry Troll Armpit Green" may be the perfect colour for the moss you need, but is easily reproduced, and with the bonus of texture.
Keep us up to date...
Karl.A
Now there is a paint colour name you can easily grow to love. :-)
I agree with the use of the chalks. Colour, texture, and can add more later if you want more depth. Like what I did here on this truck.
Wargaming paint such as "Angry Troll Armpit Green" may
Now there is a paint colour name you can easily grow to love. :-)
I agree with the use of the chalks. Colour, texture, and can add more later if you want more depth. Like what I did here on this truck.
http://www.ak-interactive-usa.com/product-ak026.html
Karl, Yup..I think that's the right path to get more texture. Didn't have the right greens so just placed an order for a palette of green Rembrandts from Dick Blick.
Alan, as above...love the wheels on your truck..I assume your planning to "crap up" the wood truck bed! or did it just get replaced when the old one fell off on the road?
Bryan, these names for the colors cracks me up! So it's "slimy grime", can you get a pic of where you used it?
Here are some more pictures....The first is the resin shed roof pieces that are simulated wood shakes. Ditto for the water tank roof second and third, and finally a shot of the water tank.
sfc
Yes the bed of truck is new. The former (fired) employee backed into a rock wall and tore the metal bed to .....
The company could not afford a new one!
Thanks for the rundown on the stone pump house. This helps a lot.
You progress looks great. I really like the water stains at the bottom of the water tank. And I agree with Mike. Could you give us a quick explanation on the water tank as well? I assume you started with spraying the entire casting with Floquil earth Spray as well. How did you build up the texture and what colors did you use? I can see some drybrushing in that picture as well ( Floquil Boxcar Red?)
Again, thanks a lot Ken, for all your explanations.
The tank really looks great, lots of definition and variation. Can't wait to see what you do to it next.....
Karl.A
Karl, thanks and appreciate you following along as your wisdom is highly valued...
I have attached pictures of my first batch of prepped strip wood. This grouping is for the shed walls. I used a stain mixed up on my bench from Floquil Dirt and hand applied and brushed rather than the soaking technique....still a manageable amount of strip wood in this kit. That will soon change as my next build will be much larger......slowly working up!
The base of the water tank looks superb. I like the various colors of he individual rocks, the bricks, and the door. The door looks old and faded. This stone and brick is very natural in its color as well. The tank and shingles look like real wood. Excellent job! Do you use photos to color the resin castings to get your colors the way you want or are you doing this simply by eye?
Jim