
Howdy, Stranger!
It looks like you're new here. If you want to get involved, click one of these buttons!
Categories
- 920 All Categories
- 3 Picture Posting and Resizing
- 53 New Member Introductions
- 111 Off-Topic Forum
- 4 Photography
- 2 Resources
- 16 New Product Information
- 165 The SierraWest Forum
- 9 Brett's Blog
- 117 General News & Ramblings
- 3 Re-Release Information
- 6 Q & A about SierraWest
- 9 What Would You Like to See?
- 361 Builds
- 131 HO Scale Builds
- 154 O Scale Builds
- 59 Finished SW Build Pics
- 12 Miscellaneous Builds
- 187 Techniques
- 19 Working with Wood
- 20 Painting Castings
- 5 Masonry
- 23 Scenery
- 36 Tools and Supplies
- 21 Layout Planning & Building
- 38 Miscellaneous
- 24 Prototype Information
- 22 Reference and Research
Rigging Shed
I got started on this a week or so ago and am making faster than expected progress. This is my first SWSM model, in fact it is my first O scale structure. Coming from N the details are fascinating to me.
I tried several wood coloring experiments but in the end used the colors and techniques exactly as described in the construction manual. I have the Trackside Trio and plan to build them in varying degrees of disrepair with this one being the most derelict. I got the trio because I called Brett to order this kit and he insisted that I would like the castings in the Woodcutter Shack much better. I kindly said thanks but send me the Rigging Shed and then ordered all 3. I need an intervention or something.
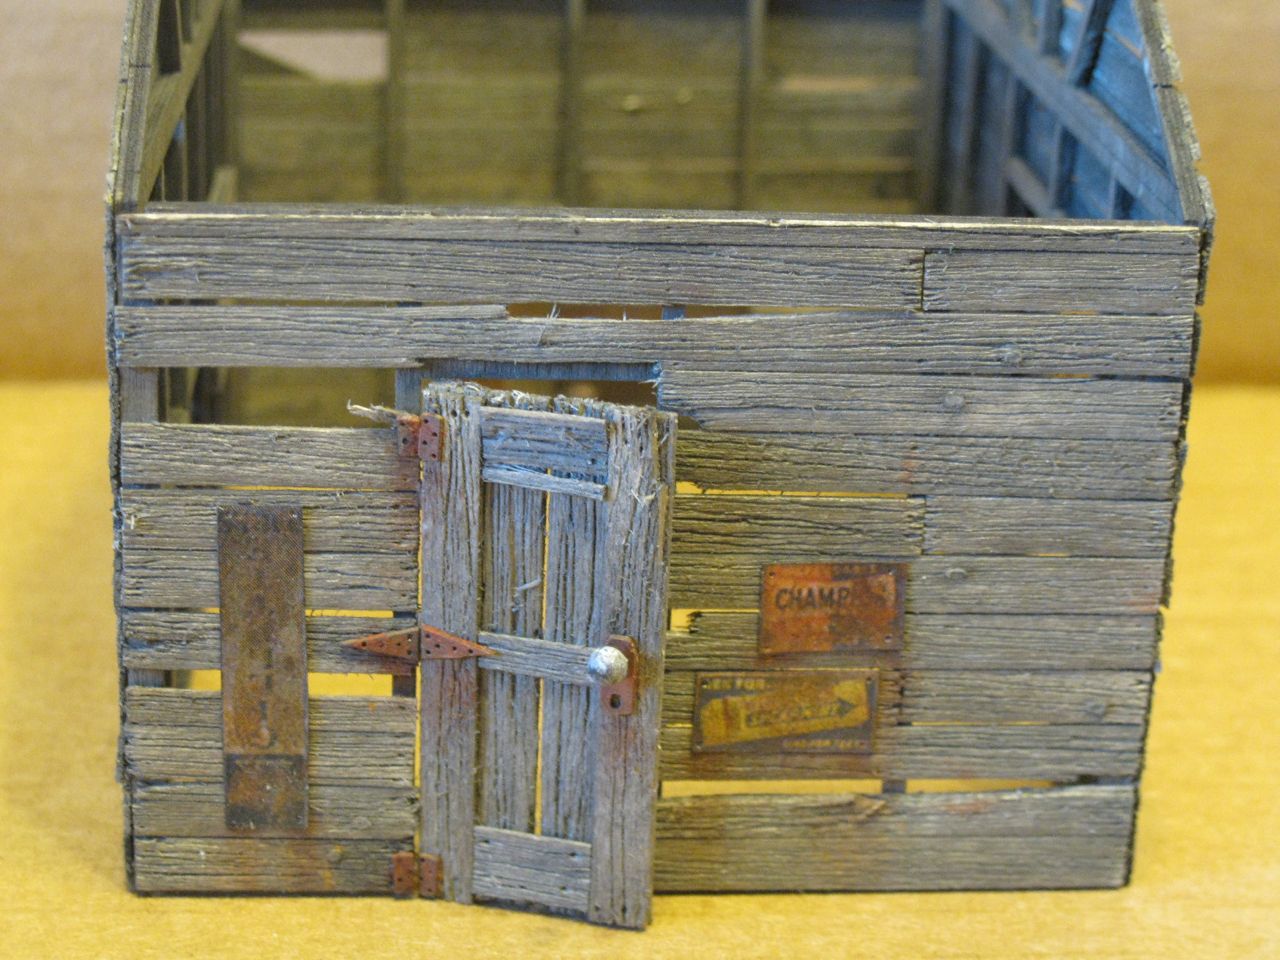
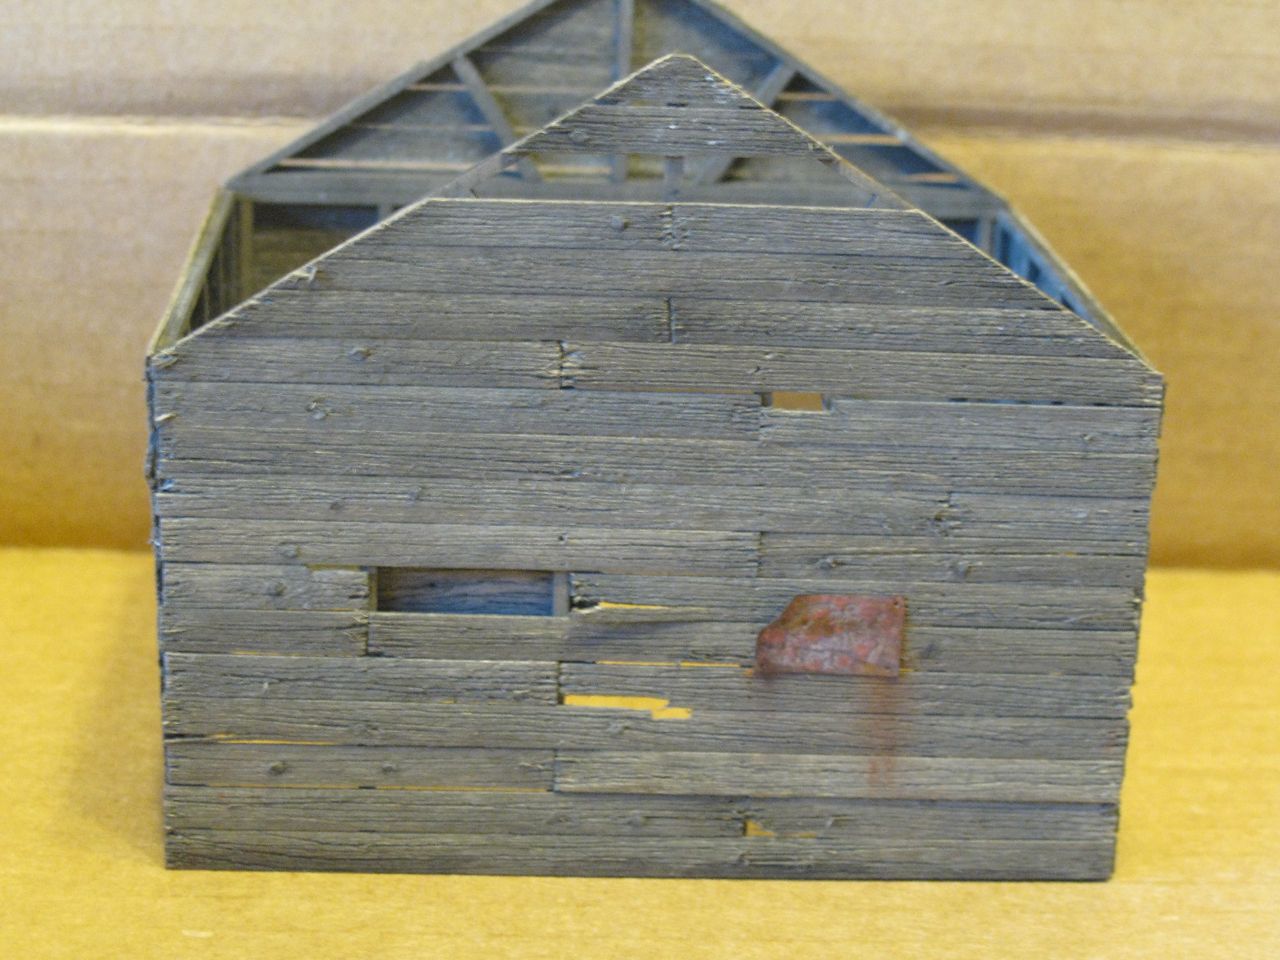
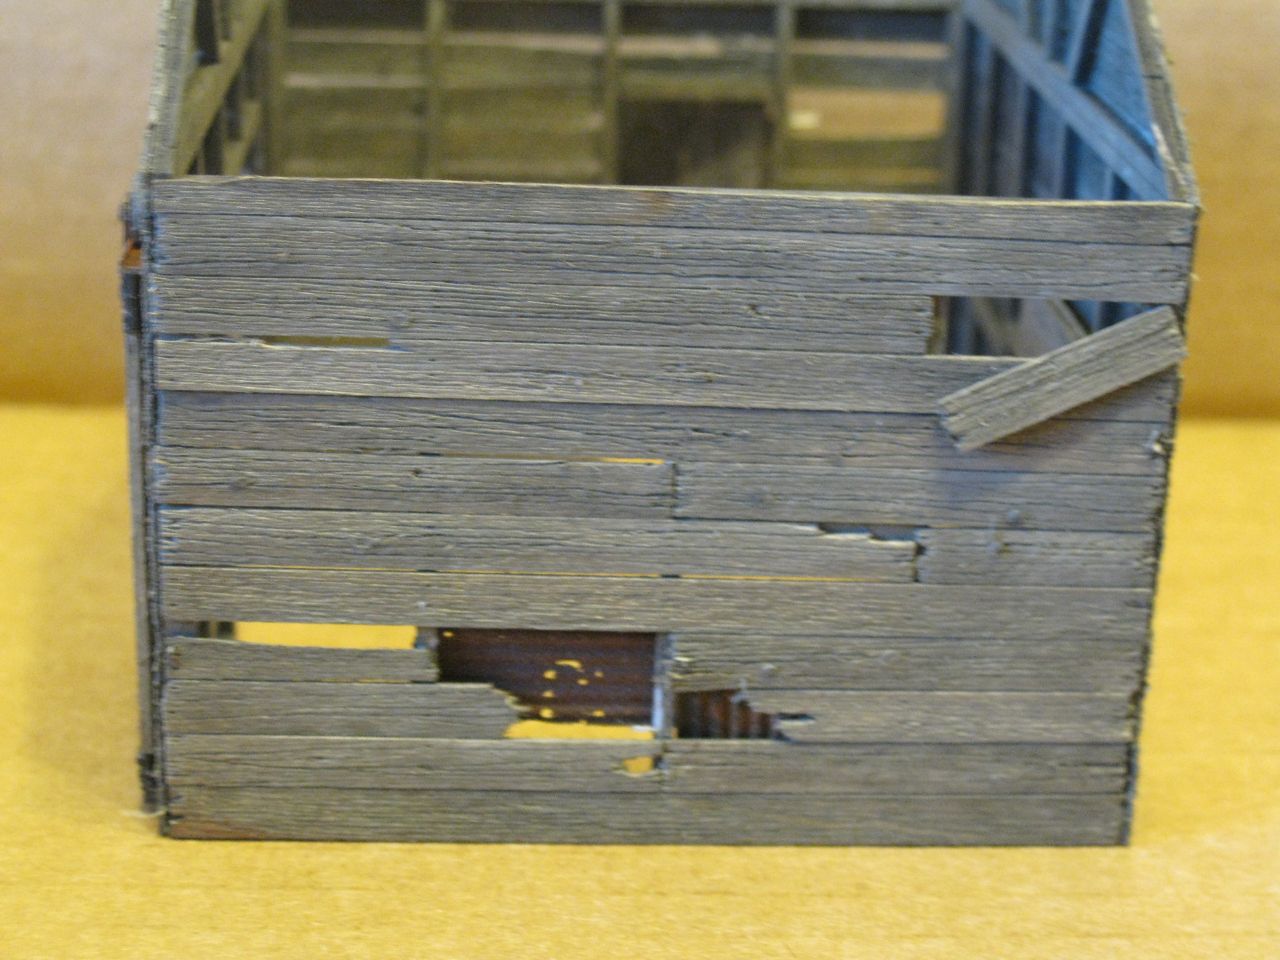
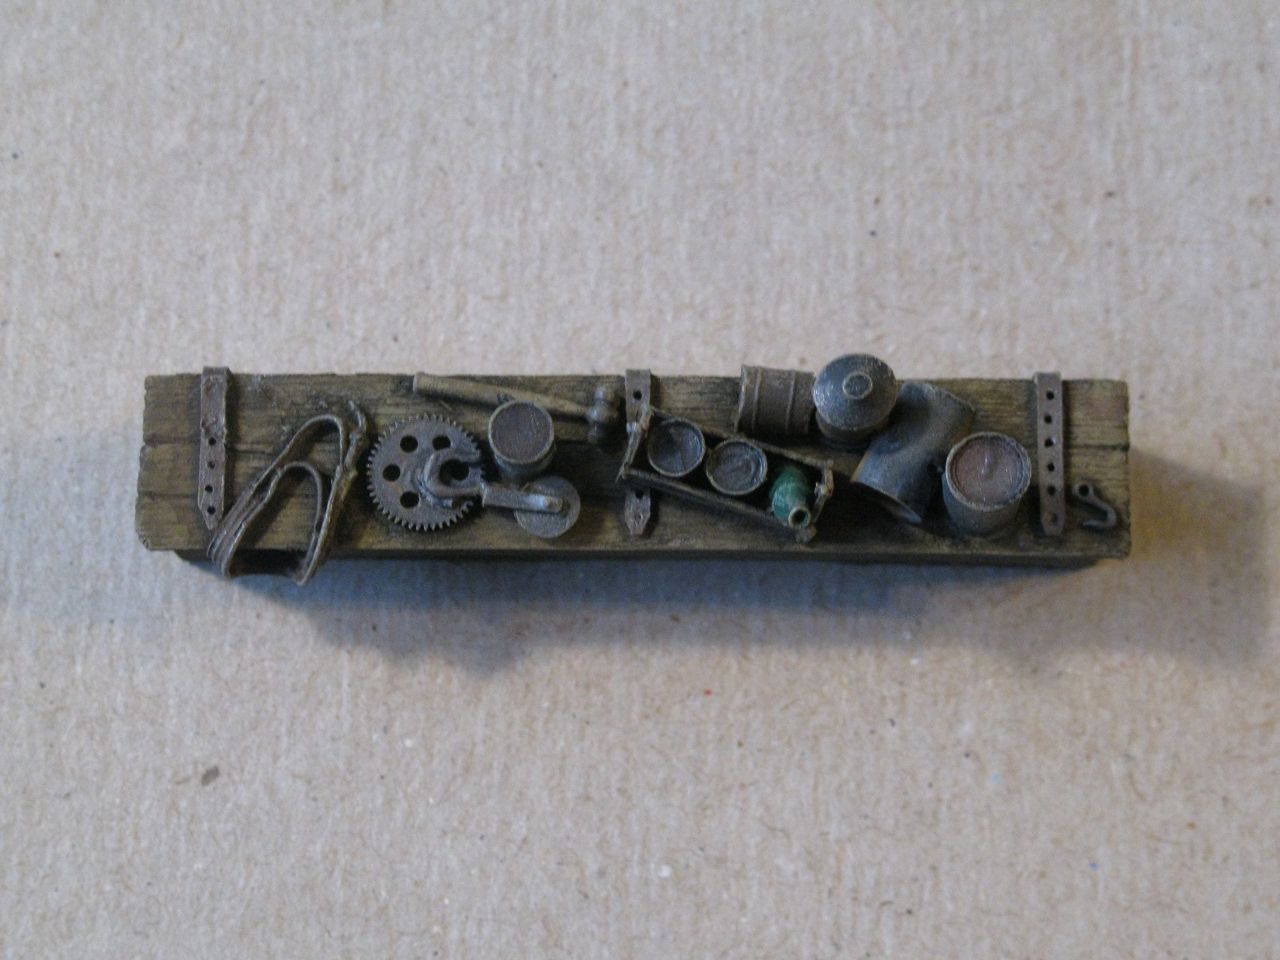
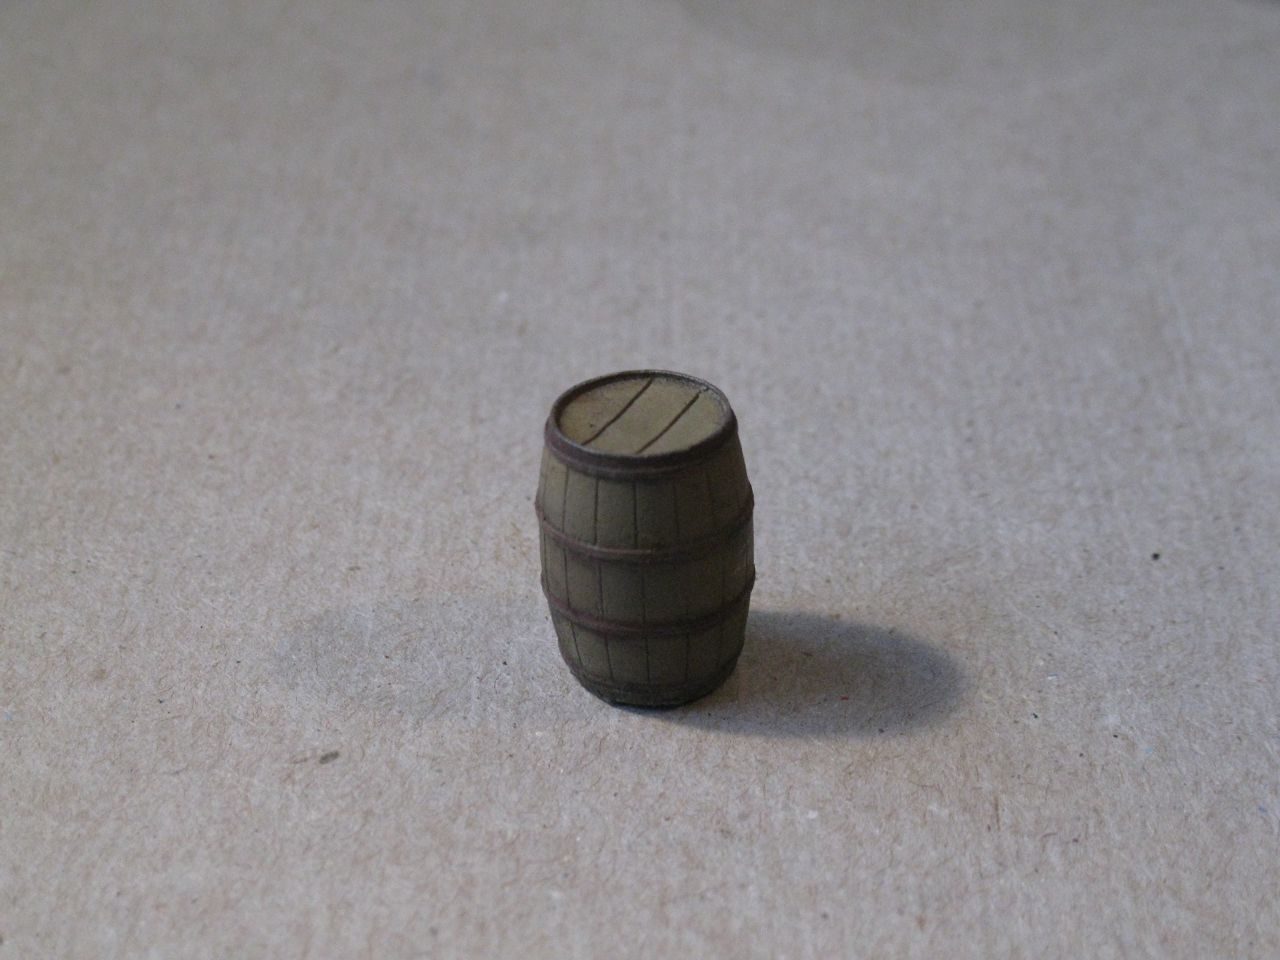
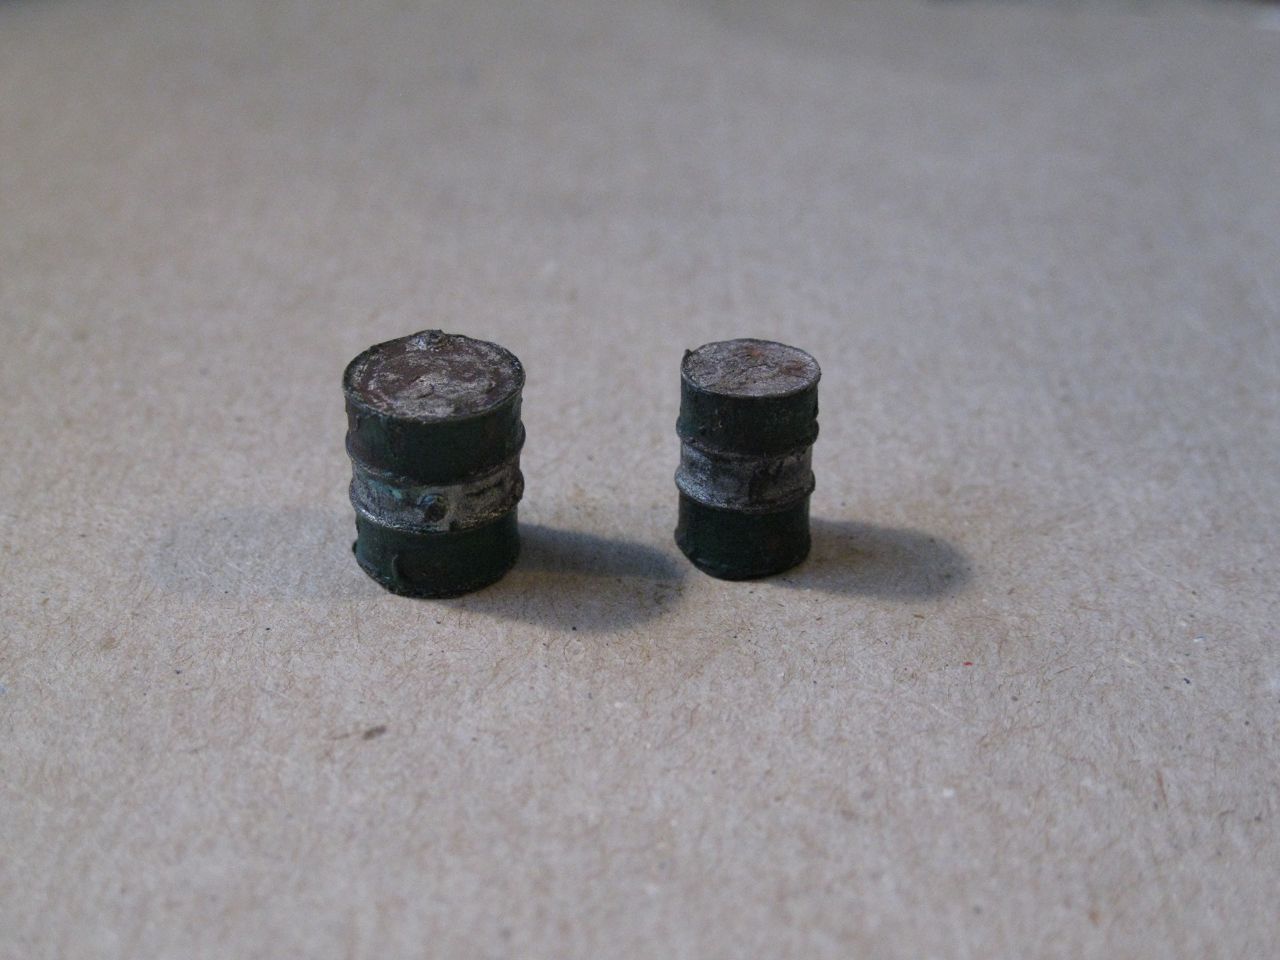
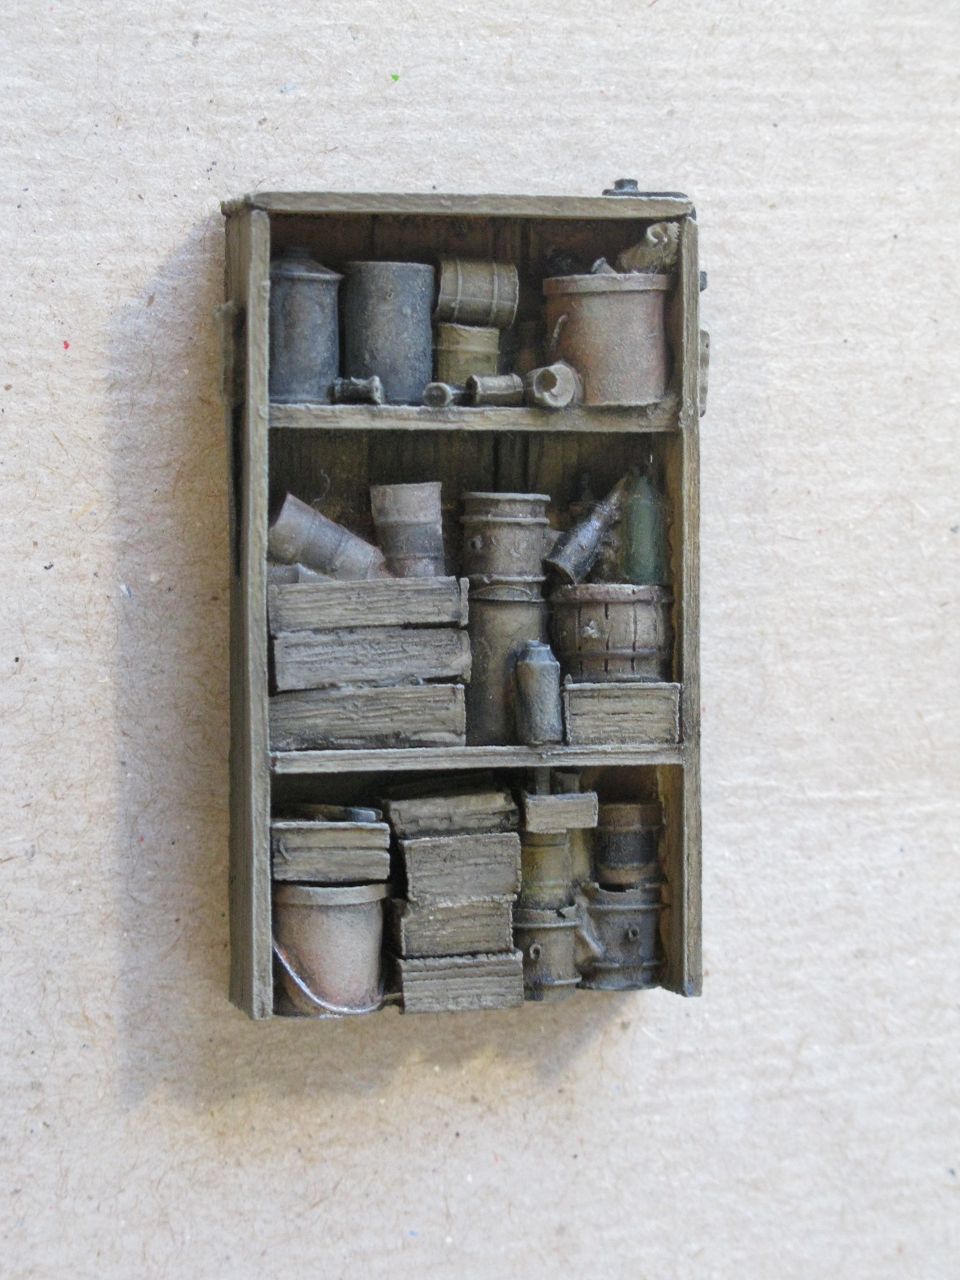
Attached are close-ups of each wall as well as a few castings. I'm about ready to move on to both roofs and plan on building a couple of extra trusses and making the main roof removable. I'm also starting to think about the floor. I'm debating attaching it to the ground like the manual says or attaching it to the structure. I plan on making a small diorama with the kit in the hopes that it will someday be incorporated into a layout in the planning stages. I'm still having trouble planning the sawmill sidings (;
I would welcome comments or suggestions on how to make this better.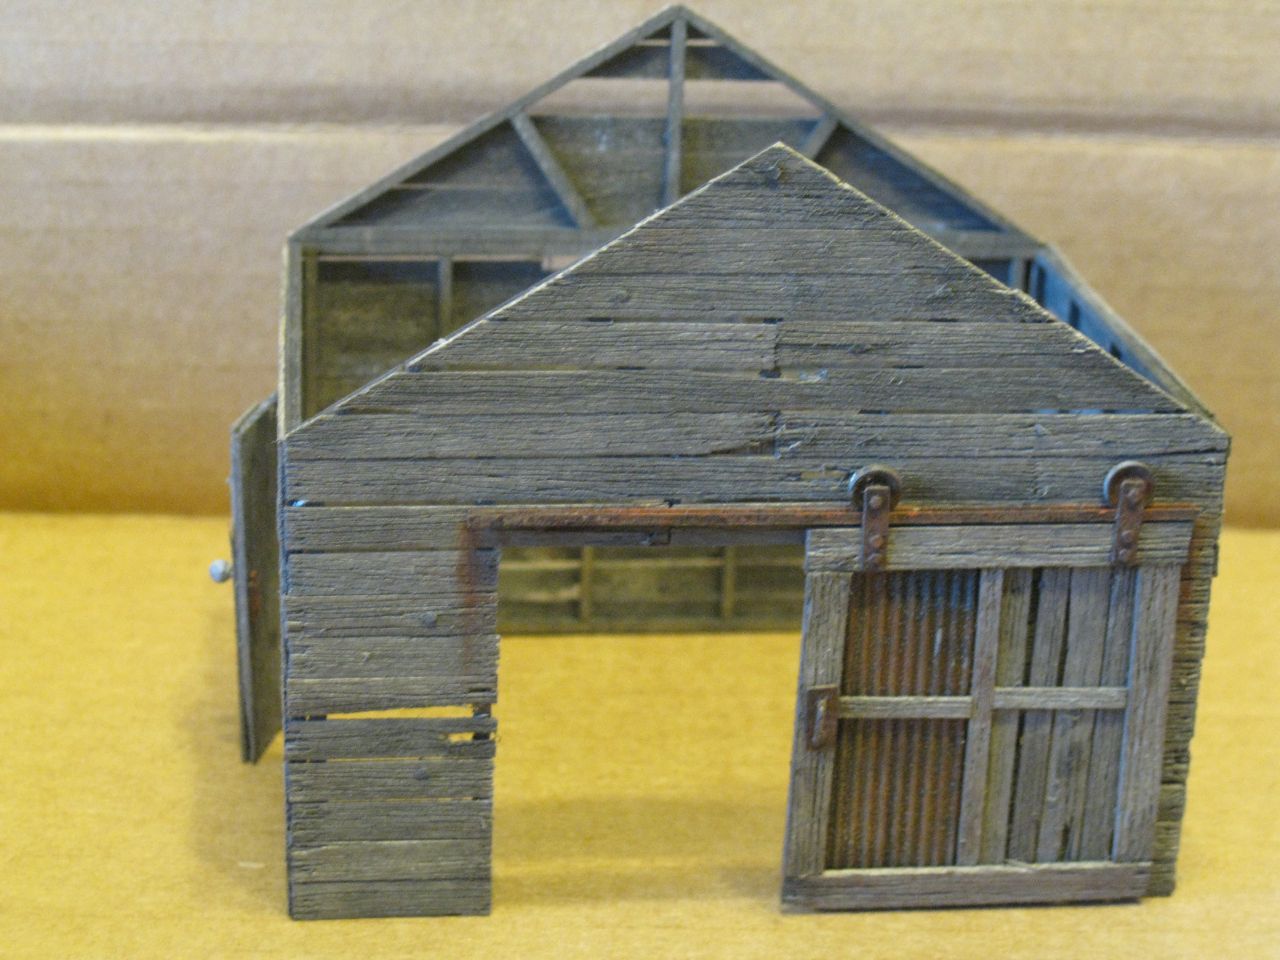
I tried several wood coloring experiments but in the end used the colors and techniques exactly as described in the construction manual. I have the Trackside Trio and plan to build them in varying degrees of disrepair with this one being the most derelict. I got the trio because I called Brett to order this kit and he insisted that I would like the castings in the Woodcutter Shack much better. I kindly said thanks but send me the Rigging Shed and then ordered all 3. I need an intervention or something.
Attached are close-ups of each wall as well as a few castings. I'm about ready to move on to both roofs and plan on building a couple of extra trusses and making the main roof removable. I'm also starting to think about the floor. I'm debating attaching it to the ground like the manual says or attaching it to the structure. I plan on making a small diorama with the kit in the hopes that it will someday be incorporated into a layout in the planning stages. I'm still having trouble planning the sawmill sidings (;
I would welcome comments or suggestions on how to make this better.
Comments
You're not alone in getting addicted to Brett's kits. I have 2 on the shelf, one under way, and a couple on order. Crack is an easier habit to kick!
I gotta tell you, your work looks fantastic! I'm interested in your methods. I know you followed the manual directions, but I always like to hear details. I'm almost fetishistic when it comes to finding the "perfect" gray tone for aged wood, so I'm curious about that. To my eye, the cracks, splits and knot holes all look natural and random. Great texture on that rail runner for the sliding door and your weathering looks nice on the corrugated roofing. Castings are fantastic! Nothing jumps out, colors are subtle and all the items look like they belong.
I only have 2 suggestions--opinions really. To me, it looks like the door got over-textured. (Mostly on the top right corner.) It looks more frayed or shredded as opposed to old and weathered.
The other thing that stood out is the holes on the hinges. Nail holes are always going to be subjective but here's what I see: old rusty hinges that have freshly drilled holes. They seem too perfect. I'm not sure how I'd change it--or if they even NEED changing, but it caught my eye.
Those are two really minor things which will be overshadowed by everything else you've done! Very very nice work! You've inspired me to get back at it!
(BTW--what's your name???)
I'll try to cover what you were asking about. To start on the wood I used a metal pick on one side only to scratch some deep grain and then used a stiff steel brush to add texture on both sides. I broke through the board in some places doing this adding to the randomness of the splitting. I colored using Rembrandt chalks. 408.3 over everything with white to gray it up on the heavy grain side only. I wanted the inside of the building to be darker. Apply IA and dust on 408.3 on all and added 704.8 to some. Once this was almost dry I brushed it off leaving a highlight. Went back over lightly with the brush to clean out the chalk buildup.
The knotholes were drilled in and a toothpick inserted (actually did this prior to applying IA step above). Some I squashed before inserting which gives an oval hole. When I cut the boards to fit I scratched the ends with the pick again hard then brushed and touched with some of the chalk and/or IA. I mixed them up and applied randomly. I did plan out where I wanted some "breakthrough" on the walls and used a piece of plywood and some corrugated metal to cover.
For the door track I gave it 2 coats of Vallejo Burnt Umber. On the second coat I gave a little 411.3 chalk, some IA and a touch more chalk. The rust streaks down the side of the wall are Bragdon powders light rust followed by dark rust. Even though the light rust would be newer it is easier on the eyes to put it on first.
The corrugated metal was cut and the panels on the side roof were painted gray on 1 side and let dry for a day. I put in etchant until I was satisfied with the results. I took a stiff brush and cleaned it off a little then did the light rust and dark rust. Then took a small brush and with IA touched the top edges and let it wick down the grooves...repeat. One of them I bent up like the wind caught it.
I was surprised at how much fun I had with the castings. Having never done anything quite like it I was a little intimidated. I used the techniques described by others that post here and I was pleasantly surprised by the results.
I really appreciate your feedback.
Bryan-
Thanks for the explanation. One of the benefits of posting on the forums is having a digital record of how you got a particular result--almost like a recipe for baking a cake. Several years from now, you might even find yourself coming back to this thread for a refresher! The results speak for themselves and you should be proud of your work. It seems like more and more of us are turning to chalks to get the color we want.
For the hinges, you may be able to use some thin brass wire to insert into the holes (use blaken-it first). Or, I've seen some guys use thin lead (like from a mechanical pencil). However, since the door is under the over hang, it might not be worth the fuss. Could possibly cause more harm than good.
Hopefully Karl or Brett will jump in. They've never been stumped yet!
Part A Bill's idea - take "thin brass wire"
Part B Alan's idea - then chalk the wire to be "rusty nails"
Just an idea....
Bryan, I have some of these hinges left from my Rigging shed build so tomorrow I am going to try something in regards to the holes so I will let you know how my experiment turns out.
OM (Kevin)
Well I guess the Old Minion is so old he can't remember where he puts things. I searched in every SW box I have and can't find the hinges from the Rigging shed, oh well.
Anyway what I was going to try was to fill the holes with some thinned wood putty or something similar and make small slots in each to represent flathead screws. You might also try some glue tinted black which could be gone over with rust when it dries. I will say that these hinges would definitely be secured with flathead screws that sit flush with the surface of the hinge and would not stick up. It is not very likely that nails would have been used.
OM (Kevin)
Use a wood patch type product, something that dries and can be sanded, not an oil base type putty.
Kevin
I would like to put this one together with the supply shed. I'm going to put this one away for a while and work on the supply shed then work on them together in a diorama.
I like what Karl A and Kevin did with theirs having both structures on the same side of the track. I also like the idea of having them across the track from one another. This one sure looks like it needs to be on the wrong side of the tracks.
Looks like you had fun with the castings and did a great job with them.
I'm looking forward to seeing this together with the next one.
Karl.A
OM