Howdy, Stranger!
It looks like you're new here. If you want to get involved, click one of these buttons!
Categories
- 922 All Categories
- 3 Picture Posting and Resizing
- 53 New Member Introductions
- 111 Off-Topic Forum
- 4 Photography
- 2 Resources
- 16 New Product Information
- 166 The SierraWest Forum
- 9 Brett's Blog
- 117 General News & Ramblings
- 3 Re-Release Information
- 6 Q & A about SierraWest
- 9 What Would You Like to See?
- 362 Builds
- 131 HO Scale Builds
- 155 O Scale Builds
- 59 Finished SW Build Pics
- 12 Miscellaneous Builds
- 187 Techniques
- 19 Working with Wood
- 20 Painting Castings
- 5 Masonry
- 23 Scenery
- 36 Tools and Supplies
- 21 Layout Planning & Building
- 38 Miscellaneous
- 24 Prototype Information
- 22 Reference and Research
HO Truck Repair Shop
I am in the process of building the Railroad Camp, but decided to split the buildings up as I won't position them the same as Brett suggested. I actually started this last September, but had to move from Hawaii to South Carolina around the holiday time. Knowing that, I did not want to start a discussion with a huge gap or glue the walls together as they pack much better flat.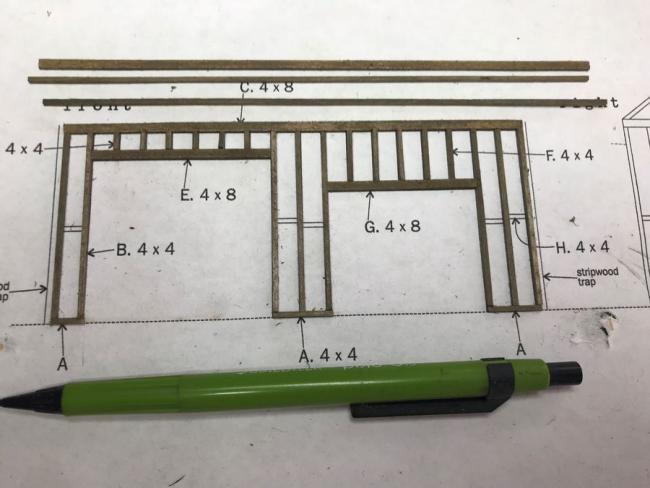
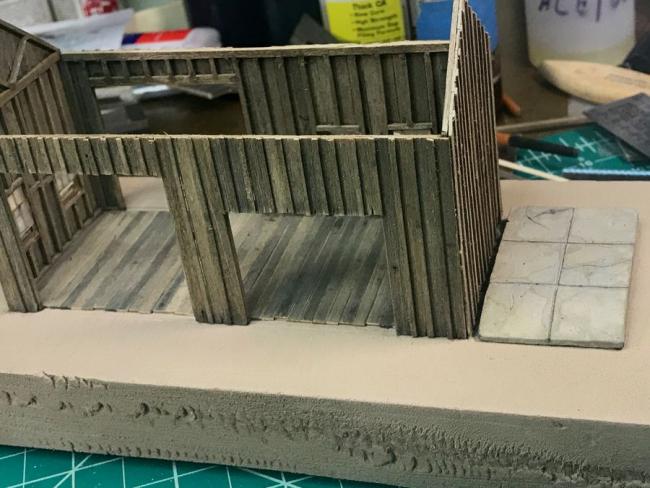
So I have progressed since getting unpacked and setup to model again. So far all is per the instructions. Here is a serious jump forward.
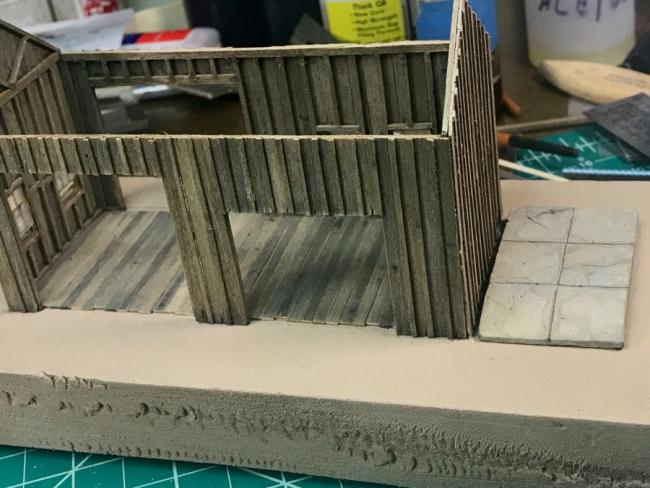
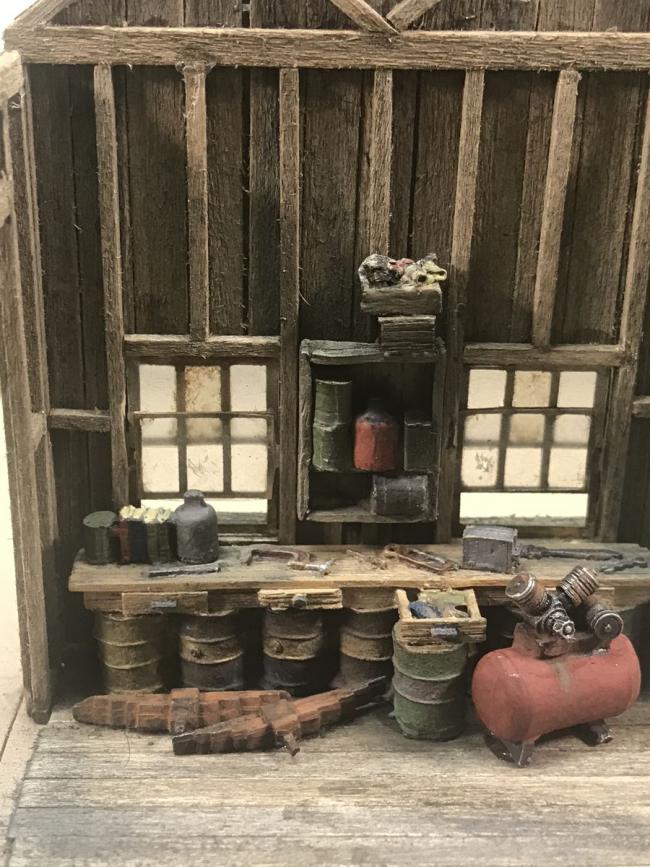
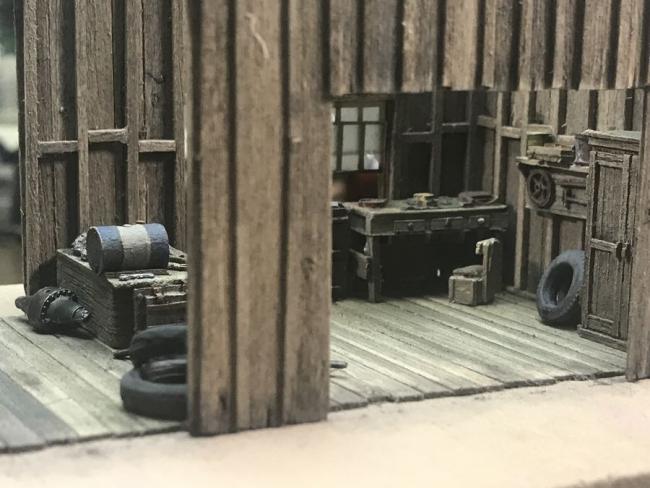
I am taking things slightly out of order as I wanted to address lighting and the roof before I did all the outside details. I also decided to do real cedar shingles. I cut shingles from sheet cedar from Sierra Scale Models then gave them a quick soak in Hunterline Driftwood stain. Here is a couple quick shots of where I am now with the shingles. Haven't tackled the lighting yet.
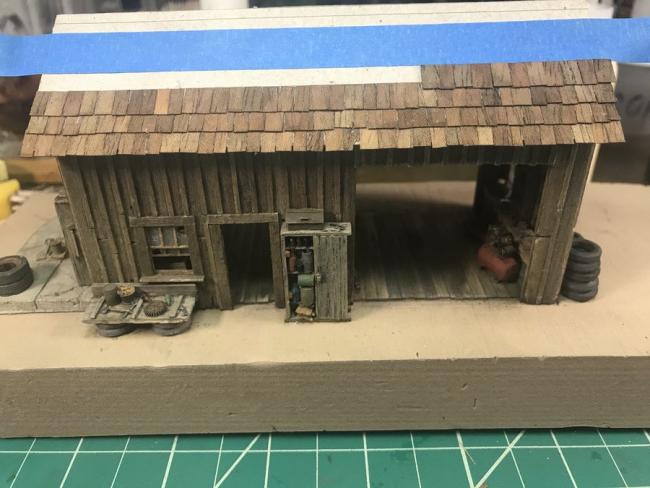
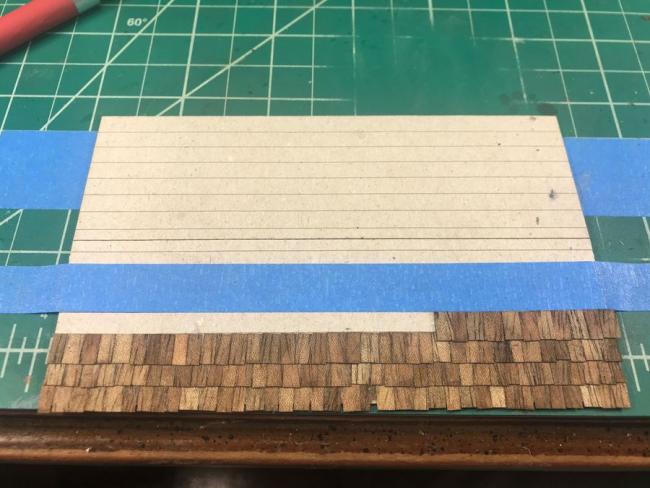
Time consuming for sure, but I think worth the effort.
All comments and suggestions welcome.
Rick


So I have progressed since getting unpacked and setup to model again. So far all is per the instructions. Here is a serious jump forward.


I am taking things slightly out of order as I wanted to address lighting and the roof before I did all the outside details. I also decided to do real cedar shingles. I cut shingles from sheet cedar from Sierra Scale Models then gave them a quick soak in Hunterline Driftwood stain. Here is a couple quick shots of where I am now with the shingles. Haven't tackled the lighting yet.


Time consuming for sure, but I think worth the effort.
All comments and suggestions welcome.
Rick


Comments
What is interesting is how all the shingles were stained together in a single batch, but how differently they absorbed the stain. The broken shingles are natural as well. Very fragile.
The roof is not fastened down. Off to lighting and many more castings to paint.
Rick
Everyone's support definitely keeps me striving to improve.
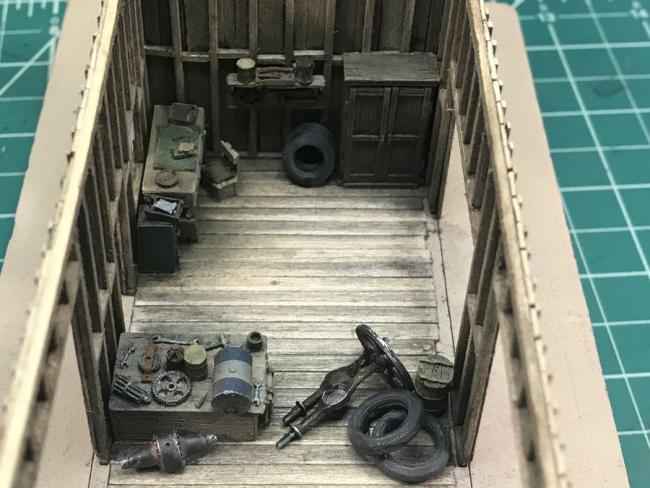
So, with staying home for obvious reasons gives extra modeling time. I wanted to add lighting to this structure. I decided the best was to add a beam down the middle of the building with a couple lamps on it. I drilled out a couple old lamp shades I had and used warm white pico LED's that are prewired ready to go with the resistors already in line from Evans Design. (There are other suppliers.) I used these as no magic is needed. Jost install, hook to 5-12v and you are good. The pico LED's are so small, they fit through the hole I drilled. The super small wire is run along the underside of the 6X8 beam. I then used Micro Kristal Clear to fill in below the LED and look more like a bulb.
I chalked the wire to help blend it into the wood coloring. I ran the wire down the wall next to the cabinet and behind the tire leaning against the wall. Third photo down. You can't see it through any of the doors. Here are the results.
Now to work on the exterior details.
i wish i had the balls to try lighting.
i'm clueless.
To answer your question Phil, the LED's as I purchase them already have the resistor installed.
They are prewired and ready to operate on anything between 5 and 13 volts DC. I shot the photo on the dime so you can see how small the pico size really is. Very simply the + or pos lead is the red and the - or neg lead is the green. I am amazed at how much light such a tiny LED can give off.
Do power one up before installation so you can see which side needs to face down. It is not off the end like a standard bulb, but otherwise just too easy. Many are intimidated for the wrong reasons. It's the same as the first time you look at a SW kit. Dive in!
The second photo didn't post correctly the first try.
I'll post my final photos soon.
Rick
Here are 2 photos showing angles no viewer should normally see. The magnet wire on the LED's is so small, a little chalk coloring blends it into the underside of the beam. Again, the viewer would have to look below ground level up under to see it at all. Where it runs down the wall is a fairly obscure location that is visible in the super magnified photo, but not where the viewer would normally look.
Yes, I am posting photos that most would never show, (not pretty) but the question was asked.
On to the office warehouse part of the Railroad Camp kit. That will be a different post.
Thanks for looking.
Looks awesome. What did you use for base, styrofoam?